Build an admin block UI extension
This guide is the second part of a five-part tutorial series that describes how to build UI extensions that display as actions and blocks in Shopify admin. Before starting this guide, you'll need to build or copy the admin action UI extension from the Build a UI extension for an admin action tutorial.
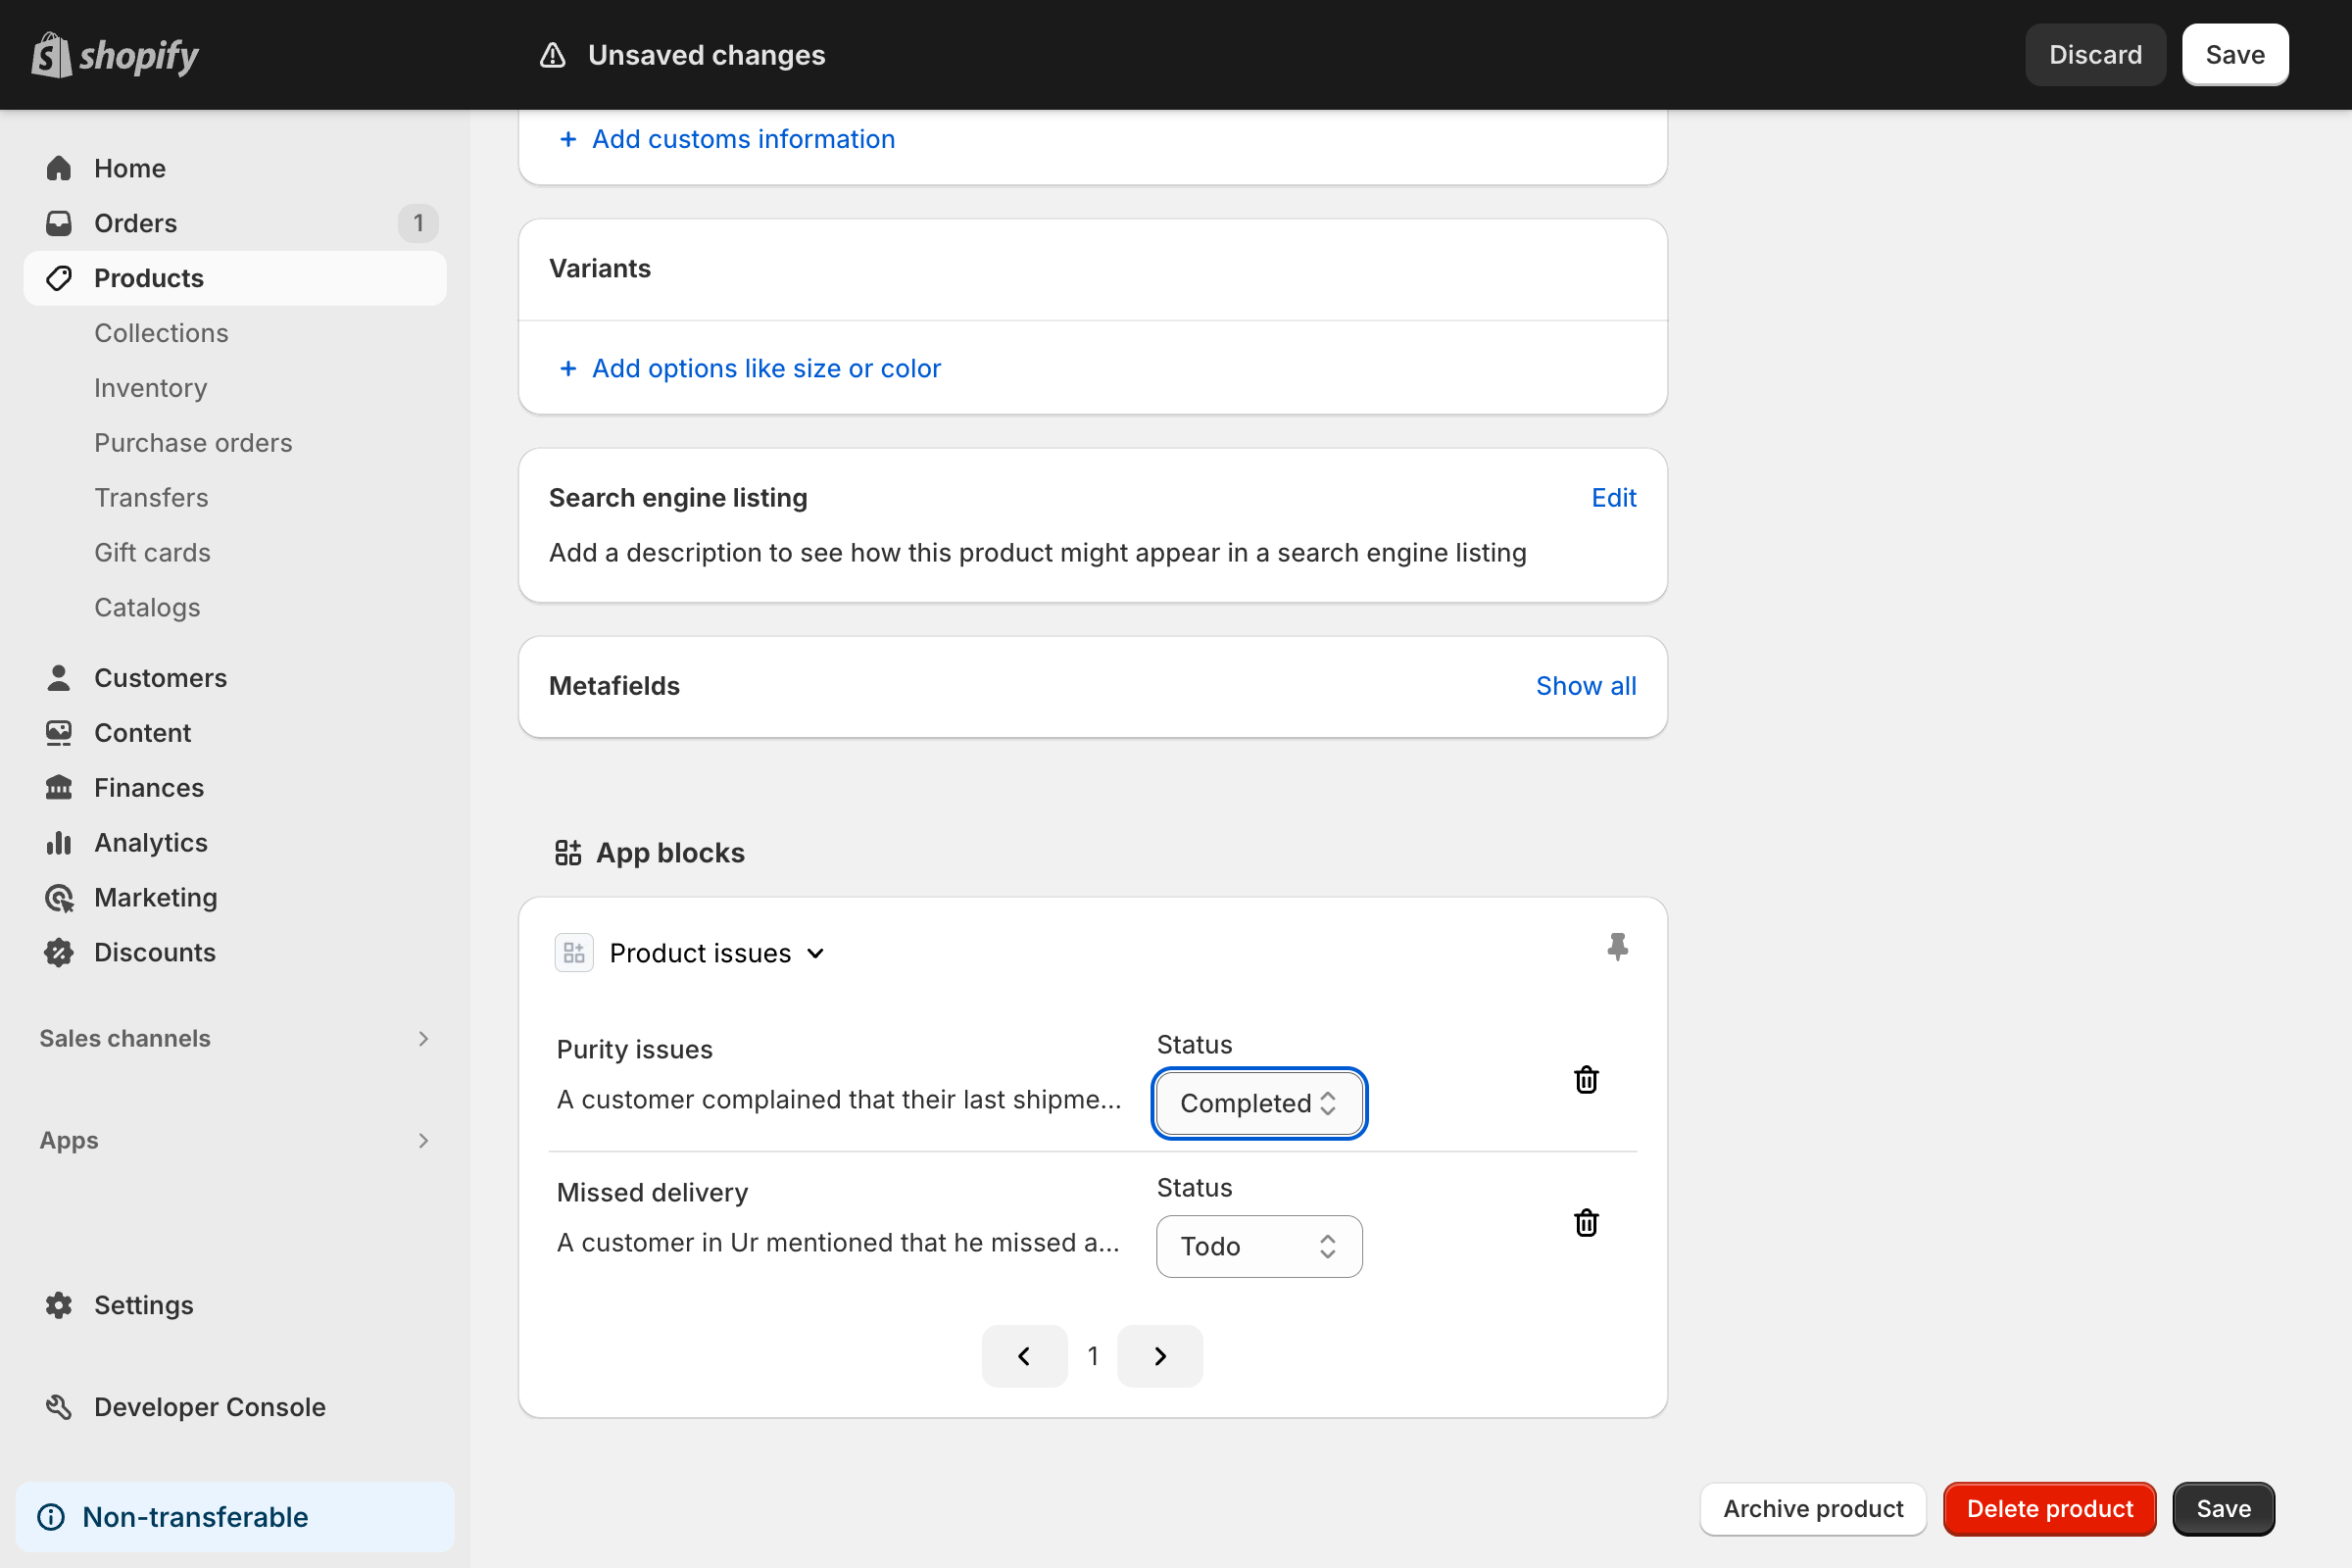
So far, you've created a UI extension for an action that enables buyers to create issues for a product. However, merchants need an easy way to see them. This guide demonstrates how to create a UI extension for a block in Shopify admin that displays buyer-created issues for a product.
Anchor to What you'll learnWhat you'll learn
In this tutorial, you'll learn how to do the following tasks:
-
Create a UI extension for a block that displays on the product details page.
-
Configure metafield definitions using TOML declarative custom data definitions.
-
Fetch information to populate the UI extension's initial state.
-
Connect the UI extension to Shopify admin's contextual save bar, when gathering input, for seamless page editing.
-
Run the UI extension locally and test it on a dev store.
Requirements
Scaffold an app with the write_products access scope that uses Shopify CLI 3.78 or higher.
- If you created a React Router app, then the
write_productsaccess scope is automatically granted to your app. - If you created an extension-only app, then you need to explicitly grant the
write_productsaccess scope to your custom app. - Add a product to your dev store. The product should not have any custom variants at the start of this tutorial.
Complete or copy the code from the Build an admin action UI extension tutorial.
Project
Anchor to Create an admin block UI extensionCreate an admin block UI extension
Use Shopify CLI to generate starter code for your UI extension.
Navigate to your app directory:
Terminal
Run the following command to create a new admin block UI extension:
Terminal
The command creates a new extension template in your app's extensions directory with the following structure:
Admin block structure
Anchor to Configure the metafield definitionConfigure the metafield definition
Use declarative custom data definitions to define the metafield that will store issue tracker data.
Note: If your
shopify.app.tomlfile already contains this metafield definition (for example, from completing the Build an admin action tutorial), you can skip this step.
Anchor to Create an interface for the UI extensionCreate an interface for the UI extension
To create an interface for the UI extension, complete the following steps:
Anchor to Review the configurationReview the configuration
The UI extension's static configuration is stored in its .toml file. To display the issue tracker on product detail pages, set the target to admin.product-details.block.render.
Anchor to Update titleUpdate title
To update the name that displays when merchants select the action from the menu, edit the name value in the locale files. To localize strings, a UI extension for an admin block uses the i18n API. This API gives you access to strings stored in locale files, and automatically chooses the correct string for the current user's locale.
Anchor to Translate titleTranslate title
Optionally translate your title to French.
Anchor to Note the exportNote the export
You can view the source of your extension in the src/BlockExtension.jsx file. This file defines a functional Preact component that's exported to run at the extension's target. You can create the extension's body by using the web components that are automatically provided.
Admin UI extensions are rendered using Remote DOM, which is a fast and secure remote-rendering framework. Because Shopify renders the UI remotely, components used in the extensions must comply with a contract in the Shopify host. We provide these components automatically to the extension.
Anchor to Render a UIRender a UI
To build your block's UX, return some components from src/BlockExtension.jsx. You'll create a simple UI to list out your product issues.
Anchor to Write the UI extension's logic and connect to the GraphQL Admin APIWrite the UI extension's logic and connect to the Graph
After defining the extension's UI, use standard Preact tooling to write the logic that controls it.
When you're writing UI extensions, you don't need proxy calls to the GraphQL Admin API through your app's backend. Instead, your UI extension can use direct API access to create requests directly using fetch. For merchants, this makes UI extensions more performant and responsive. This guide includes a utility file for GraphQL queries.
Your app can also get data from the extension APIs, which includes data on the current resource from the data API.
First, you'll need to populate the UI extension's interface with existing issue data. To do this, use direct API calls to query the Issue Tracker metafield configured in the previous step, and use the metafield data to populate a paginated list in the UI extension's block. Paginate issues to prevent the block from becoming too tall and difficult for users to use.
Create a new file at ./src/utils.js and add the GraphQL queries that the extension uses to read and write metafield data (the metafield definition is handled by TOML).


Import the getIssues utility method from the utils.js file. You'll use it to query the GraphQL Admin API for the initial data for the extension.
Anchor to Get initial data and set up paginationGet initial data and set up pagination
Use the getIssues utility method to fetch the initial data for the UI extension. Add a function to manage pagination.
At this point, you can use the Dev Console to run your app's server and preview your UI extension. As you preview the UI extension, changes to its code automatically cause it to reload.
At this point, you can use the Dev Console to run your app's server and preview your UI extension. As you preview the UI extension, changes to its code automatically cause it to reload.
Anchor to Update data and integrate with the page's contextual save barUpdate data and integrate with the page's contextual save bar
Next, you'll create a status dropdown and a delete button that enables users to either mark issues as completed or remove them entirely. When you create the status dropdown, you'll integrate it with the page's contextual save bar. This enables users to save changes to your block using the same controls that they would use to save changes to other fields in the Shopify admin.
Import the updateIssues utility method and use it to update the UI extension state.
Anchor to Handle status changes and deleting issuesHandle status changes and deleting issues
Add the functions to handle deleting and changing the status.
Call the updateIssues utility method when the issue is deleted and when the form is submitted.
For more information on how to integrate with the contextual save bar, refer to this reference.
For more information on how to integrate with the contextual save bar, refer to this reference.
Anchor to Test the UI extensionTest the UI extension
After you've built the UI extension, test it with the following steps:
-
Navigate to your app directory:
Terminal
cd <directory> -
To build and preview your app, either start or restart your server with the following command:
Terminal
shopify app dev -
Press
pto open the Dev Console -
In the extension list for your app, click on the preview link for the issue tracker UI extension. The product details page opens. If you don't have a product in your store, then you need to create one.
-
To find your block, scroll to the bottom of the page. It should display the issues that you've created so far.
-
When you change the status of an issue, the contextual save bar should display. The change is saved when you click the Save button.
Anchor to Next stepsNext steps
In the next tutorial in this series, you'll connect your admin action UI extension to your admin block UI extension, to enable issue editing.
Hide UI extensionsLearn how to hide action UI extensions when they're not useful or relevant.
TargetsLearn about the various places that Shopify admin can display UI extensions.
Web componentsLearn about the full set of available web components for writing admin UI extensions.
DeployLearn how to deploy your UI extensions to merchants.