Connect UI extensions to your app's backend
This guide is the fourth part of a five-part tutorial series that describes how to build UI extensions that display as actions and blocks in Shopify admin. Before starting this guide, you'll need to build or copy the code for the issue tracker UI extensions from the previous section of the tutorial.
So far you've used direct API access to interact with the GraphQL Admin API. However, your app may have data or functionality that can only be accessed from your app's backend. This tutorial will demonstrate how to fetch data from your app's backend in an admin UI extension.
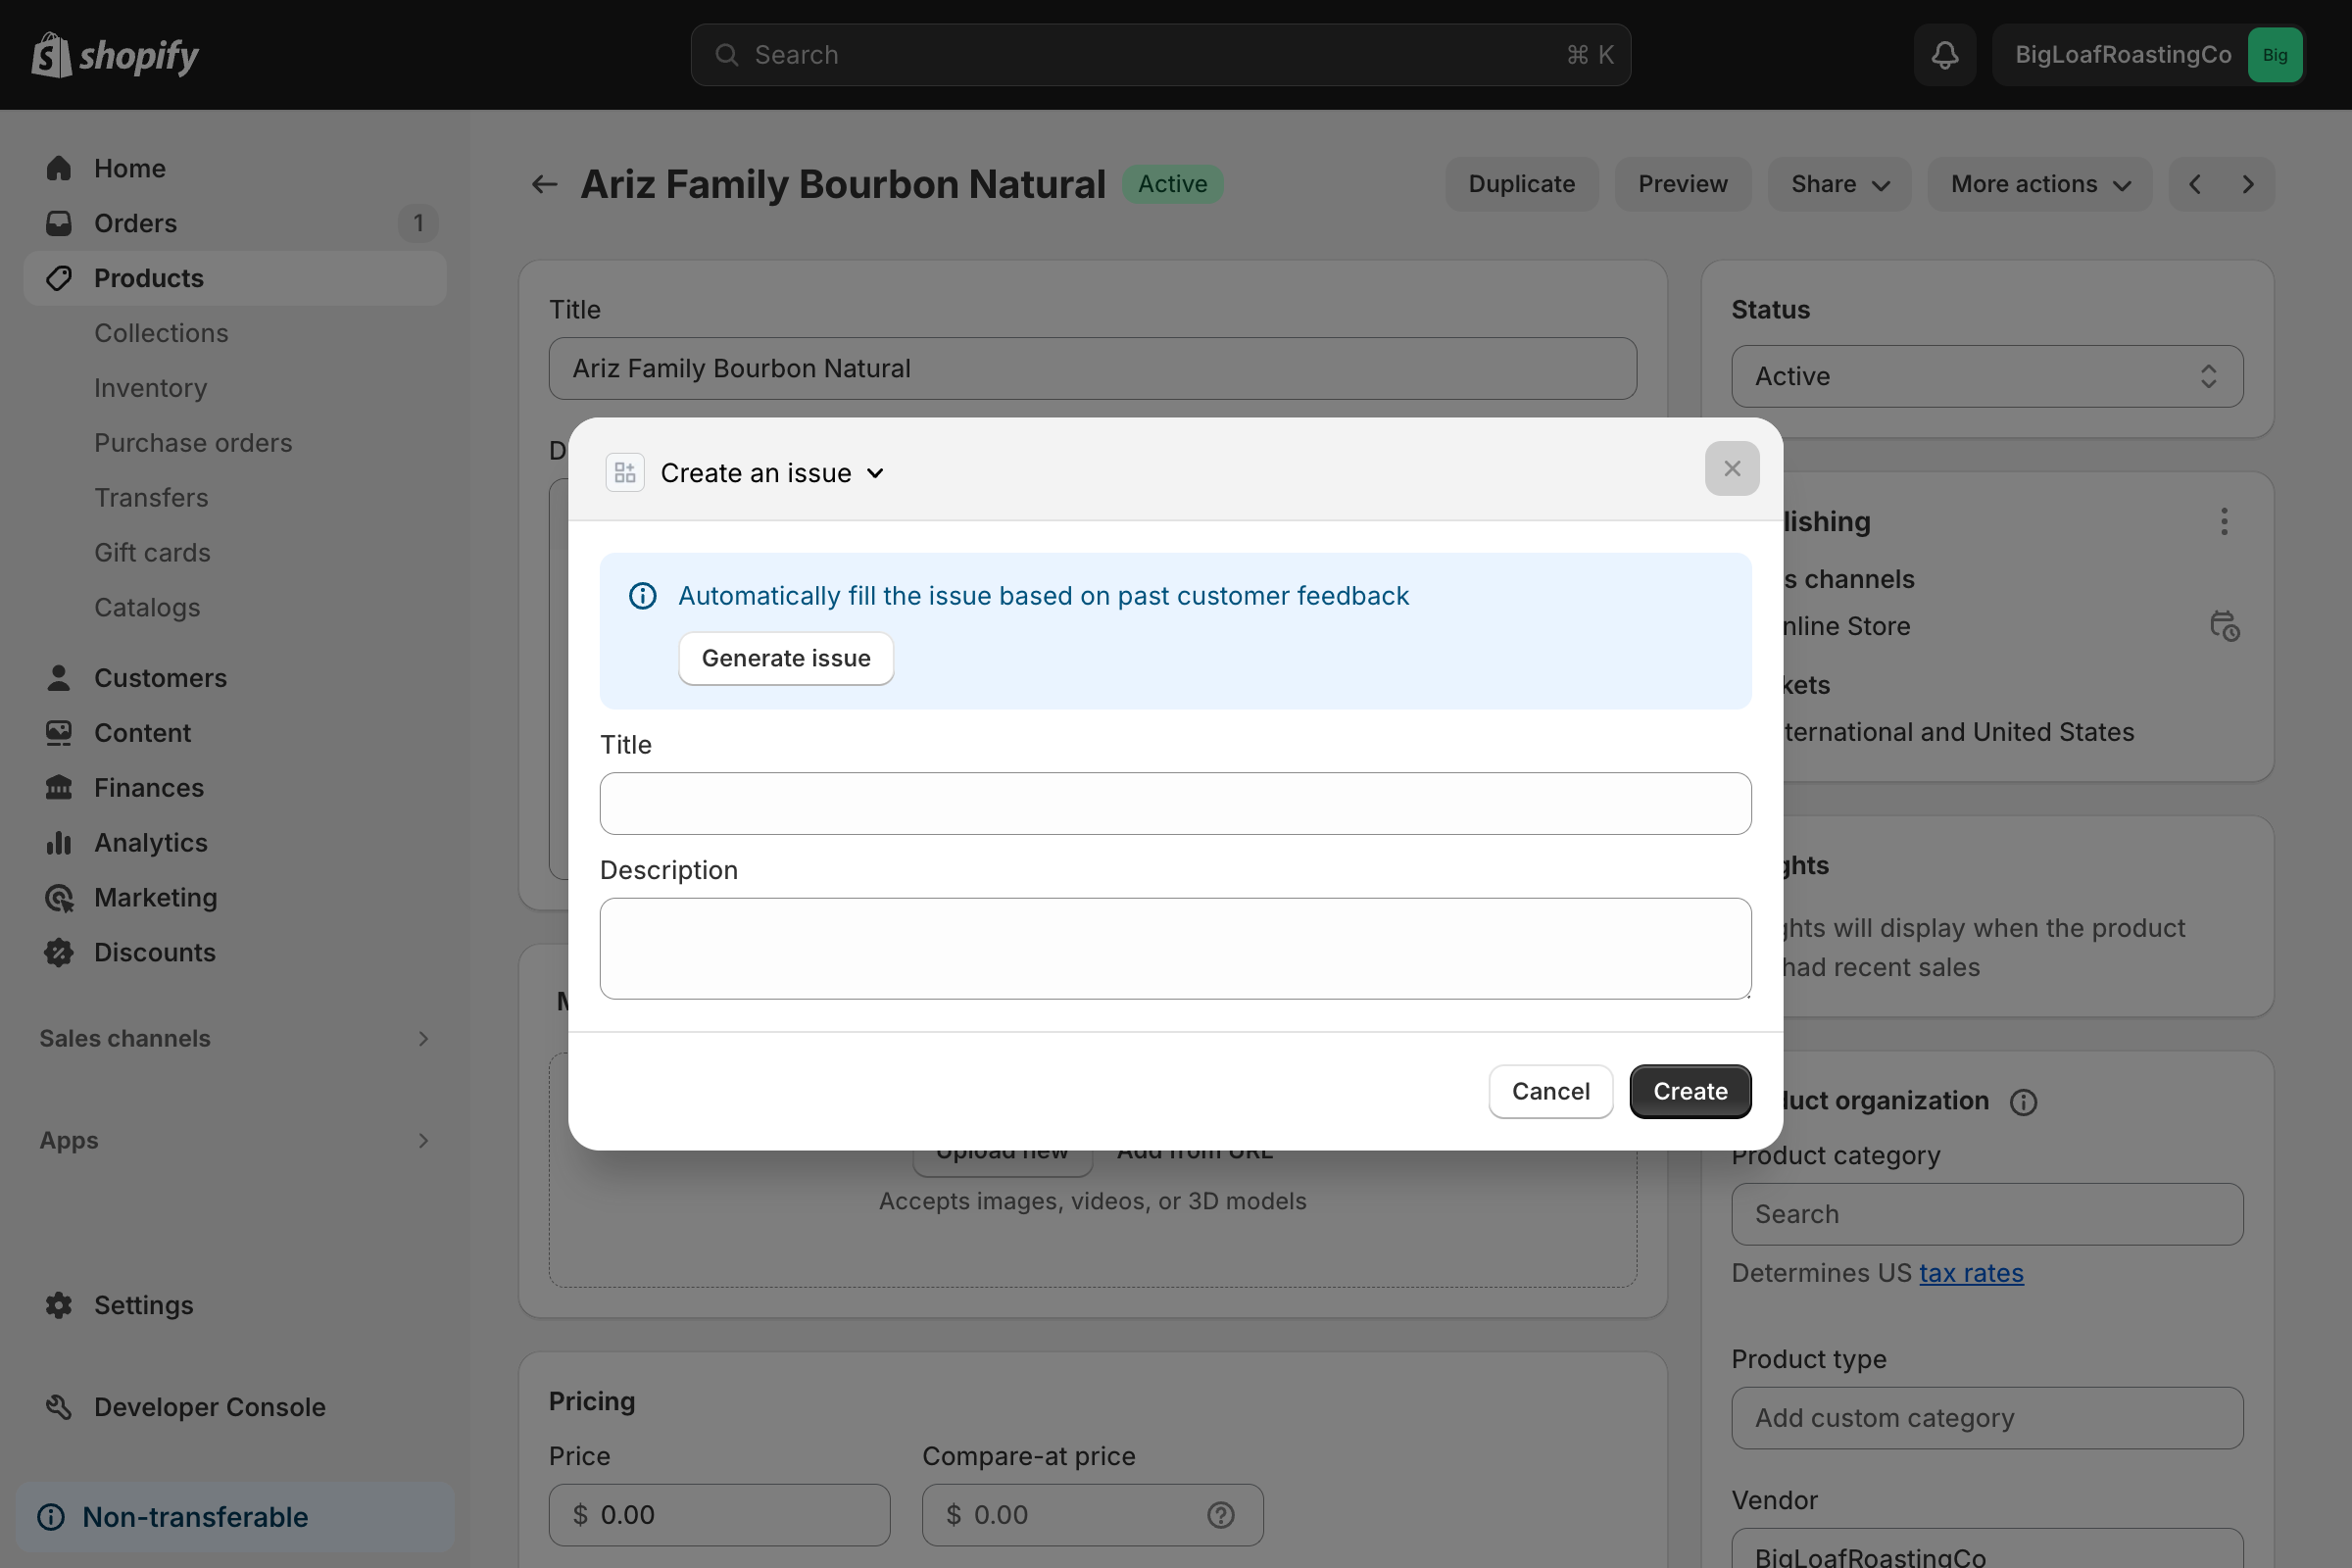
To demonstrate this, we'll build a new Generate issue button that populates an issue's title and description with suggested values from the app's backend.
Anchor to What you'll learnWhat you'll learn
In this tutorial, you'll learn how to do the following tasks:
-
Create a resource route in the React Router app template that an admin UI extension can use to fetch data
-
Update your UI extension, so that your action can fetch the data when a merchant presses a button
-
Run the UI extensions locally and test them on a dev store
Requirements
You've completed or copied the code from the admin action tutorial, the admin block tutorial, and the tutorial about connecting admin UI extensions.
Project
Anchor to Create a new resource route that returns dataCreate a new resource route that returns data
Create a resource route in your app, by creating a new route file that doesn't export a default component. This route will return suggested issue titles and descriptions.
When you're returning data from this route, you should wrap the response with the cors helper that's returned from the authenticate.admin() function.
Shopify extensions are hosted on a separate domain, so this route is inaccessible if you don't set the correct CORS headers with this method.
Create and return a list of product issues from your new route.
Anchor to Call the route from your UI extension's actionCall the route from your UI extension's action
Now that your app has an API to return a suggestion, you can call it from the app's admin action UI extension and use the provided data to populate the extension's title and description fields.
Admin UI extensions can make calls to your app's backend by using fetch(). The extension automatically adds the correct authorization header, manages session tokens, and resolves any relative paths against your app's app_url.
Anchor to Test the UI extensionTest the UI extension
After you've updated the UI extension, test it with the following steps:
-
Navigate to your app directory:
Terminal
cd <directory> -
To build and preview your app, either start or restart your server with the following command:
Terminal
shopify app dev -
Press
pto open the Dev Console. -
In the extension list for your app, click on the preview link for the issue tracker UI extension. The product details page opens. If you don't have a product in your store, then you need to create one.
-
To launch your UI extension, in the top right of the page click the More actions dropdown list and select your UI extension.
- In the banner, click Generate issue. The issue's title and description are populated with data from your app's backend.
Anchor to Next stepsNext steps
Complete the next guide in this tutorial series to conditionally hide UI extensions.
Admin UI extension APIsLearn about the admin UI extension APIs.
ParticipateFile any issues or feature requests on the UI Extensions GitHub repository.
DeployLearn how to deploy your UI extensions to merchants.