This is the first part of a tutorial series to build a tokengating app. Read the [overview](/docs/apps/build/blockchain/tokengating) section before starting this tutorial.
## What you'll learn
In this tutorial, you'll use Node.js, React, Shopify App Bridge and Polaris components to create an admin app and use Gates API to create gates.
### Frontend
The admin app has two pages:
* **Tokengates index**: Uses the Polaris `List` component to display previously created tokengates.
* **Tokengate form**: Enables merchants to create a new tokengate with a name, a discount, unlocking token addresses, and a list of products to be gated.
### Backend
The backend consists of a Node.js Express app that leverages the Gates API to create, update, and delete gate configurations and gate subjects.
## Requirements
- You've created a [Partner account](https://www.shopify.com/partners).
- You've created a [development store](/docs/api/development-stores) that uses [generated test data](/docs/api/development-stores/generated-test-data).
- You've created an app that uses the [Express.js app template](/docs/api#app-templates) and [Shopify CLI](/docs/apps/build/cli-for-apps).
You can create a new app using the Express.js app template by running the following command:
## Step 1: Start your development server
You can view and test your frontend components in the Shopify admin as you build them. After you've created an app, navigate to your app's directory and start your local server to build and preview your app:
## Step 2: Create a form to configure a product gate
The form enables merchants to:
* Define an exclusive discount
* Define segments by adding token collections
* Apply tokengates to products
### Install required packages
You need to install [@shopify/react-form](https://www.npmjs.com/package/@shopify/react-form) to your required packages. We use this to manage React forms by providing custom hooks.
### Create the form component
The form submits the form data to the Gates API to create a new gate.
1. In the `/web/frontend/pages` directory, create a new file called `CreateTokengate.jsx`. The [app boilerplate](/docs/apps/build/scaffold-app) code comes with automatic routing, where a new route is created when a file is added to this directory.
2. Add the following code to the file:
> Note:
> We've made reference to some backend APIs that don't exist. We'll create them later in the tutorial.
### Create a resource picker component for the form
1. In the `/web/frontend/components` directory, create a new file called `TokengatesResourcePicker.jsx`.
2. Add the following code to the file:
## Step 3: Create the list component
The list component fetches the gates from the Gates API.
1. In the `/web/frontend/components` directory, create a new file called `TokengatesList.jsx`.
2. Add the following code to the file:
### Add the list component to the home page
Import the `TokengatesList` component and include the component markup in your index page.
1. Open `/web/frontend/pages/index.jsx`.
2. Replace your code with:
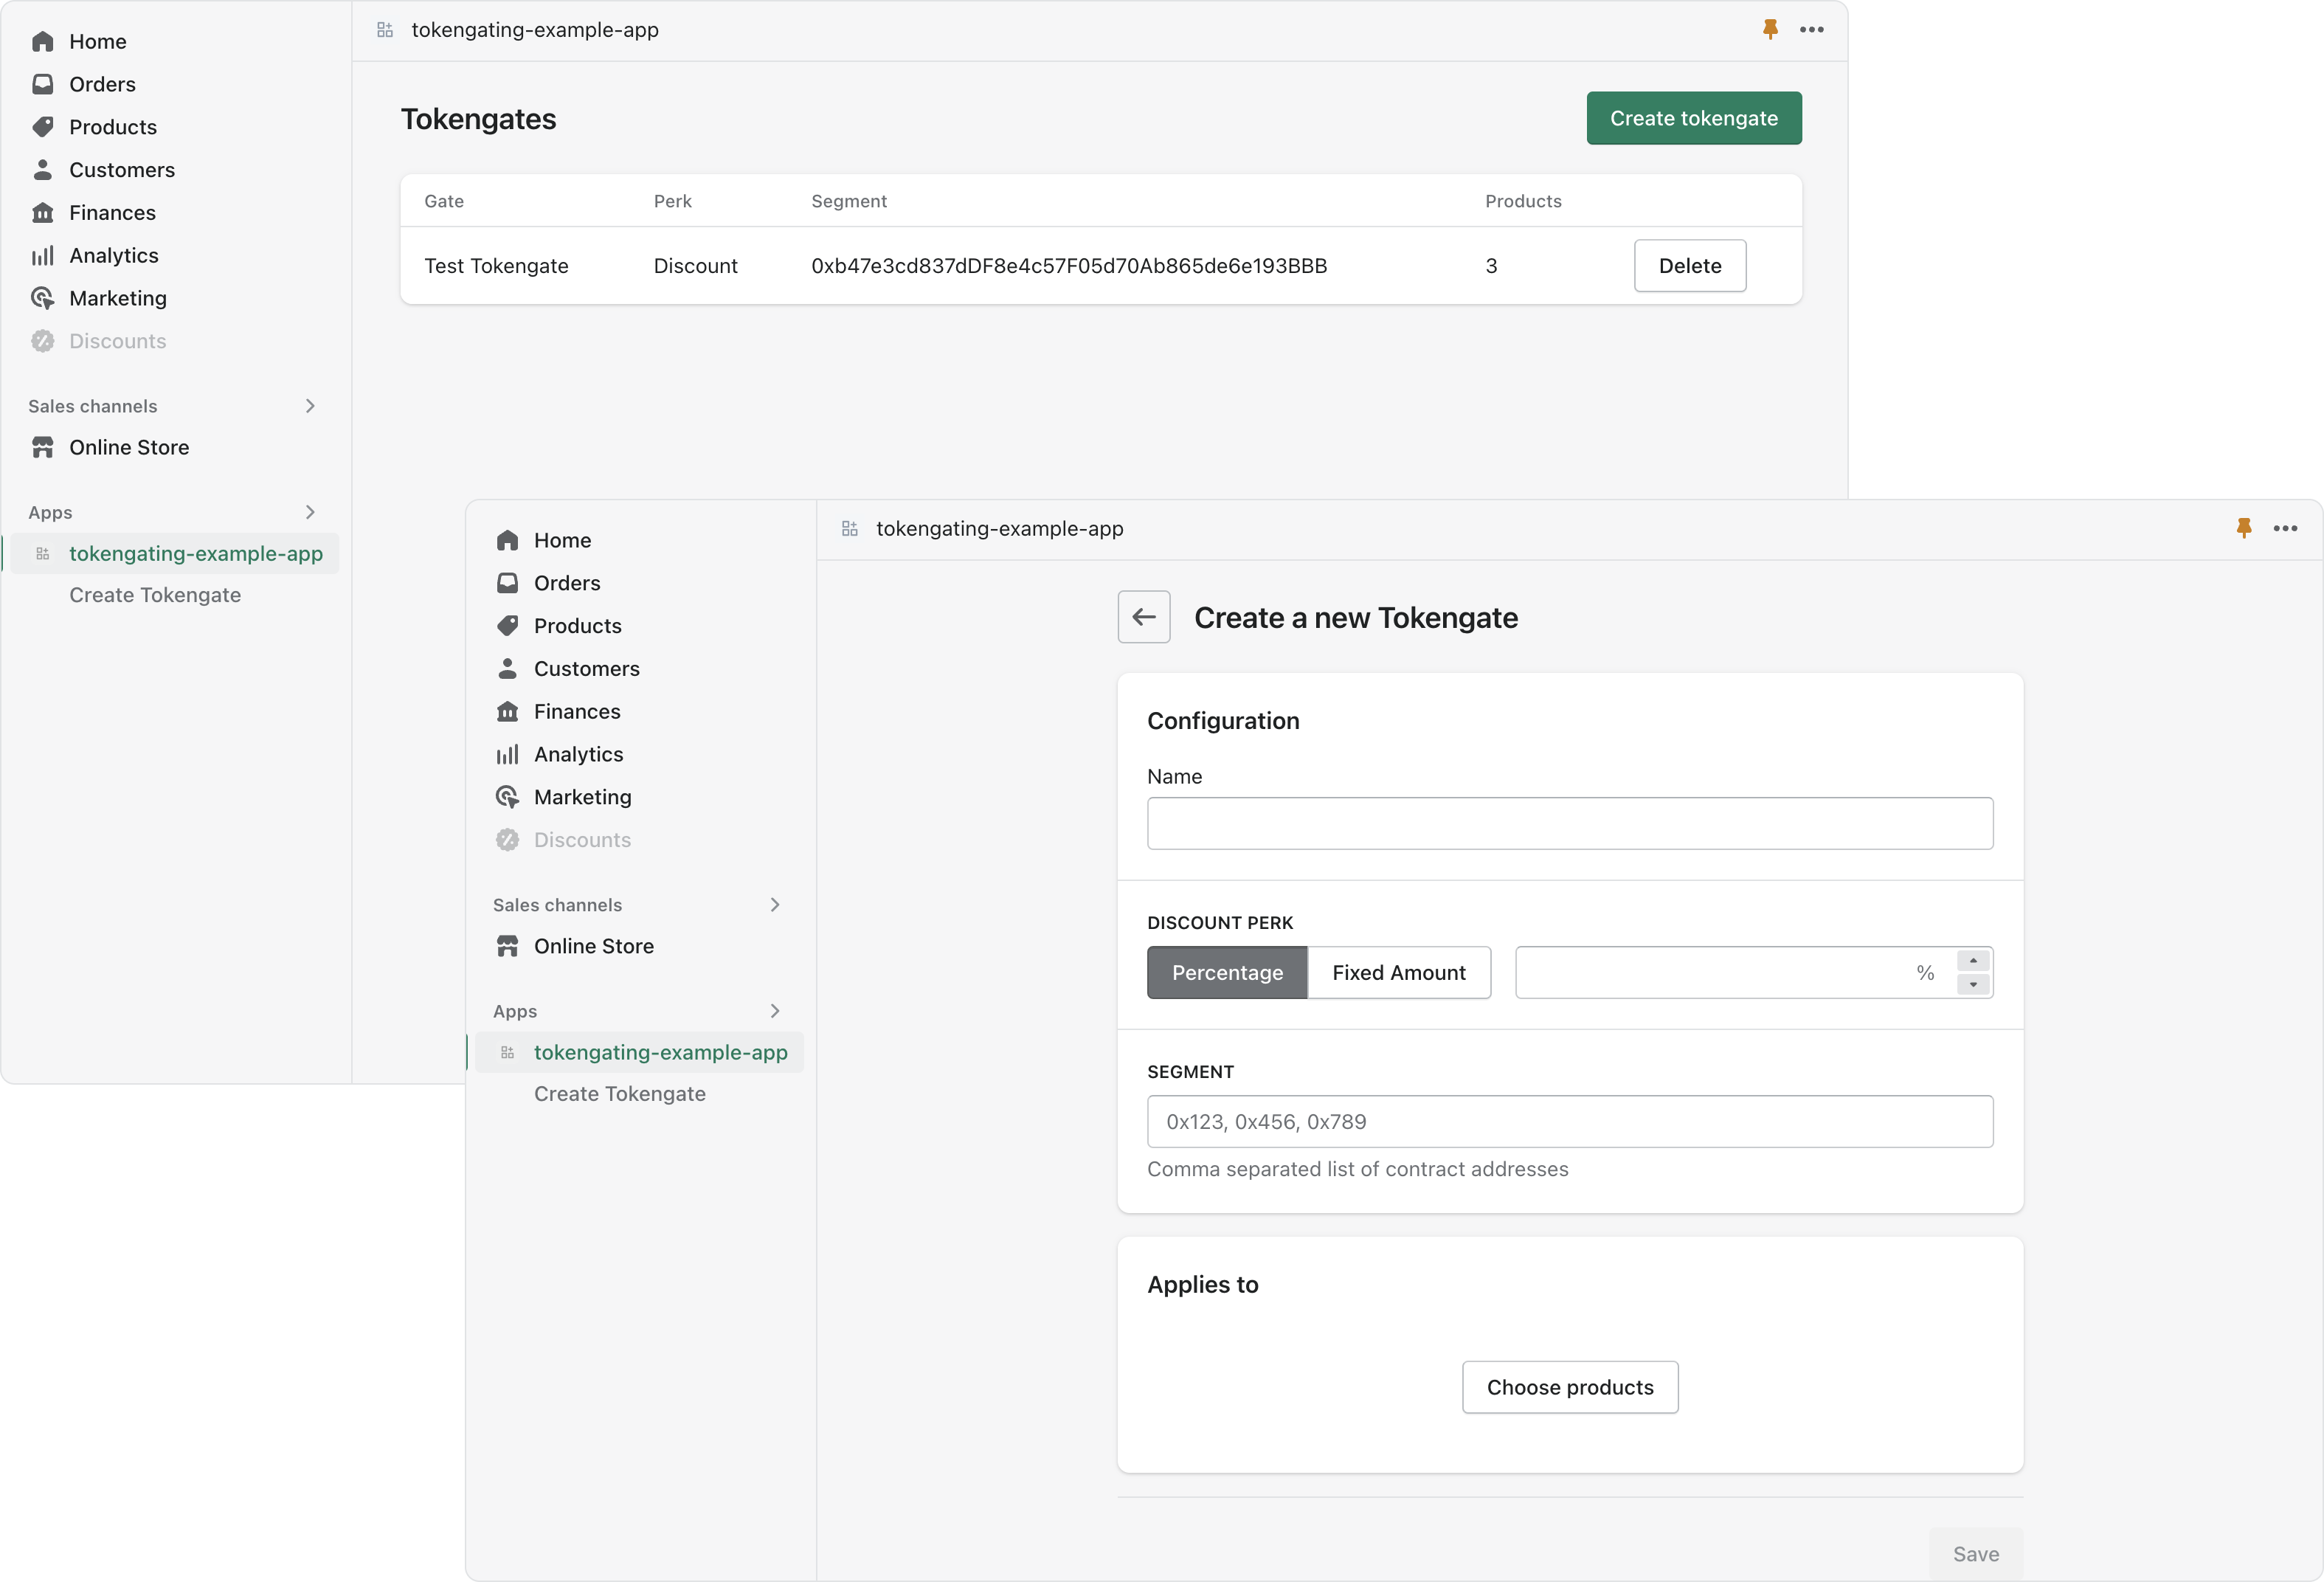
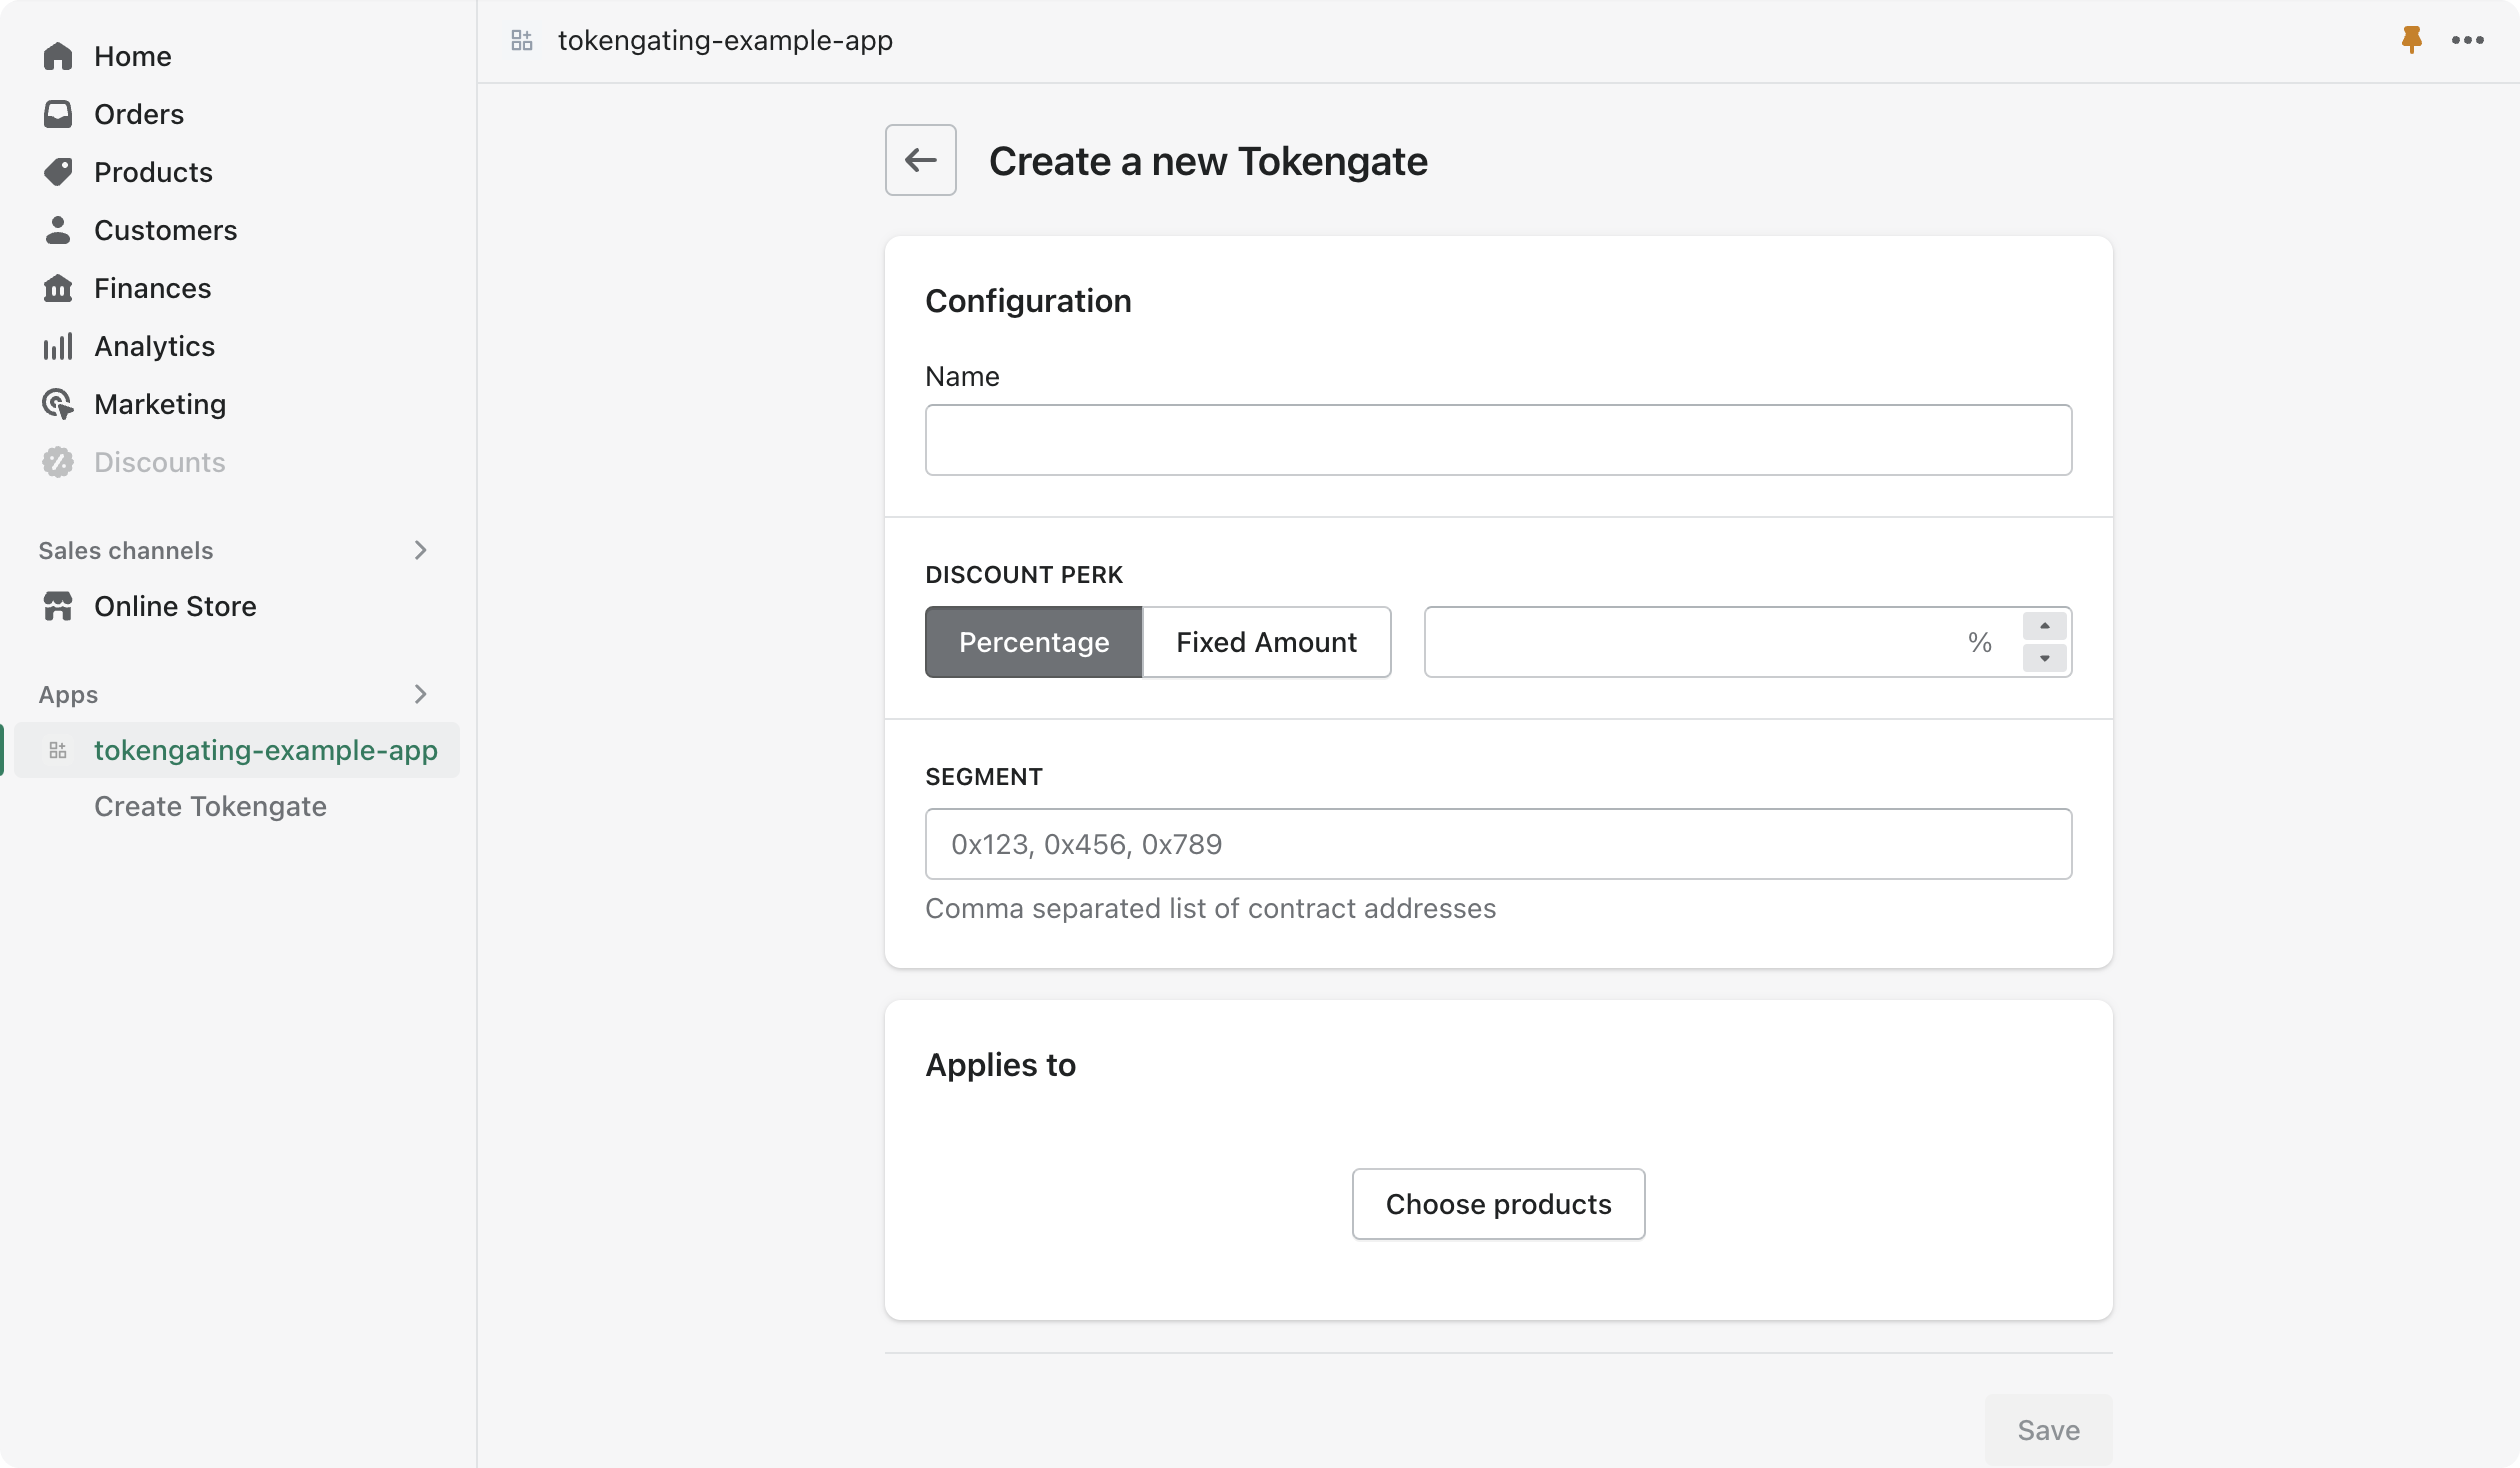
3. In the browser, view your development store. After this step, your form should look like this:
## Step 4: Create the backend for the admin app UI to interact with the Gates API
Now that you have created the frontend, you need to request additional scopes for your app to interact with gates. After, add the backend to create discounts, create, retrieve and delete gates.
### Setup the gates scope
1. In `/shopify.app.toml`, update the existing scopes.
2. Modify the existing scopes declaration to add the `read_gates`, `write_gates`, `read_discounts`, and `write_discounts` scopes.
3. Deploy your updated configuration to Shopify:
4. Start your development server. If your server is already running, restart it.
5. View your app again in your store admin. If prompted for an app update that applies the new scopes, then accept the update.
### Enable the `unstable` API
The Gates API is available in the `unstable` API version. Configure the Shopify API client to use the `unstable` API version.
1. Open `/web/shopify.js`
2. Set the `shopify` configuration key `apiVersion` to `unstable`.
### Create the backend to interact with the Gates API
1. Create a new directory `/web/api/`, and inside create a new file called `constants.js`.
2. Add the following code to the file:
3. In the `/web/api` directory, create a new file called `create-discount.js`.
4. Add the following code to the file:
In [the last part of this tutorial series](/docs/apps/build/blockchain/tokengating/build-a-tokengating-app/create-gated-discount-function), after deploying your function to apply the gate discount, you'll come back to fill in `YOUR_FUNCTION_ID`.
5. In the `/web/api/` directory, create a new file called `create-gate.js`.
6. Add the following code to the file:
> Note:
> The `create-gate.js` code supports the behavior that when a new gate is created with a product that belongs to an existing gate, the product will be removed from the existing gate and assigned to the newly created gate.
7. In the `/web/api/` directory, create a new file called `retrieve-gates.js`.
8. Add the following code to the file:
7. In the `/web/api/` directory, create a new file called `delete-gate.js`.
8. Add the following code to the file:
## Step 5: Add the API endpoints to the server
The app uses authenticated endpoints to create, update, delete, and view the gates. You'll import the helpers `createGate`, `retrieveGates`, and `deleteGate` that you created in the previous steps, and call those endpoints with a `GET` and `POST` request.
1. Open `/web/index.js`.
2. Replace the code with:
### Step 6: Create a gate
The admin UI to create tokengates is complete. Try it out by entering details in the form and pressing create. The gate should be created and included in the tokengate list.
To ensure later steps in this tutorial are successful, make sure to:
* Input token addresses in the Segments field that you have access to
* Select at least one product when creating a tokengate
* Not leave the discount or name fields blank

## Next steps
* If you're using a custom storefront built using Hydrogen or the Headless channel, then follow the [build a tokengated storefront](/docs/apps/build/blockchain/tokengating/build-a-tokengated-storefront) tutorial series.
* If you plan to integrate your app with a regular storefront, then [show gates on the storefront using a theme app extension](/docs/apps/build/blockchain/tokengating/build-a-tokengating-app/show-gates-storefront).