Build an inline profile UI extension
Inline extensions render after, before, or within a piece of UI, at targets on customer account pages.
In this tutorial, you'll build an extension for the customer Profile page that displays the total points earned.
Anchor to What you'll learnWhat you'll learn
In this tutorial, you'll learn how to do the following tasks:
- Create an extension that will be render on the Profile page
- Run the extension locally and test it on a dev store
Requirements
The development store should be pre-populated with test data, including an order associated with the email address you'll use to log in to the customer account experience.
You'll need to use the latest version of Shopify CLI.
Scaffold an app that uses Shopify CLI.
Project
Anchor to Create a customer account UI extension for the profile block targetCreate a customer account UI extension for the profile block target
To create a customer account UI extension, you can use Shopify CLI, which generates starter code for building your extension and automates common development tasks.
-
Navigate to your app directory:
Terminal
cd <directory> -
Run the following command to create a new customer account UI extension:
Terminal
shopify app generate extension --template customer_account_ui --name customer-account-ui-extensionYou should now have a new extension directory in your app's directory. The extension directory includes the extension script at
src/{FileName}.jsx. The following is an example directory structure:Customer account UI extension file structure
└── my-app└── extensions└── my-customer-account-ui-extension├── src│ └── CustomerAccount.jsx // The index page of the customer account UI extension├── locales│ ├── en.default.json // The default locale for the customer account UI extension│ └── fr.json // The locale file for non-regional French translations├── shopify.extension.toml // The config file for the customer account UI extension└── package.json
-
Start your development server to build and preview your app:
Terminal
shopify app devTo learn about the processes that are executed when you run
dev, refer to the Shopify CLI command reference. -
Press
pto open the Dev Console. -
In the extension list for your app, click on the preview link for your extension.
Anchor to Set up the target for your extensionSet up the target for your extension
Set up the target for your customer account UI extension. Targets control where your extension renders in the customer account flow.
The example code uses the following target:
customer-account.profile.block.render
In your extension's configuration file, for the customer-account.profile.block.render target, create an [[extensions.targeting]] section with the following information:
target: An identifier that specifies where you're injecting code into Shopify.
module: The path to the file that contains the extension code.
Create a file in your extension's src directory for the target. In this example, you'll create a file for the profile block extension. Make sure that the name of the files match the module paths that you specified.
shopify.extension.toml is the configuration file for your extension.
Anchor to Build the profile block extensionBuild the profile block extension
Anchor to Build the UIBuild the UI
Add a card to the customer account page that displays the customer's loyalty program information, using the section component and other web components. In this example, the rewards information is hard-coded. In a production-ready application, you'd retrieve this information by making an API call to your server, or to the Customer Account API if you're storing loyalty and rewards data in metafields.
While this is outside of the scope of this tutorial, the example also adds a View rewards button, which you could link to a full-page extension that displays the customer's rewards information in more detail.
Customer account UI extensions are limited to specific UI components exposed by the platform for security reasons. Web components allow you to create a UI that feels seamless within the checkout experience, and that inherits a merchant's brand settings.
Anchor to Preview the extensionPreview the extension
Preview your extension to make sure that it works as expected.
Anchor to Start your serverStart your server
Run the Shopify CLI dev command to build your app and preview it on your development store.
-
In a terminal, navigate to your app directory.
-
Either start or restart your server to build and preview your app:
Terminal
shopify app dev -
If prompted, select a development store.
-
Press
pto open the Dev Console. -
In the extension list for your app, click on the preview link for your extension.
The customer accounts experience opens.
Navigate to the Profile page of a customer account to see your extension in action.

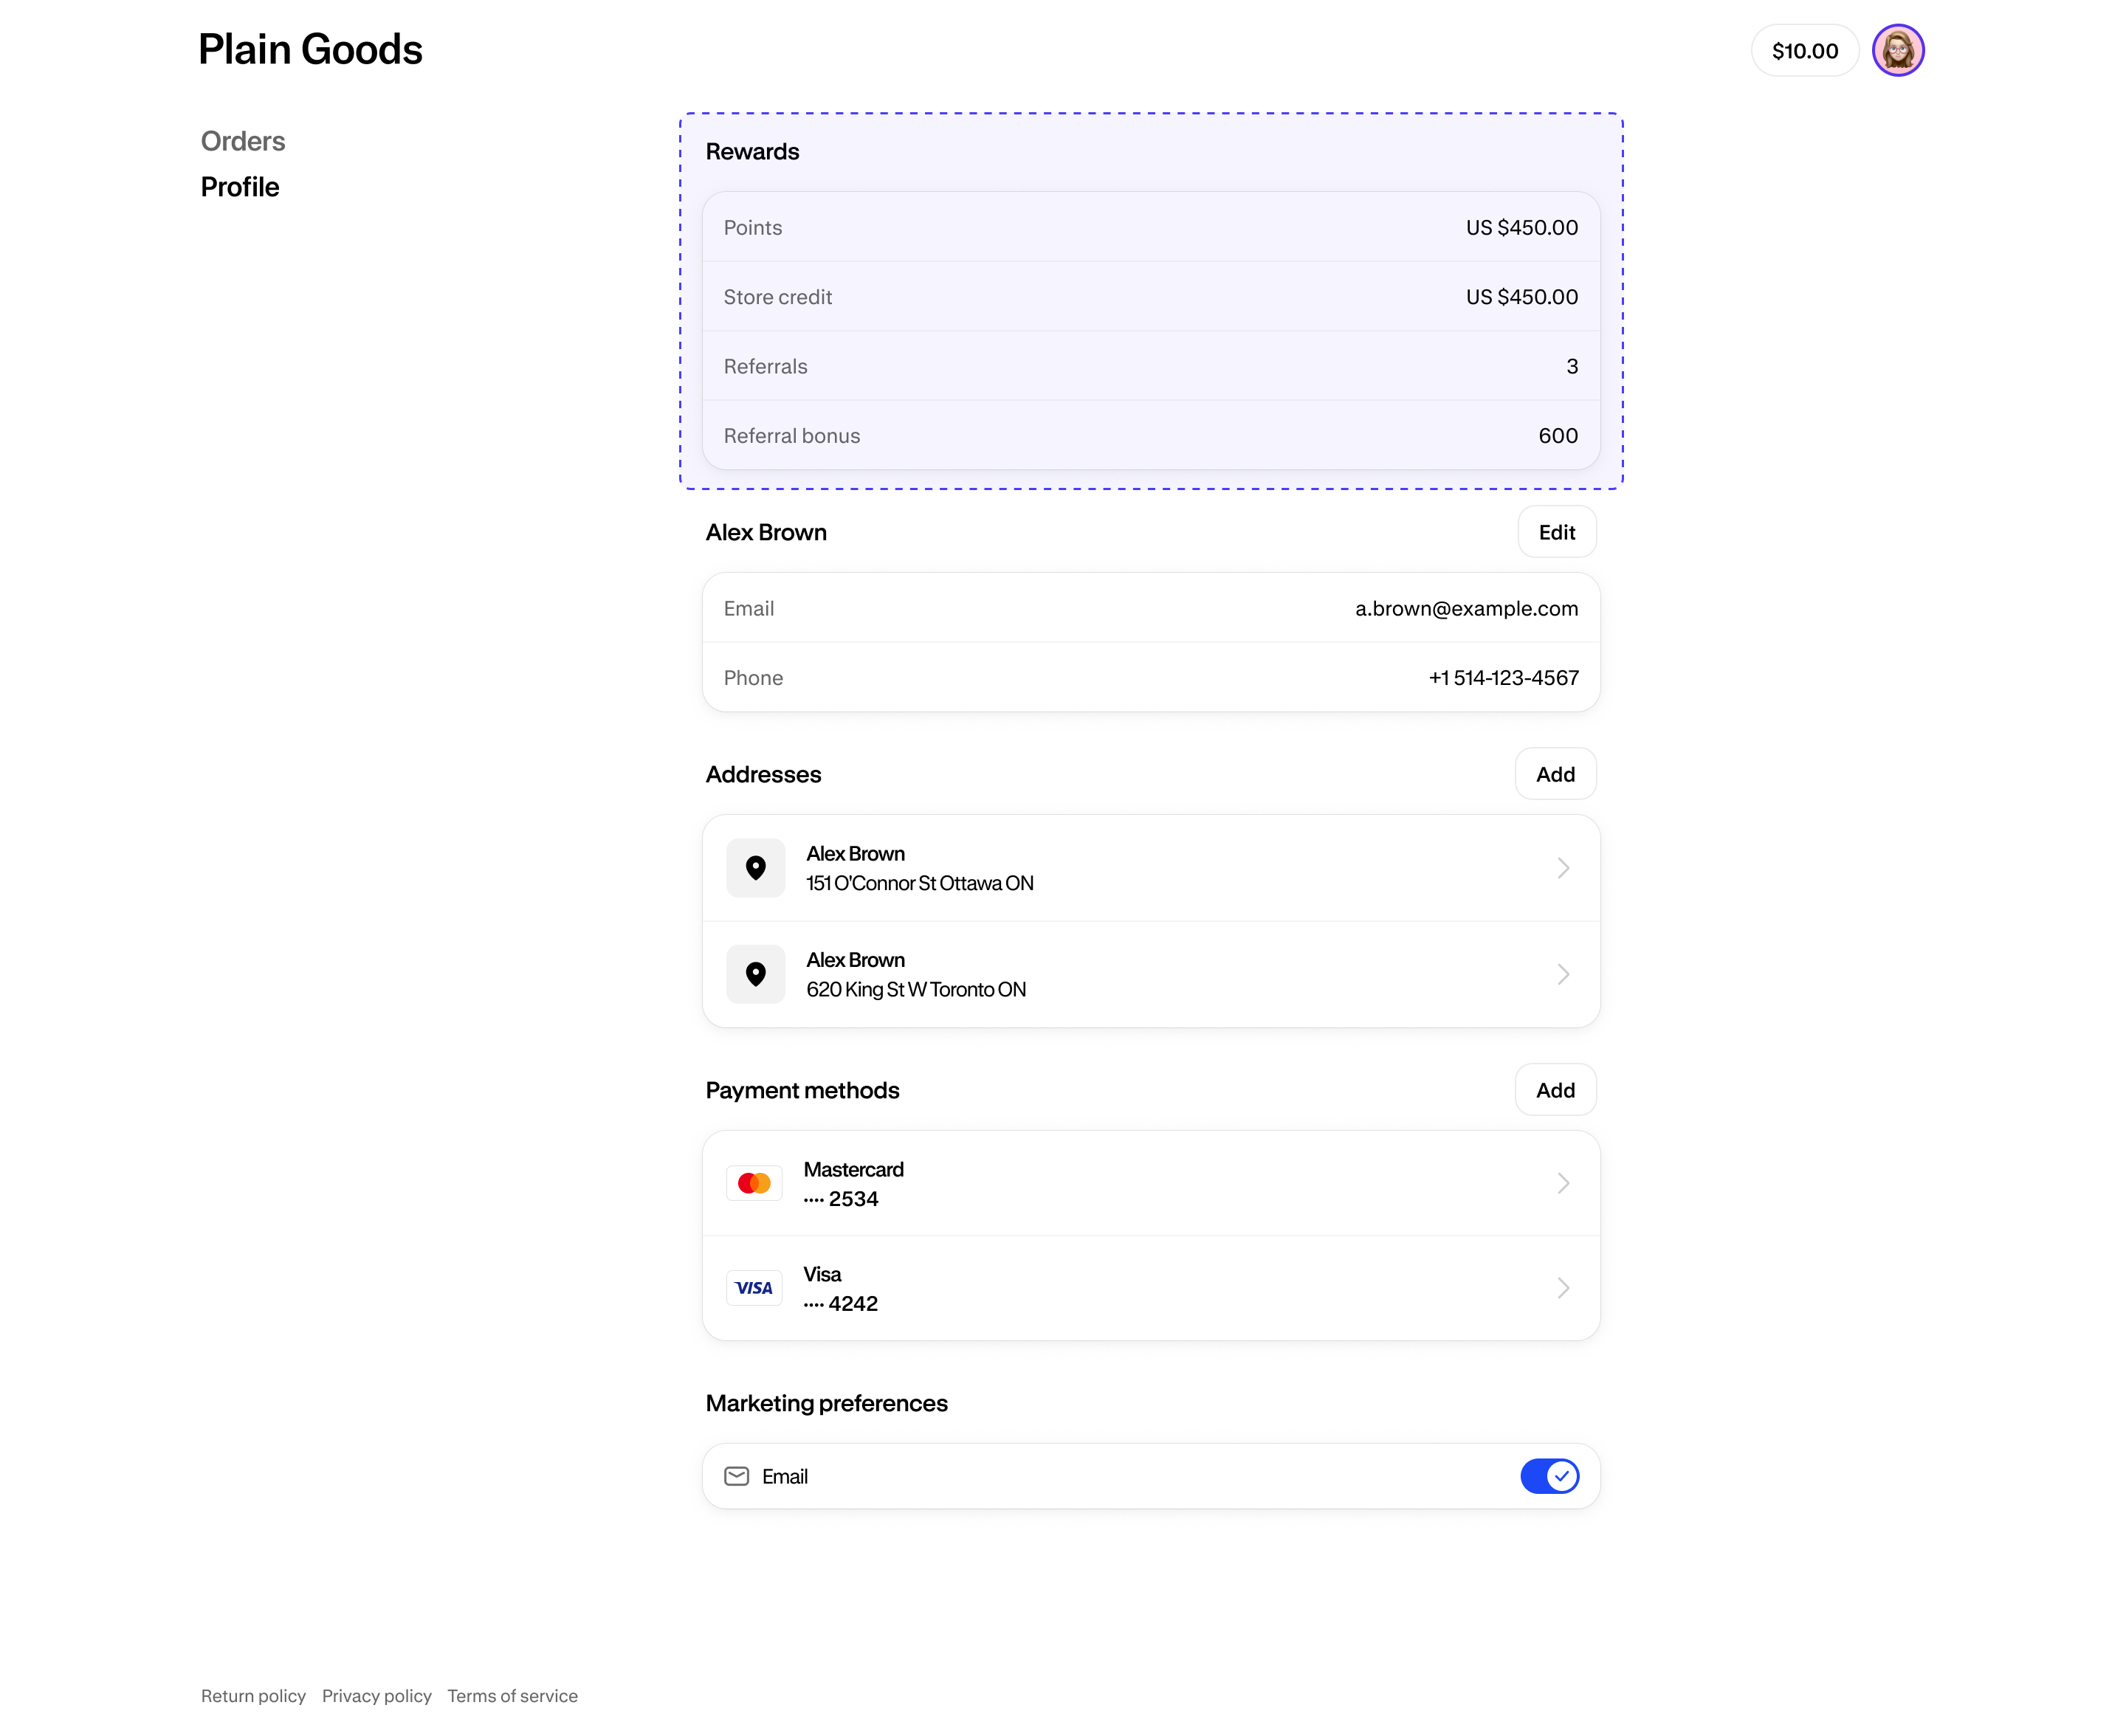
On the Profile page, your UI extension's block first displays at the top of the page, between the navigation header and the page title. By default, blocks are placed in the first available placement reference.
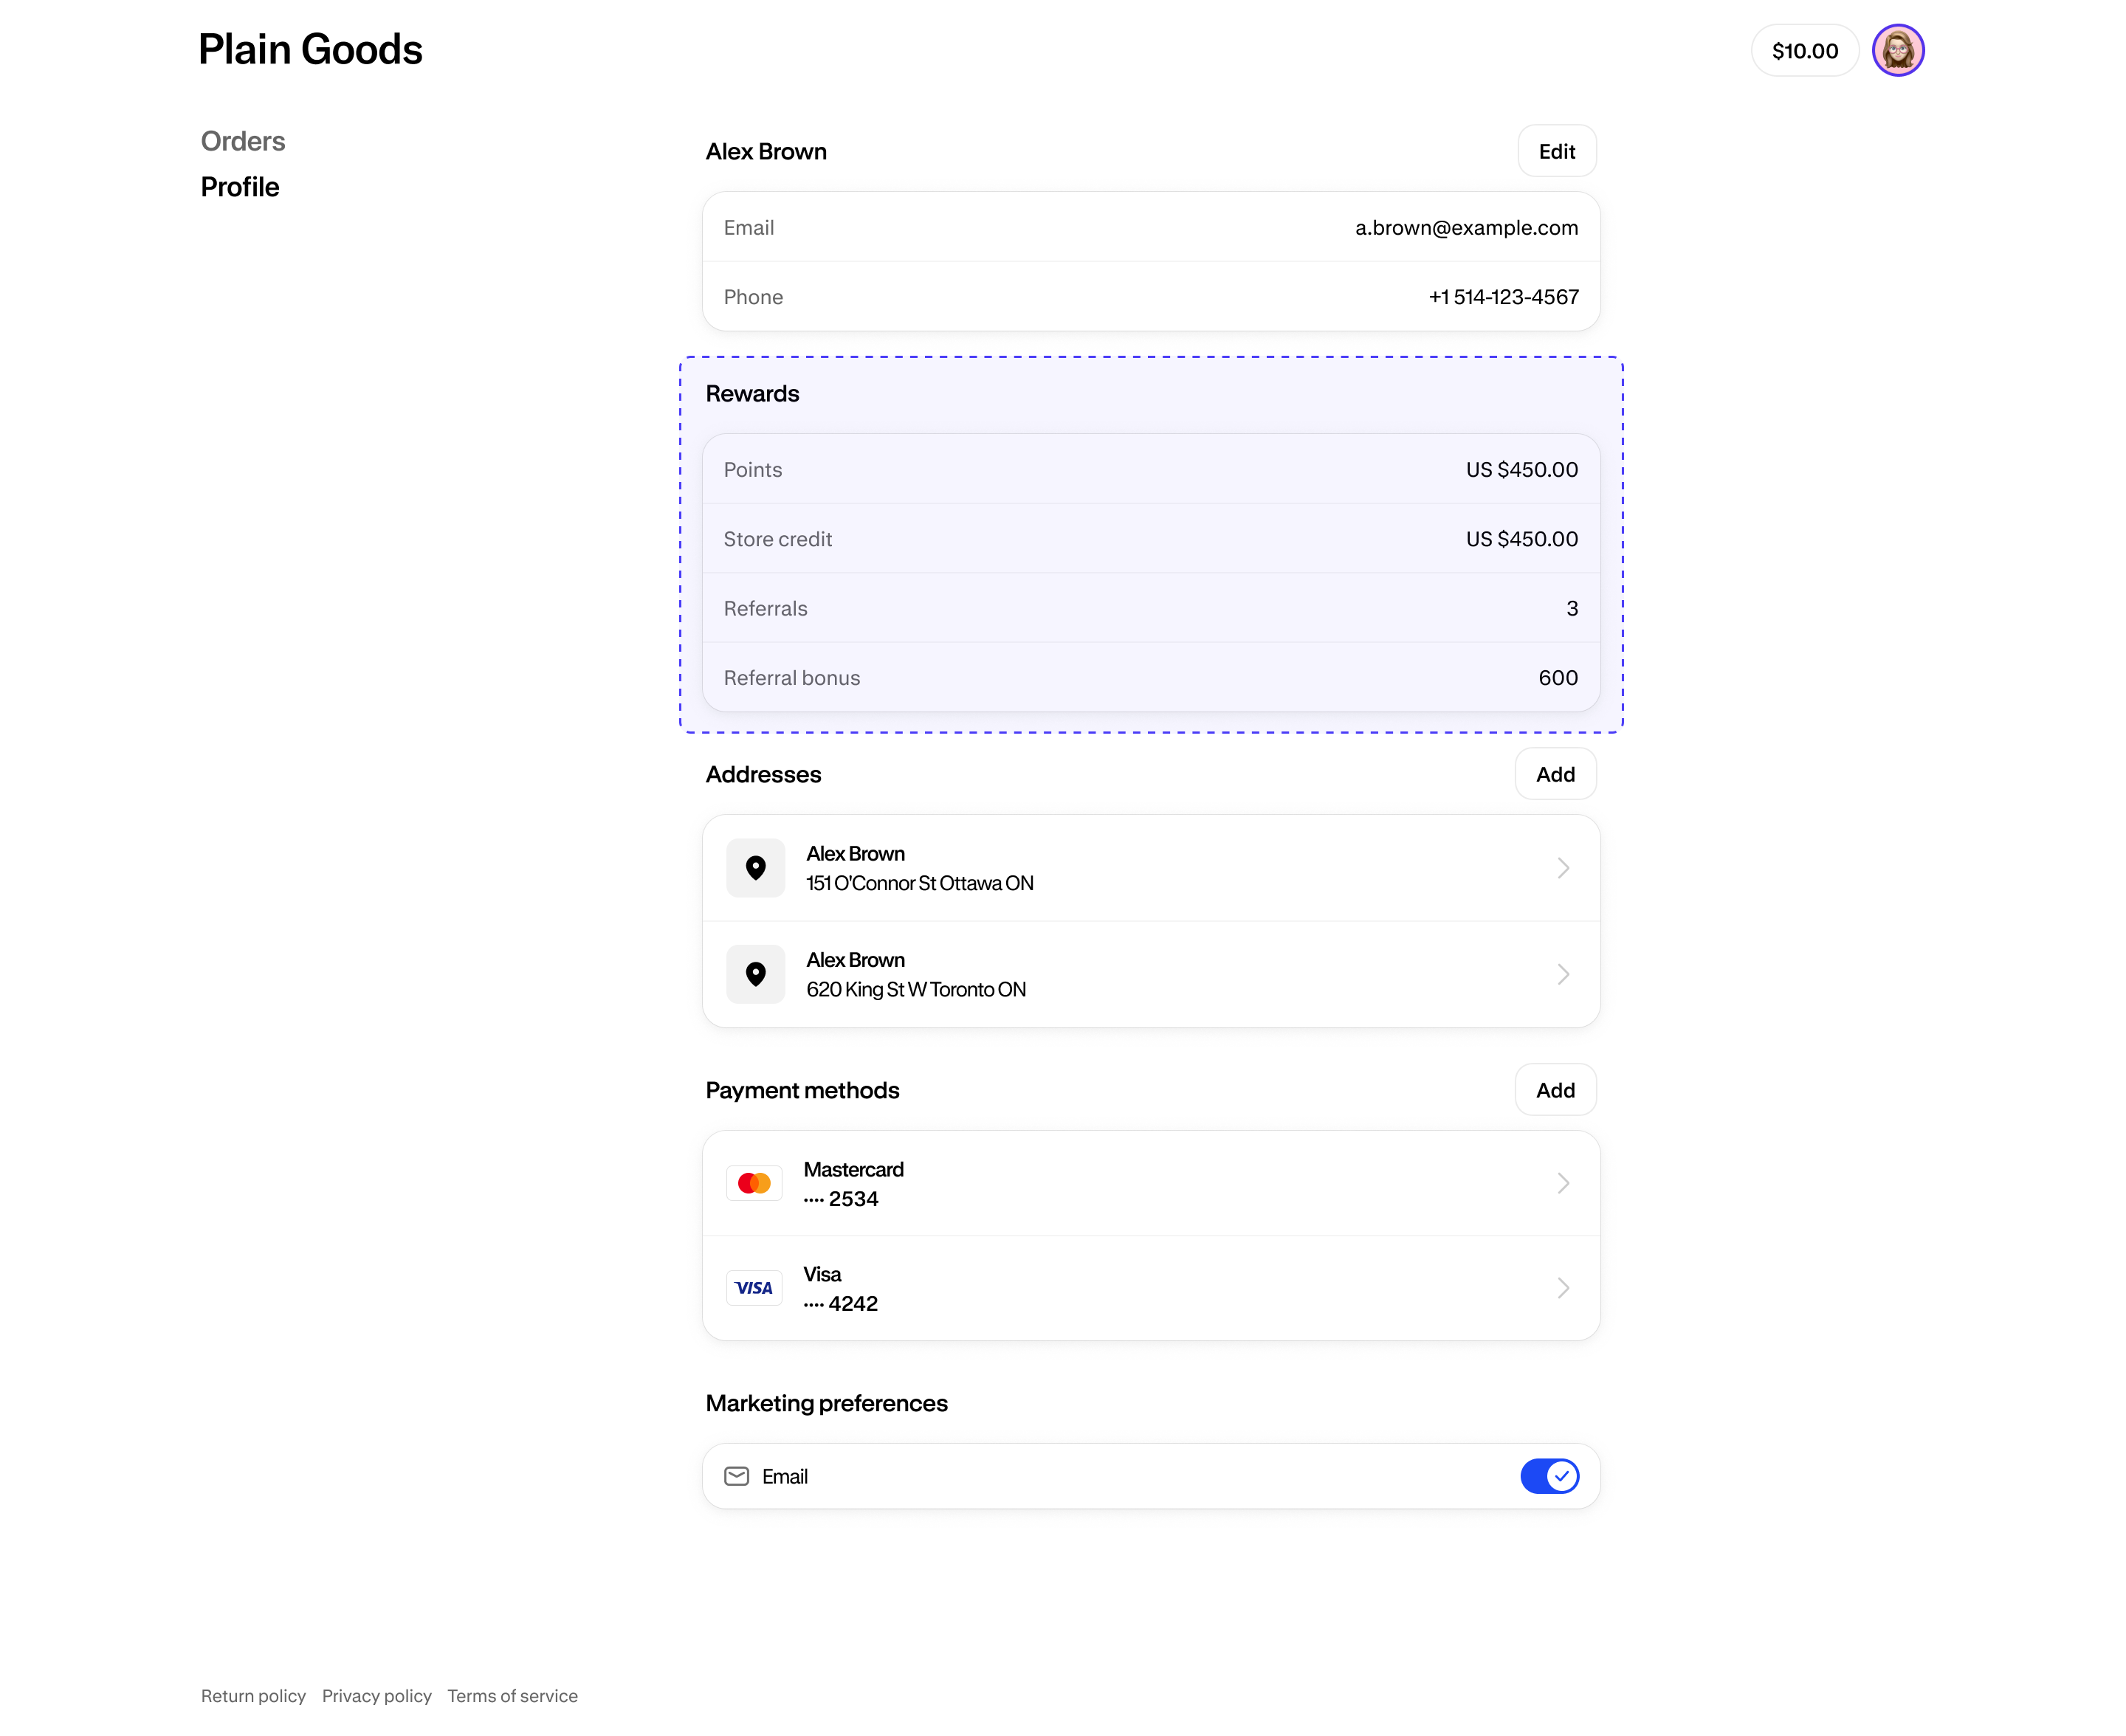
Visually this extension should not be rendered before the heading of the page, and it should instead render in the next placement reference on the page. In a production-ready situation, merchants move this extension to the right location using the checkout editor. To test this, you can add the ?placement-reference=PROFILE1 query parameter to the URL of the Profile page. This moves the extension the next placement reference on the page.
Learn more about testing UI extensions in different placement references.
On the Profile page, your UI extension's block first displays at the top of the page, between the navigation header and the page title. By default, blocks are placed in the first available placement reference.
Visually this extension should not be rendered before the heading of the page, and it should instead render in the next placement reference on the page. In a production-ready situation, merchants move this extension to the right location using the checkout editor. To test this, you can add the ?placement-reference=PROFILE1 query parameter to the URL of the Profile page. This moves the extension the next placement reference on the page.
Learn more about testing UI extensions in different placement references.
Anchor to Tutorial complete!Tutorial complete!
Nice work - what you just built could be used by Shopify merchants around the world! Keep the momentum going with these related tutorials and resources.
Anchor to Next StepsNext Steps
Explore extension placement options and make informed decisions on where to position them.
Localize your extensionLearn about localizing your customer account UI extensions for international merchants and customers.
TargetsLearn about the targets offered for customer accounts.
UX guidelinesFollow our UX guidelines for customer accounts to ensure a consistent and satisfying user experience.
Web componentsLearn about the components you can use to build customer account UI extensions.