About Shopify Functions
- Stores on any plan can use public apps that are distributed through the Shopify App Store and contain functions. Only stores on a Shopify Plus plan can use custom apps that contain Shopify Function APIs.
- Some Shopify Functions capabilities are available only to stores on a Shopify Plus plan. See Shopify Function APIs for details.
- Stores on any plan can use public apps that are distributed through the Shopify App Store and contain functions. Only stores on a Shopify Plus plan can use custom apps that contain Shopify Function APIs.
- Some Shopify Functions capabilities are available only to stores on a Shopify Plus plan. See Shopify Function APIs for details.
Shopify Functions allow developers to customize the backend logic of Shopify. This guide introduces how Shopify Functions work and the benefits of using Shopify Functions.
Anchor to How Shopify Functions workHow Shopify Functions work
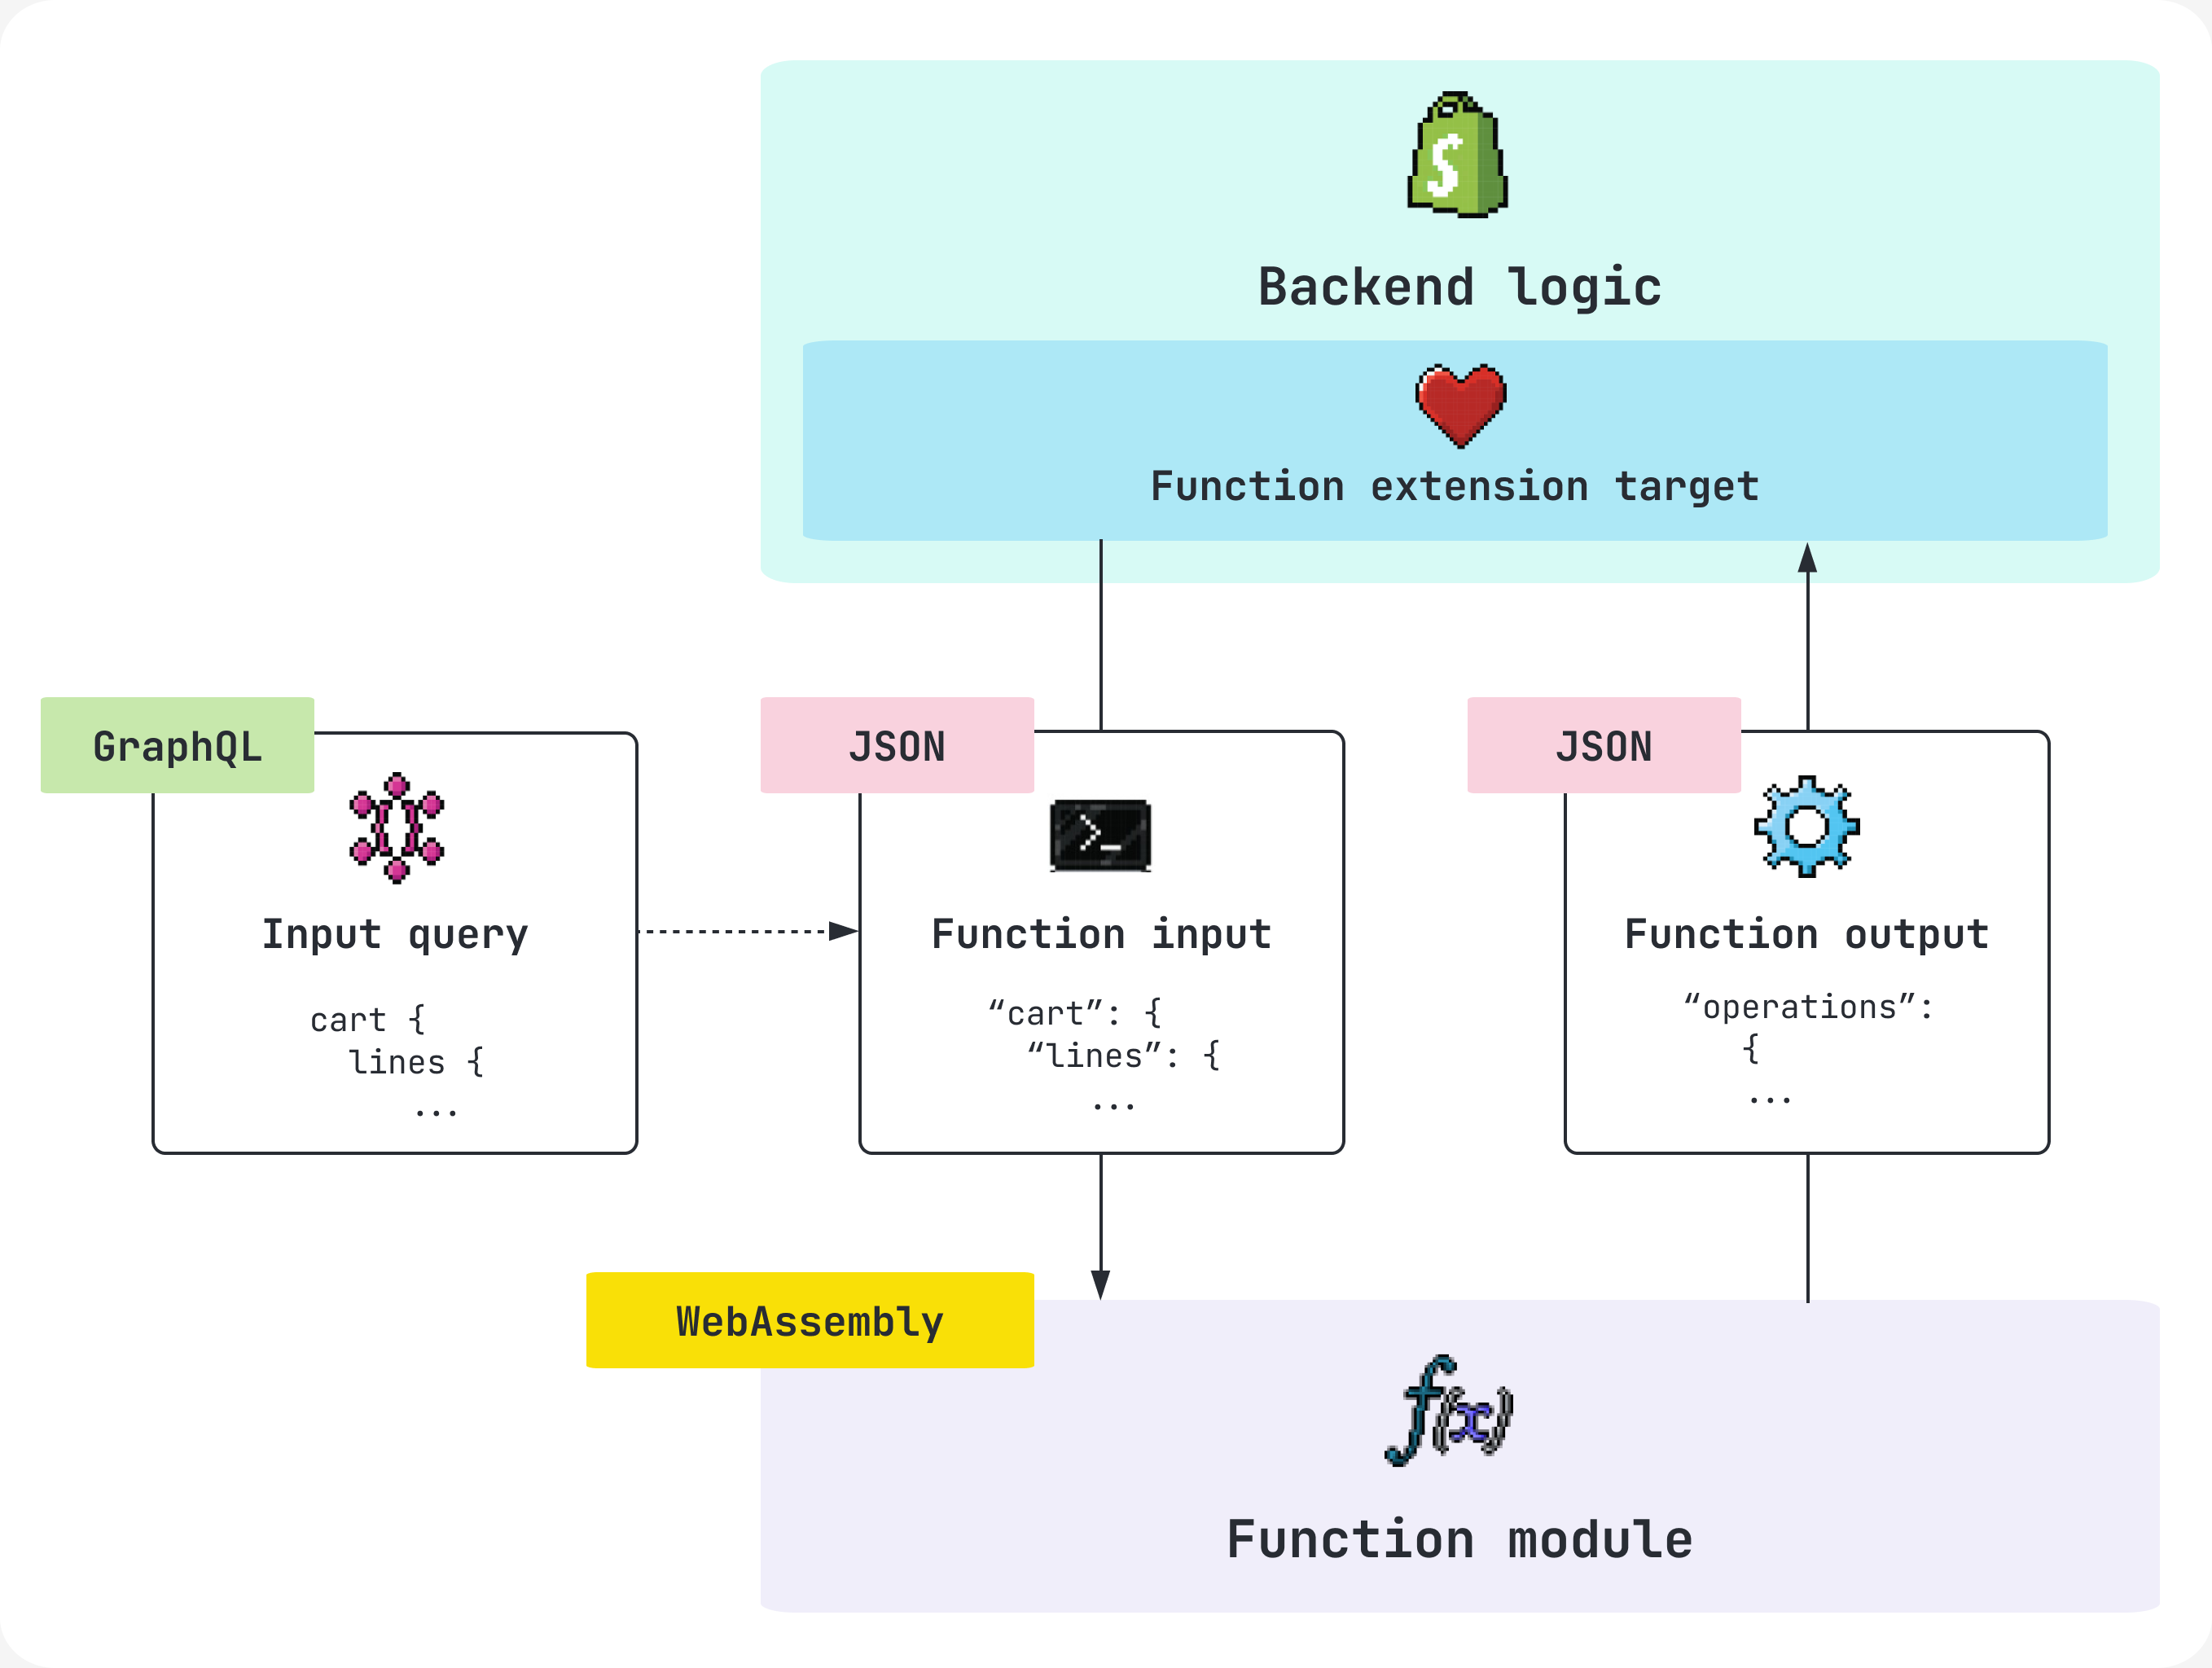
Function Targets inject code into the backend logic of Shopify. The following diagram shows how Shopify invokes a function which has been configured for a target:
-
Function input: The function input is a JSON object which is the result of a GraphQL input query you define. Input queries allow you to select the specific data you need for your function, such as cart line product data or metafields.
-
Function logic: The function logic is written in any language that can compile a WebAssembly module which meets function requirements. Function templates and client libraries are available for Rust and JavaScript.
CautionShopify strongly recommends Rust as the most performant language choice to avoid your function failing with large carts.
Caution:Shopify strongly recommends Rust as the most performant language choice to avoid your function failing with large carts.
-
Function output: The function output is a JSON document that describes the operations you'd like Shopify to carry out.
GraphQL schemas provided by Shopify specify the targets, available inputs, and expected outputs for a Functions API.
Anchor to Lifecycle of a Shopify FunctionLifecycle of a Shopify Function
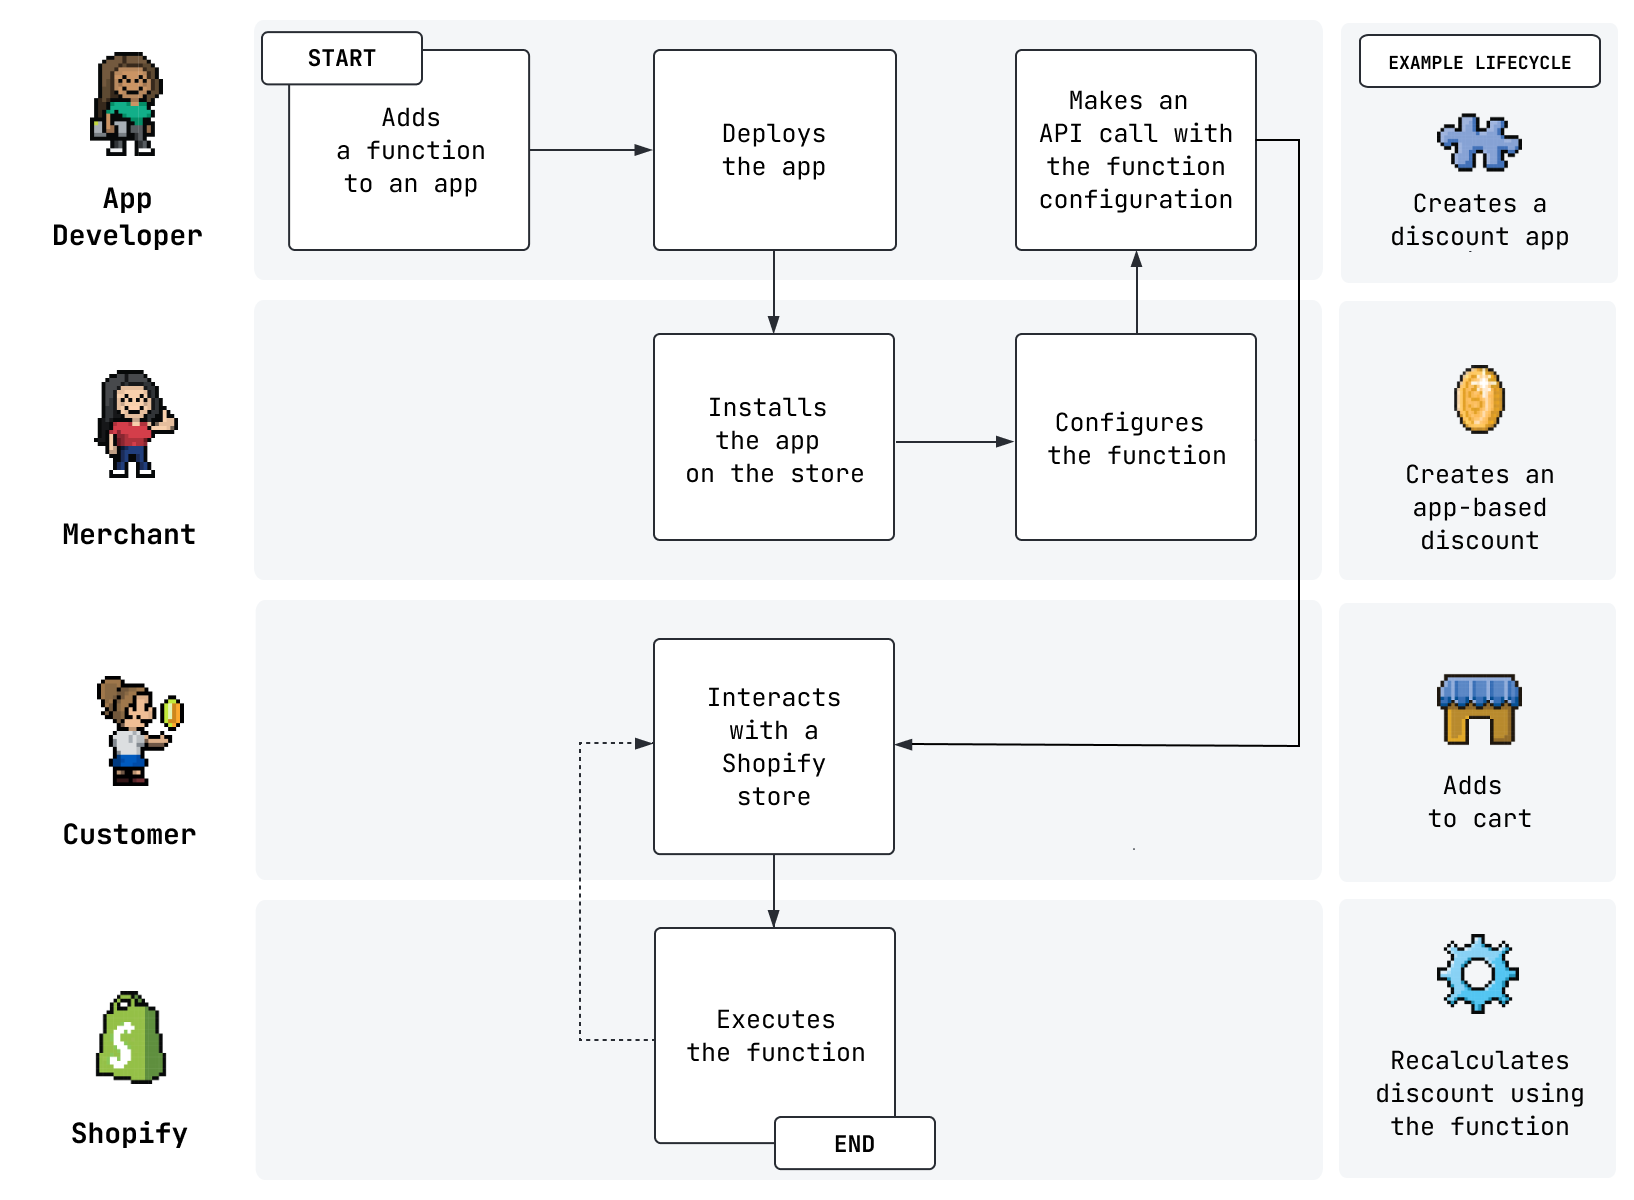
The following diagram shows an example lifecycle of a Shopify Function:
-
App developers create and deploy apps that contain functions.
-
Merchants install the app on their Shopify store and configure the function. An API call is made with the function configuration.
-
Customers interact with a Shopify store and Shopify executes the function.
For example, an app developer might create and deploy an app with a function that defines a new discount type. The merchant can then install the app on their Shopify store and create a new discount from a discount type provided by the app. Shopify executes the function to calculate the discount when a customer adds a product to their cart.
Shopify Functions are never invoked directly by URL or otherwise. Shopify invokes them as-needed within the customer journey.
Anchor to Getting startedGetting started
Learn how to use Shopify Functions by following one of our use case tutorials:


Anchor to Developer tools and resourcesDeveloper tools and resources
Explore the developer tools and resources available for Shopify Functions.


Anchor to Deleting functionsDeleting functions
To delete a Shopify Function, you need to remove the relevant files from your app's /extensions directory, and then redeploy your app. Learn more about removing a Shopify Function.
When you delete a function, the following behavior occurs:
- The function, including all associated function owners, is permanently deleted.
- The function no longer runs, and becomes inaccessible to any Shopify stores that have your app installed.
Anchor to Next stepsNext steps
- Learn about how data is input to and output from Shopify Functions.
- Explore the references for each Function API.