Add a payment gateway to your partners account
Starting April 30, 2022, new users can no longer install your legacy Hosted Payment SDK (HPSDK) integrations. Your new payments app should be launched by this time to ensure that there's no disruption with new user onboarding. Existing users will have until July 31, 2022 to switch to your payments app. In early May 2022, Shopify will contact impacted users who haven't migrated to the new platform to help them adopt an alternative payments app and avoid payment processing disruptions. After July 31, 2022, all HPSDK integrations will be deprecated.
Starting April 30, 2022, new users can no longer install your legacy Hosted Payment SDK (HPSDK) integrations. Your new payments app should be launched by this time to ensure that there's no disruption with new user onboarding. Existing users will have until July 31, 2022 to switch to your payments app. In early May 2022, Shopify will contact impacted users who haven't migrated to the new platform to help them adopt an alternative payments app and avoid payment processing disruptions. After July 31, 2022, all HPSDK integrations will be deprecated.
To learn more about the HPSDK deprecation, and how to migrate to Payments Platform, refer to Hosted Payment SDK overview.
To learn more about the HPSDK deprecation, and how to migrate to Payments Platform, refer to Hosted Payment SDK overview.
Learn more about the new payments platform.
Learn more about the new payments platform.
Adding a gateway to your Shopify Partner's account will prepare you for publishing your gateway integration. Before you can add a gateway to a shop, make sure that the gateway meets the requirements.
Anchor to RequirementsRequirements
Anchor to Add your gateway to your Partner accountAdd your gateway to your Partner account
After you have completed the development of your gateway, you can add it to your dev store:
-
Log in to the Partner Dashboard.
-
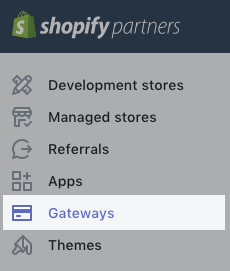
Click Gateways:
-
Click Create gateway.
-
Fill out the following fields with your gateway's info:
-
Gateway Name - This will appear in the merchant payment settings and on customer checkout pages as a payment option.
-
Gateway Website - This URL will be provided to the merchant within the payment settings and will also be used to review your service.
-
Gateway Logo - This will appear at checkout at a height of 24 pixels and a maximum width of 220 pixels. Learn more ›
-
Gateway Category - This is the category that your gateway will display under within payment settings.
-
Redirect URL - The customer will be redirected to this address at checkout. This URL must properly handle the request values that will be sent.
-
Login Label - The naming convention used to describe the login credential types for your gateway, such as
UsernameorAccount Number. -
Password Label - The naming convention used to describe passwords for this gateway, such as
PasswordorSecret Key. -
Sandbox URL (Optional): - You can send test transactions to this URL.
-
Payment Types - These will appear next to your gateway logo at checkout.
-
Countries Served - Supported countries in which merchant accounts are available.
-
Anchor to Helpful tips for your logo fileHelpful tips for your logo file
Your gateway logo will appear at checkout as a payment option:
To make sure it looks the as nice as possible, upload a logo that:
-
has a max height of 24 pixels, and max width of 220 pixels
-
is a high-resolution raster (PNG) file format
-
has a transparent background
-
does not rely on small text that is difficult to read at a height of 24 pixels.
If you have already developed your gateway, you can now bring your gateway live privately or publicly.