About Flow triggers
Anchor to How triggers workHow triggers work
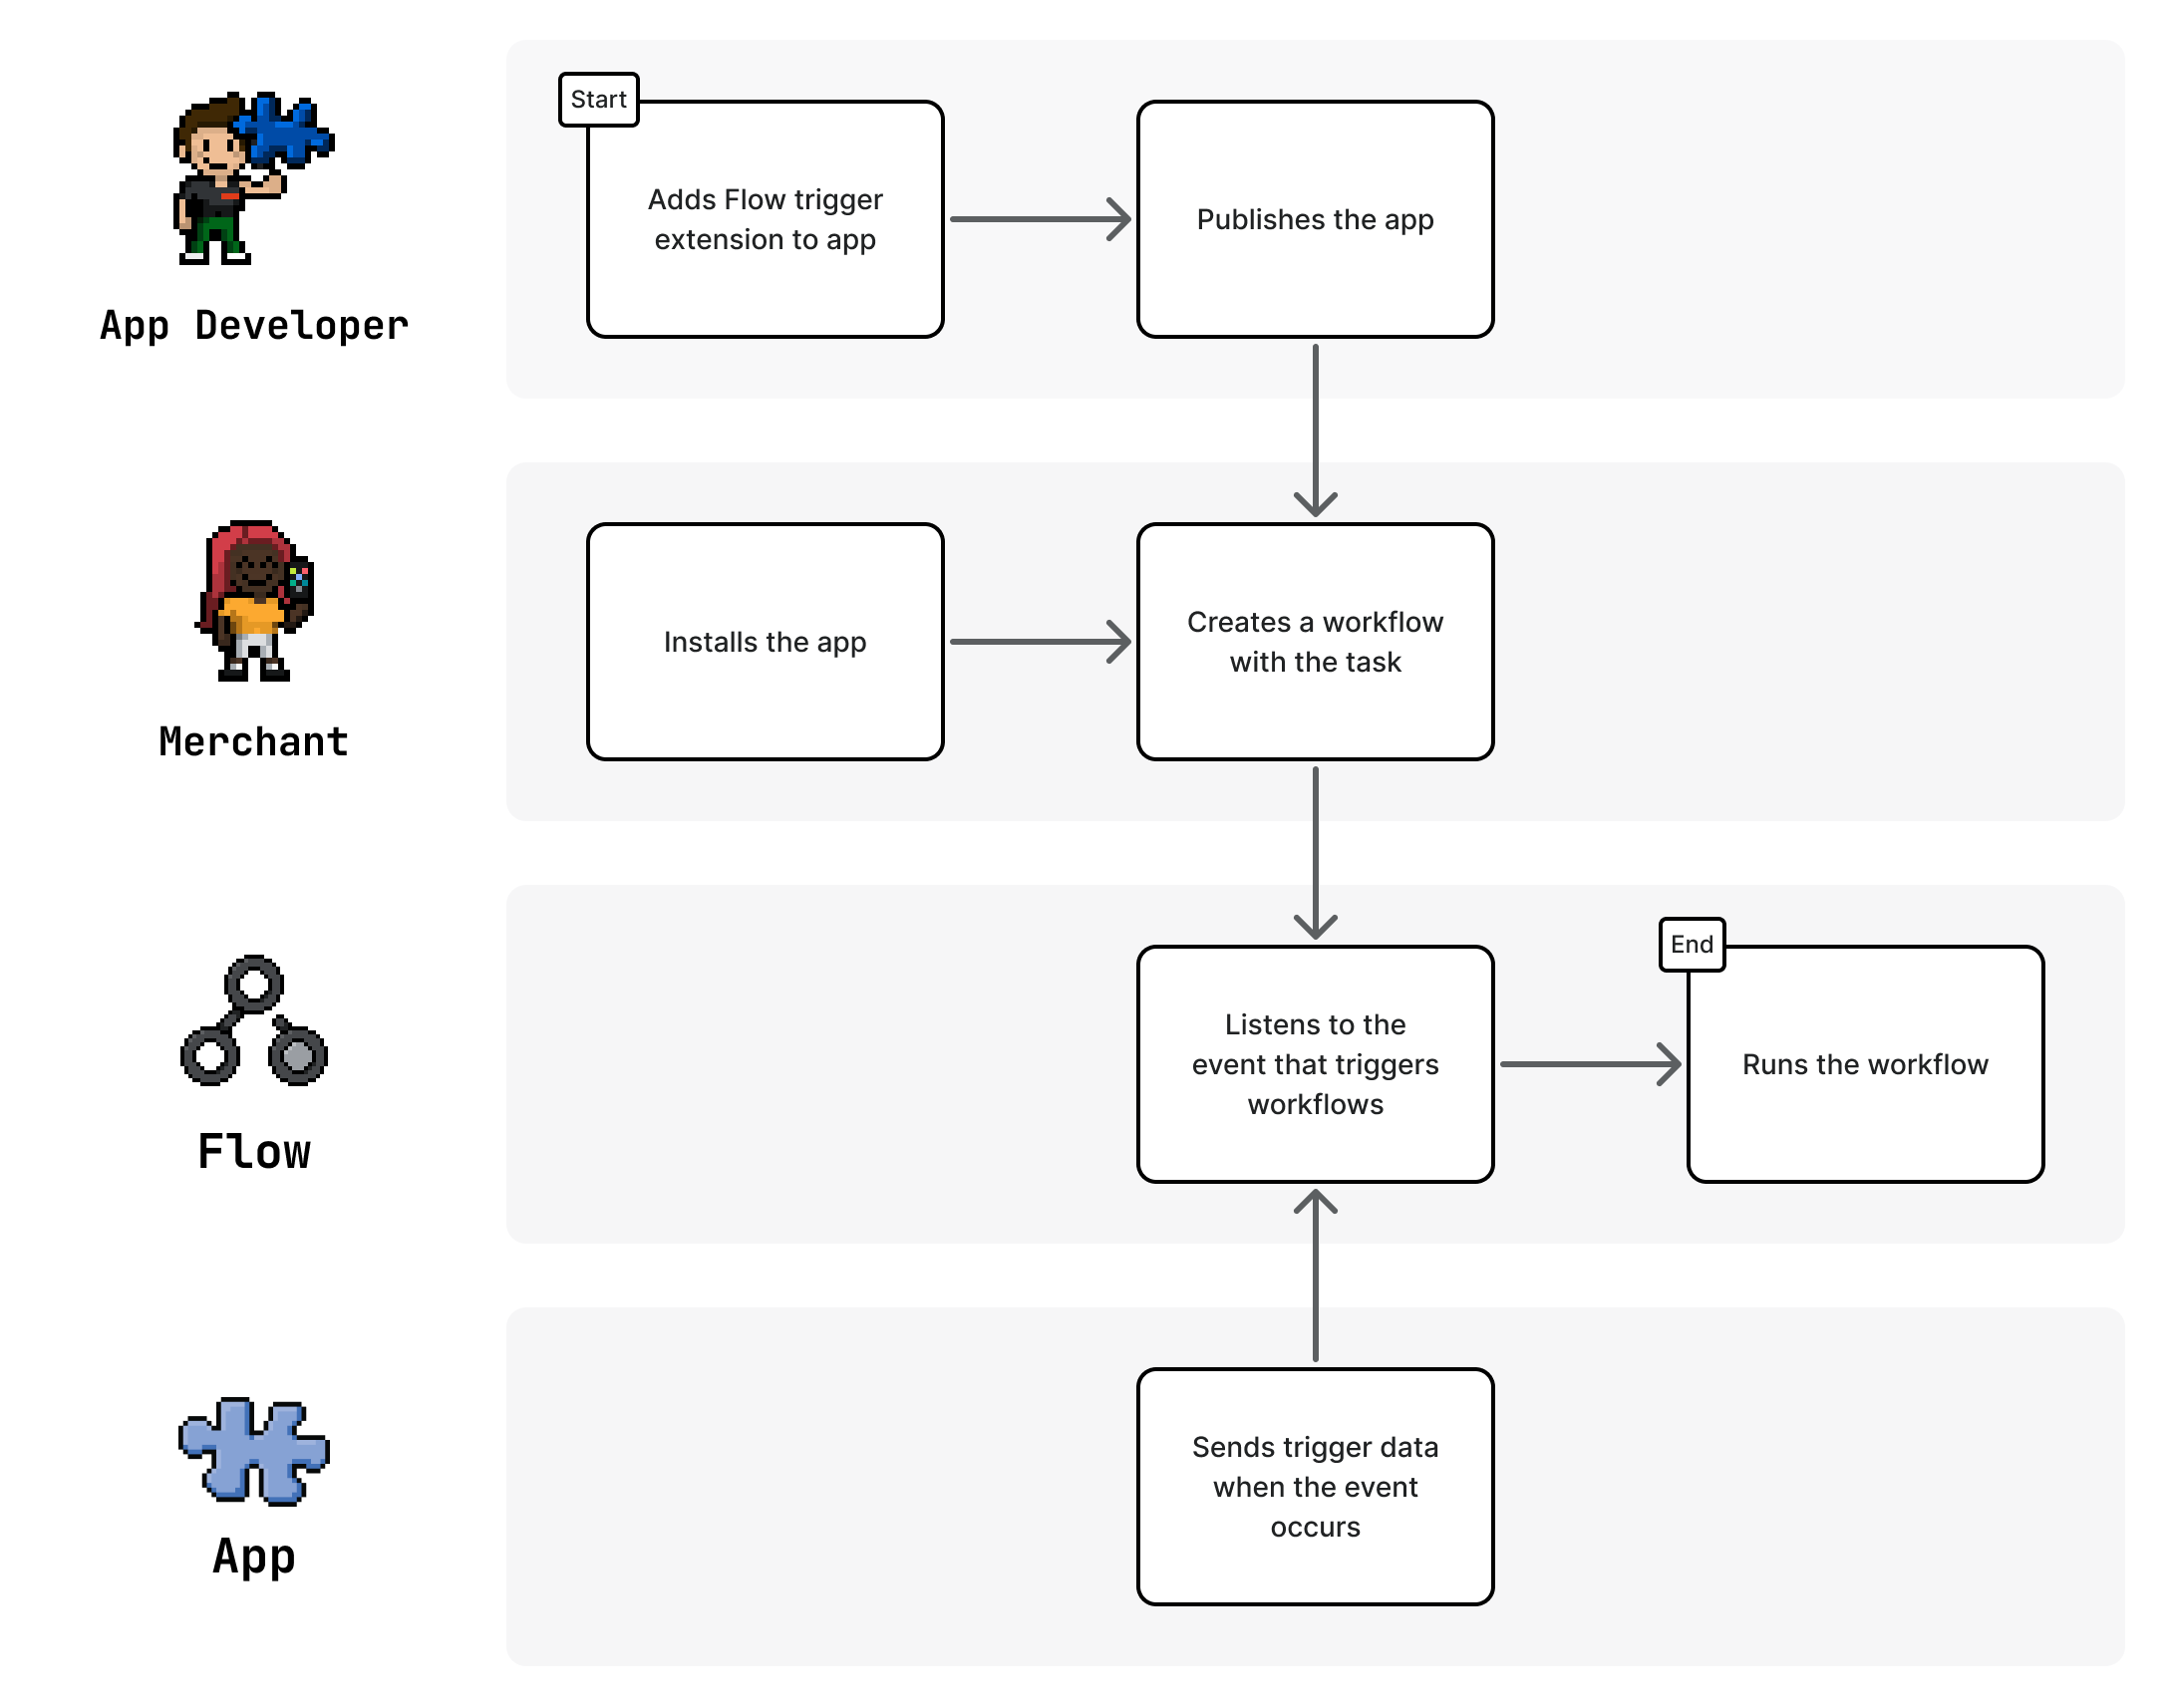
A trigger is a task in Shopify Flow that starts the execution of a workflow. The trigger represents an event that happens in a store or in an app. You can build a trigger for Shopify Flow so that events in your app trigger workflows to run.
Anchor to Next stepsNext steps
- To build a trigger, you need to create a trigger extension in your app. In that extension, you specify details about the trigger using a TOML file.
- Once you have published your extension, you can then test or use it by calling the Shopify API with the trigger payload.
Was this page helpful?