Build a Discounts Allocator Function
This Function API is available only in the Discounts Allocator feature preview.
The Discounts Allocator Function will be available only to Shopify Plus merchants.
This Function API is available only in the Discounts Allocator feature preview.
The Discounts Allocator Function will be available only to Shopify Plus merchants.
Building a Discounts Allocator Function allows for greater customization in defining discount strategies, like implementing custom logic to distribute discounts across line items in an order.
Anchor to What you'll learnWhat you'll learn
In this tutorial, you'll create a Discounts Allocator Function that uses metafields to help define its custom allocation logic.
The first metafield is applied at the order level. It sets a cap on the discount, ensuring that a 50% discount won't exceed a specified dollar amount.
The second metafield is applied at the shop level. It sets a maximum discounted amount for a cart.
Requirements
Create a React Router app that has the write_discounts and read_products access
scopes, using the latest version of Shopify CLI.
Install Node.js 22 or higher.
Install your app on the development store.
Project


Anchor to Update your app's access scopesUpdate your app's access scopes
Your app requires the write_discounts_allocator_functions access scope to create and update discounts.
Anchor to Update the ,[object Object], fileUpdate the shopify.app.toml file
shopify.app.toml fileAdd the write_discounts_allocator_functions scope to your app's shopify.app.toml file.
Anchor to Start your app to preview changesStart your app to preview changes
-
Save your updated configuration TOML file.
-
Start
app devif it's not already running:Terminal
shopify app devThe configuration TOML file changes will be applied automatically on the development store.
Anchor to Create the Discounts Allocator FunctionCreate the Discounts Allocator Function
- Navigate to your app's directory:
Terminal
cd directory - Run the following command to create a new Discounts Allocator Function:
Terminal
shopify app generate extension --template discounts_allocator --name discounts-allocator - Choose the language that you want to use. For this tutorial, select
JavaScript.
Anchor to Update the configurationUpdate the configuration
Anchor to Replace the content of the extension's ,[object Object], fileReplace the content of the extension's run.graphql file
run.graphql fileThis GraphQL query is structured to retrieve all necessary data for applying discounts to shopping cart items, including discount details, cart line items, and shop metafields.
It ensures the function has access to discount rules, item specifics, and cap limits to accurately calculate and apply discounts according to predefined policies.
Navigate to your extension's directory:
Terminal
Run the following command to regenerate types based on your input query:
Terminal
Anchor to Update the function logicUpdate the function logic
Anchor to Replace the content of ,[object Object], , file.Replace the content of run.js file.
run.js file.This function applies discounts to shopping cart items according to set rules and limits.
It calculates discount amounts, enforces caps to prevent excessive reductions, and compiles the results and any errors into a structured output, ensuring fair and policy-compliant discount application.
Anchor to Define discount metafieldsDefine discount metafields
Anchor to Add metafield definitions to your app configurationAdd metafield definitions to your app configuration
Add metafield definitions to your app's shopify.app.toml file to track discount caps at the discount and shop levels.
Anchor to Deploy your app configurationDeploy your app configuration
Deploy the metafield definitions with your app:
Terminal
Anchor to Create the frontend UI for registering your Discounts Allocator FunctionCreate the frontend UI for registering your Discounts Allocator Function
After a merchant installs your app, they'll need to register the Discounts Allocator Function to actively allocate discounts.
You're replacing the Shopify discount engine with the Discounts Allocator Function. Your Function will take precedence over most discount features that are built by Shopify.
You're replacing the Shopify discount engine with the Discounts Allocator Function. Your Function will take precedence over most discount features that are built by Shopify.
Anchor to Create a new route for the Discounts Allocator FunctionCreate a new route for the Discounts Allocator Function
In app/routes, create a new file named app.discounts-allocator.$functionId.jsx.
The Shopify React Router app template uses file-based routing, so the filename determines the page's URL. The $ prefix indicates that functionId is a dynamic segment. The path for this page is /app/discounts-allocator/{functionId}.
Anchor to Add an ,[object Object], function to handle form submissionAdd an action function to handle form submission
action function to handle form submissionAdd an action function to app.discounts-allocator.$functionId.jsx to handle the form submission. This function calls the discountsAllocatorFunctionRegister mutation to register the Discounts Allocator Function.
Anchor to Create the UI for registering the Discounts Allocator FunctionCreate the UI for registering the Discounts Allocator Function
Use the primaryAction in the Page component to expose a button that calls the action function. This button allows merchants to register the Discounts Allocator Function.
Anchor to Update the UI pathUpdate the UI path
In extensions/discounts-allocator/shopify.extension.toml, populate the create and details setting in the [extensions.ui.paths] section. This change is automatically applied as long as you're running dev.
The settings in the shopify.extension.toml file define the URLs that Shopify uses to enable merchants to create and edit discounts based on your Function. Shopify automatically fills in any dynamic tokens in these URLs.
Anchor to Register your Discounts Allocator FunctionRegister your Discounts Allocator Function
- If your app isn't already running, then start it using Shopify CLI:
Terminal
shopify app dev - Follow the CLI prompts to preview your app, and install or view it on your dev store.
-
In your dev store, navigate to
/app/discounts-allocator/function-handleand register your Discounts Allocator Function.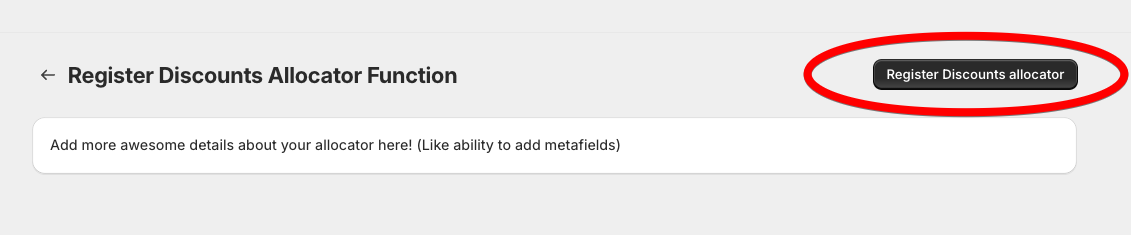
Troubleshooting
If you receive a Could not find Function error, then confirm the following:
shopify app devis running.- The function handle is correct.
- Your app has the
write_discountsaccess scope.
Anchor to Create a discount and build a cartCreate a discount and build a cart
To test the single-discount-cap capability of your allocator, prepare an automatic discount and build a cart to apply the discount.
- In your Shopify admin, go to Discounts.
- Click the Create discount button near the top right of your page and select Amount off products. Fill in the values for the discount:
- For Method, use Automatic.
- For Discount percentage, use 50.
- Open your dev store and build a cart with some eligible products. The discount amount applied should be 50 percent off.
Anchor to Test your Discounts Allocator Function with a Single Discount CapTest your Discounts Allocator Function with a Single Discount Cap
Anchor to Set the maximum eligible amount for individual discountsSet the maximum eligible amount for individual discounts
Use the metafieldsSet mutation to set the single_discount_cap metafield for the discount you created.
Anchor to Replace the placeholdersReplace the placeholders
Replace DISCOUNT_ID with the ID of the discount you created and replace SINGLE_DISCOUNT_CAP with the desired cap, for example 500.
Notice that the discount amount applied to your cart is capped at the value you set in the metafield when you refresh the cart.
Anchor to Create a maximum discount amount for a cartCreate a maximum discount amount for a cart
Anchor to Set the maximum discount amount for a cartSet the maximum discount amount for a cart
Use the metafieldsSet mutation in your shop to utilize the per_cart_cap capability of your allocator.
Anchor to Replace the placeholdersReplace the placeholders
Replace SHOP_ID with the ID of your shop and replace PER_CART_CAP with the desired per cart cap, for example 50.
Anchor to Test your Discounts Allocator Function with a Per Cart CapTest your Discounts Allocator Function with a Per Cart Cap
- Click the Create discount button and select Amount off order. Fill in the values for the discount:
- For Method, use Automatic.
- For Fixed Amount, use 500 or any amount higher than your
PER_CART_CAP.
- Go to the cart you created and refresh the page, the total savings will be capped at the
PER_CART_CAPvalue you set in the metafield.
Anchor to Deploy your appDeploy your app
When you're ready to release your changes to users, you can create and release an app version. An app version is a snapshot of your app configuration and all extensions.
-
Navigate to your app directory.
-
Run the following command.
Optionally, you can provide a name or message for the version using the
--versionand--messageflags.Terminal
shopify app deploy
Releasing an app version replaces the current active version that's served to stores that have your app installed. It might take several minutes for app users to be upgraded to the new version.
If you want to create a version, but avoid releasing it to users, then run the deploy command with a --no-release flag.
You can release the unreleased app version using Shopify CLI's release command, or through the Dev Dashboard.
If you want to create a version, but avoid releasing it to users, then run the deploy command with a --no-release flag.
You can release the unreleased app version using Shopify CLI's release command, or through the Dev Dashboard.
Anchor to Tutorial complete!Tutorial complete!
You've successfully created a Discounts Allocator Function that uses metafields to help define its custom allocation logic. Now, you can use this Function to apply discounts.Anchor to Next StepsNext Steps
Add configuration to your discounts experience using metafields and build a user interface for your Function.Build a React Router app to configure your discount Function
Add configuration to your discounts experience using metafields and build a user interface for your Function.Review the UX guidelines
Review the UX guidelines to learn how to implement discounts in user interfaces.Learn more about deploying app versions
Learn more about deploying app versions to Shopify