The `gift_card.liquid` template renders the gift card page, which displays the [gift card](https://help.shopify.com/manual/products/gift-card-products) issued to a customer upon purchase.

> Tip:
> Refer to the [gift_card.liquid template](https://github.com/Shopify/dawn/blob/main/templates/gift_card.liquid) in Dawn for an example of this template.

Unlike other pages in your store, gift card pages are hosted on the `checkout.shopify.com` domain. Gift card URLs contain unique identifiers for your store and gift card:

```text
https://checkout.shopify.com/gift_cards/[store_id]/[gift_card_token]
```

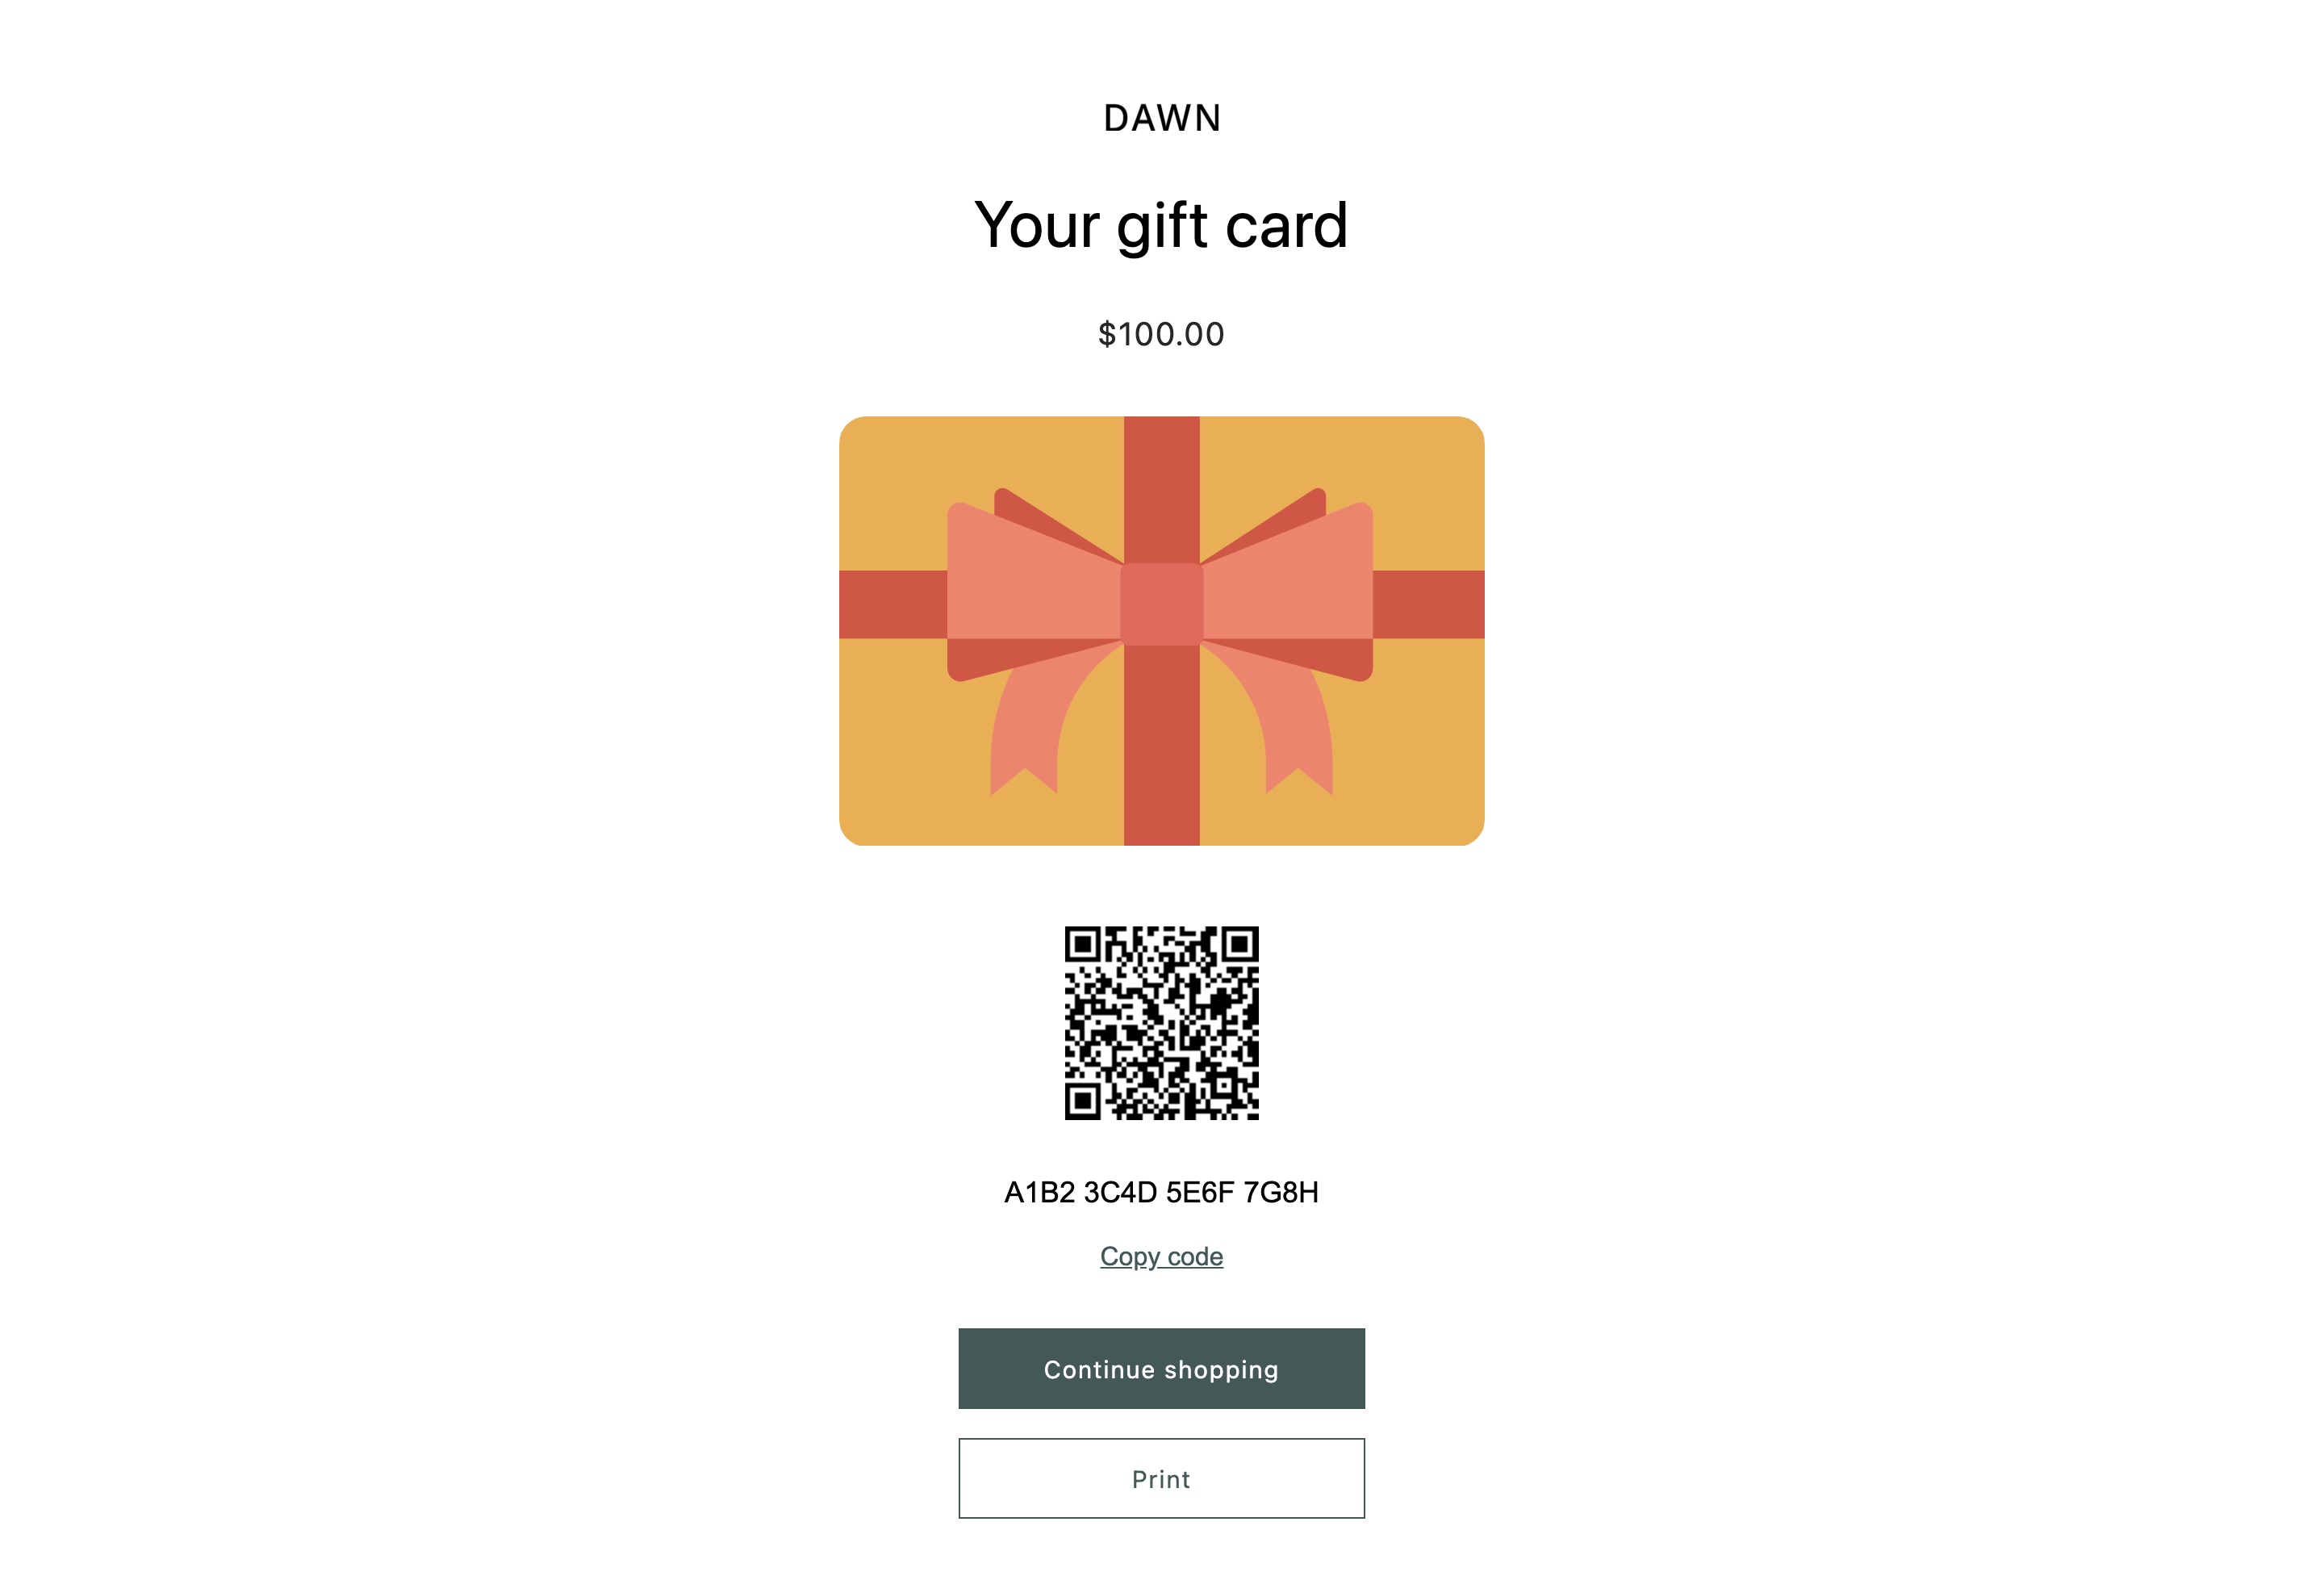
The following image is an example of how Dawn's `gift_card.liquid` template renders the gift card page.

<figure class="figure">
  <img src="/assets/themes/templates/gift-card.png" style="width: 100%; max-width: 550px;" alt="An example of the gift card template in Dawn">
</figure>


## Location

The `gift_card` template is located in the `templates`  directory of the theme:

```text
└── theme
    ├── layout
    ├── templates
    |   ...
    |   ├── gift_card.liquid
    |   ...
    ...
```

## Content

This template can't be a [JSON template](/docs/storefronts/themes/architecture/templates/json-templates).

You can include the following in your gift_card template or a section inside of the template:

- [The gift_card object](#the-gift_card-object)

You can also include [a QR code](#qr-code) or [Apple wallet passes](#apple-wallet-passes).

### The gift_card object

You can access the Liquid [`gift_card` object](/docs/api/liquid/objects/gift_card) to display the gift card details.

## Usage

When working with the `gift_card` template, you should familiarize yourself with the following:

- [Adding a QR code link](#qr-code)
- [Including Apple Wallet passes to the template](#apple-wallet-passes)
- [Displaying only the gift card details](#display-only-the-gift-card-details)

To learn how to personalize gift card templates with a custom image, refer to the [Shopify Help Center](https://help.shopify.com/manual/online-store/themes/themes-by-shopify/vintage-themes/customizing-vintage-themes/personalize-gift-cards).

### QR code

You can include a QR code link by adding JavaScript that generates a QR code. Add the following snippets in the `<head>` and `<body>` elements of the page, respectively.
To control the content of the QR code, update the `text` property with the desired content.
In this example, the QR code links to the store's URL.

<p>
<div class="react-code-block" data-preset="file">
<div class="react-code-block-preload ThemeMode-dim">
<div class="react-code-block-preload-bar "></div>
<div class="react-code-block-preload-placeholder-container">
<div class="react-code-block-preload-code-container">
<div class="react-code-block-preload-codeline-number"></div>
<div class="react-code-block-preload-codeline"></div>
</div>
<div class="react-code-block-preload-code-container">
<div class="react-code-block-preload-codeline-number"></div>
<div class="react-code-block-preload-codeline"></div>
</div>

</div>
</div>

<script data-option="filename" data-value="Include in <head>"></script>

<script type="text/plain" data-language="liquid">

{{ 'vendor/qrcode.js' | shopify_asset_url | script_tag }}


</script>

</div>
</p>


<p>
<div class="react-code-block" data-preset="file">
<div class="react-code-block-preload ThemeMode-dim">
<div class="react-code-block-preload-bar "></div>
<div class="react-code-block-preload-placeholder-container">
<div class="react-code-block-preload-code-container">
<div class="react-code-block-preload-codeline-number"></div>
<div class="react-code-block-preload-codeline"></div>
</div>
<div class="react-code-block-preload-code-container">
<div class="react-code-block-preload-codeline-number"></div>
<div class="react-code-block-preload-codeline"></div>
</div>
<div class="react-code-block-preload-code-container">
<div class="react-code-block-preload-codeline-number"></div>
<div class="react-code-block-preload-codeline"></div>
</div>
<div class="react-code-block-preload-code-container">
<div class="react-code-block-preload-codeline-number"></div>
<div class="react-code-block-preload-codeline"></div>
</div>
<div class="react-code-block-preload-code-container">
<div class="react-code-block-preload-codeline-number"></div>
<div class="react-code-block-preload-codeline"></div>
</div>
<div class="react-code-block-preload-code-container">
<div class="react-code-block-preload-codeline-number"></div>
<div class="react-code-block-preload-codeline"></div>
</div>
<div class="react-code-block-preload-code-container">
<div class="react-code-block-preload-codeline-number"></div>
<div class="react-code-block-preload-codeline"></div>
</div>
<div class="react-code-block-preload-code-container">
<div class="react-code-block-preload-codeline-number"></div>
<div class="react-code-block-preload-codeline"></div>
</div>
<div class="react-code-block-preload-code-container">
<div class="react-code-block-preload-codeline-number"></div>
<div class="react-code-block-preload-codeline"></div>
</div>
<div class="react-code-block-preload-code-container">
<div class="react-code-block-preload-codeline-number"></div>
<div class="react-code-block-preload-codeline"></div>
</div>

</div>
</div>

<script data-option="filename" data-value="Include in <body>"></script>

<script type="text/plain" data-language="liquid">

<div id="qr-code"></div>

<script>
  new QRCode(document.getElementById('qr-code'), {
    text: '{{ shop.url }}',
    width: 120,
    height: 120
  });
&lt;/script&gt;


</script>

</div>
</p>


### Apple Wallet passes

You can include [Apple Wallet passes](https://support.apple.com/en-ca/guide/iphone/iphe7aa3336/ios) by adding the following snippet to the `<body>` element of the page:

```liquid

{% if gift_card.pass_url %}
  <a href="{{ gift_card.pass_url }}" >
    <img id="apple-wallet-badge"
      src="{{ 'gift-card/add-to-apple-wallet.svg' | shopify_asset_url }}"
      width="120"
      height="40"
      alt="Add To Apple Wallet">
    </a>
{% endif %}

```

### Display only the gift card details

If you don’t want to include theme elements, like the header and footer, you can choose to render the `gift_card.liquid` template with no layout or with a custom layout, using the Liquid [`layout` object](/docs/api/liquid/tags/layout).

For example:

<p>
<div class="react-code-block" data-preset="file">
<div class="react-code-block-preload ThemeMode-dim">
<div class="react-code-block-preload-bar "></div>
<div class="react-code-block-preload-placeholder-container">
<div class="react-code-block-preload-code-container">
<div class="react-code-block-preload-codeline-number"></div>
<div class="react-code-block-preload-codeline"></div>
</div>
<div class="react-code-block-preload-code-container">
<div class="react-code-block-preload-codeline-number"></div>
<div class="react-code-block-preload-codeline"></div>
</div>
<div class="react-code-block-preload-code-container">
<div class="react-code-block-preload-codeline-number"></div>
<div class="react-code-block-preload-codeline"></div>
</div>

</div>
</div>

<script data-option="filename" data-value="gift_card.liquid"></script>

<script type="text/plain" data-language="liquid">

{% layout none %}

<!-- template content -->

</script>

</div>
</p>


## Preview the template

You can preview the gift card's appearance by navigating to the gift card template from the [theme editor](/docs/storefronts/themes/tools/online-editor).

1. From the theme editor, open the drop-down menu at the top of the page.
2. Under **Templates**, click **Others**. Then click **Gift card**.

> Note:
> If you can't find the gift card template in the theme editor's navigation menu, then you might need to insert the [`content_for_header` Liquid object](/docs/themes/architecture/layouts#content_for_header) in the HTML `<head>` tag of your `gift_card.liquid` template.