Create an app
You're ready to create a new app. You want to set up your development environment so that you can start coding.
In this tutorial, you'll create an app that users can access in the Shopify admin. You'll generate starter code and use Shopify CLI to develop your app.
What you'll learn
Anchor link to section titled "What you'll learn"In this tutorial, you'll learn how to do the following tasks:
- Initialize a Remix app that uses Shopify CLI
- Install your app on a development store
- Generate a product using your new app
Requirements
Anchor link to section titled "Requirements"You've created a Partner account and a development store.
You've installed Shopify CLI
Step 1: Create a new app
Anchor link to section titled "Step 1: Create a new app"You can create a new Shopify app using Shopify CLI
Navigate to the directory where you want to create your app.
Your app will be created in a new subdirectory.
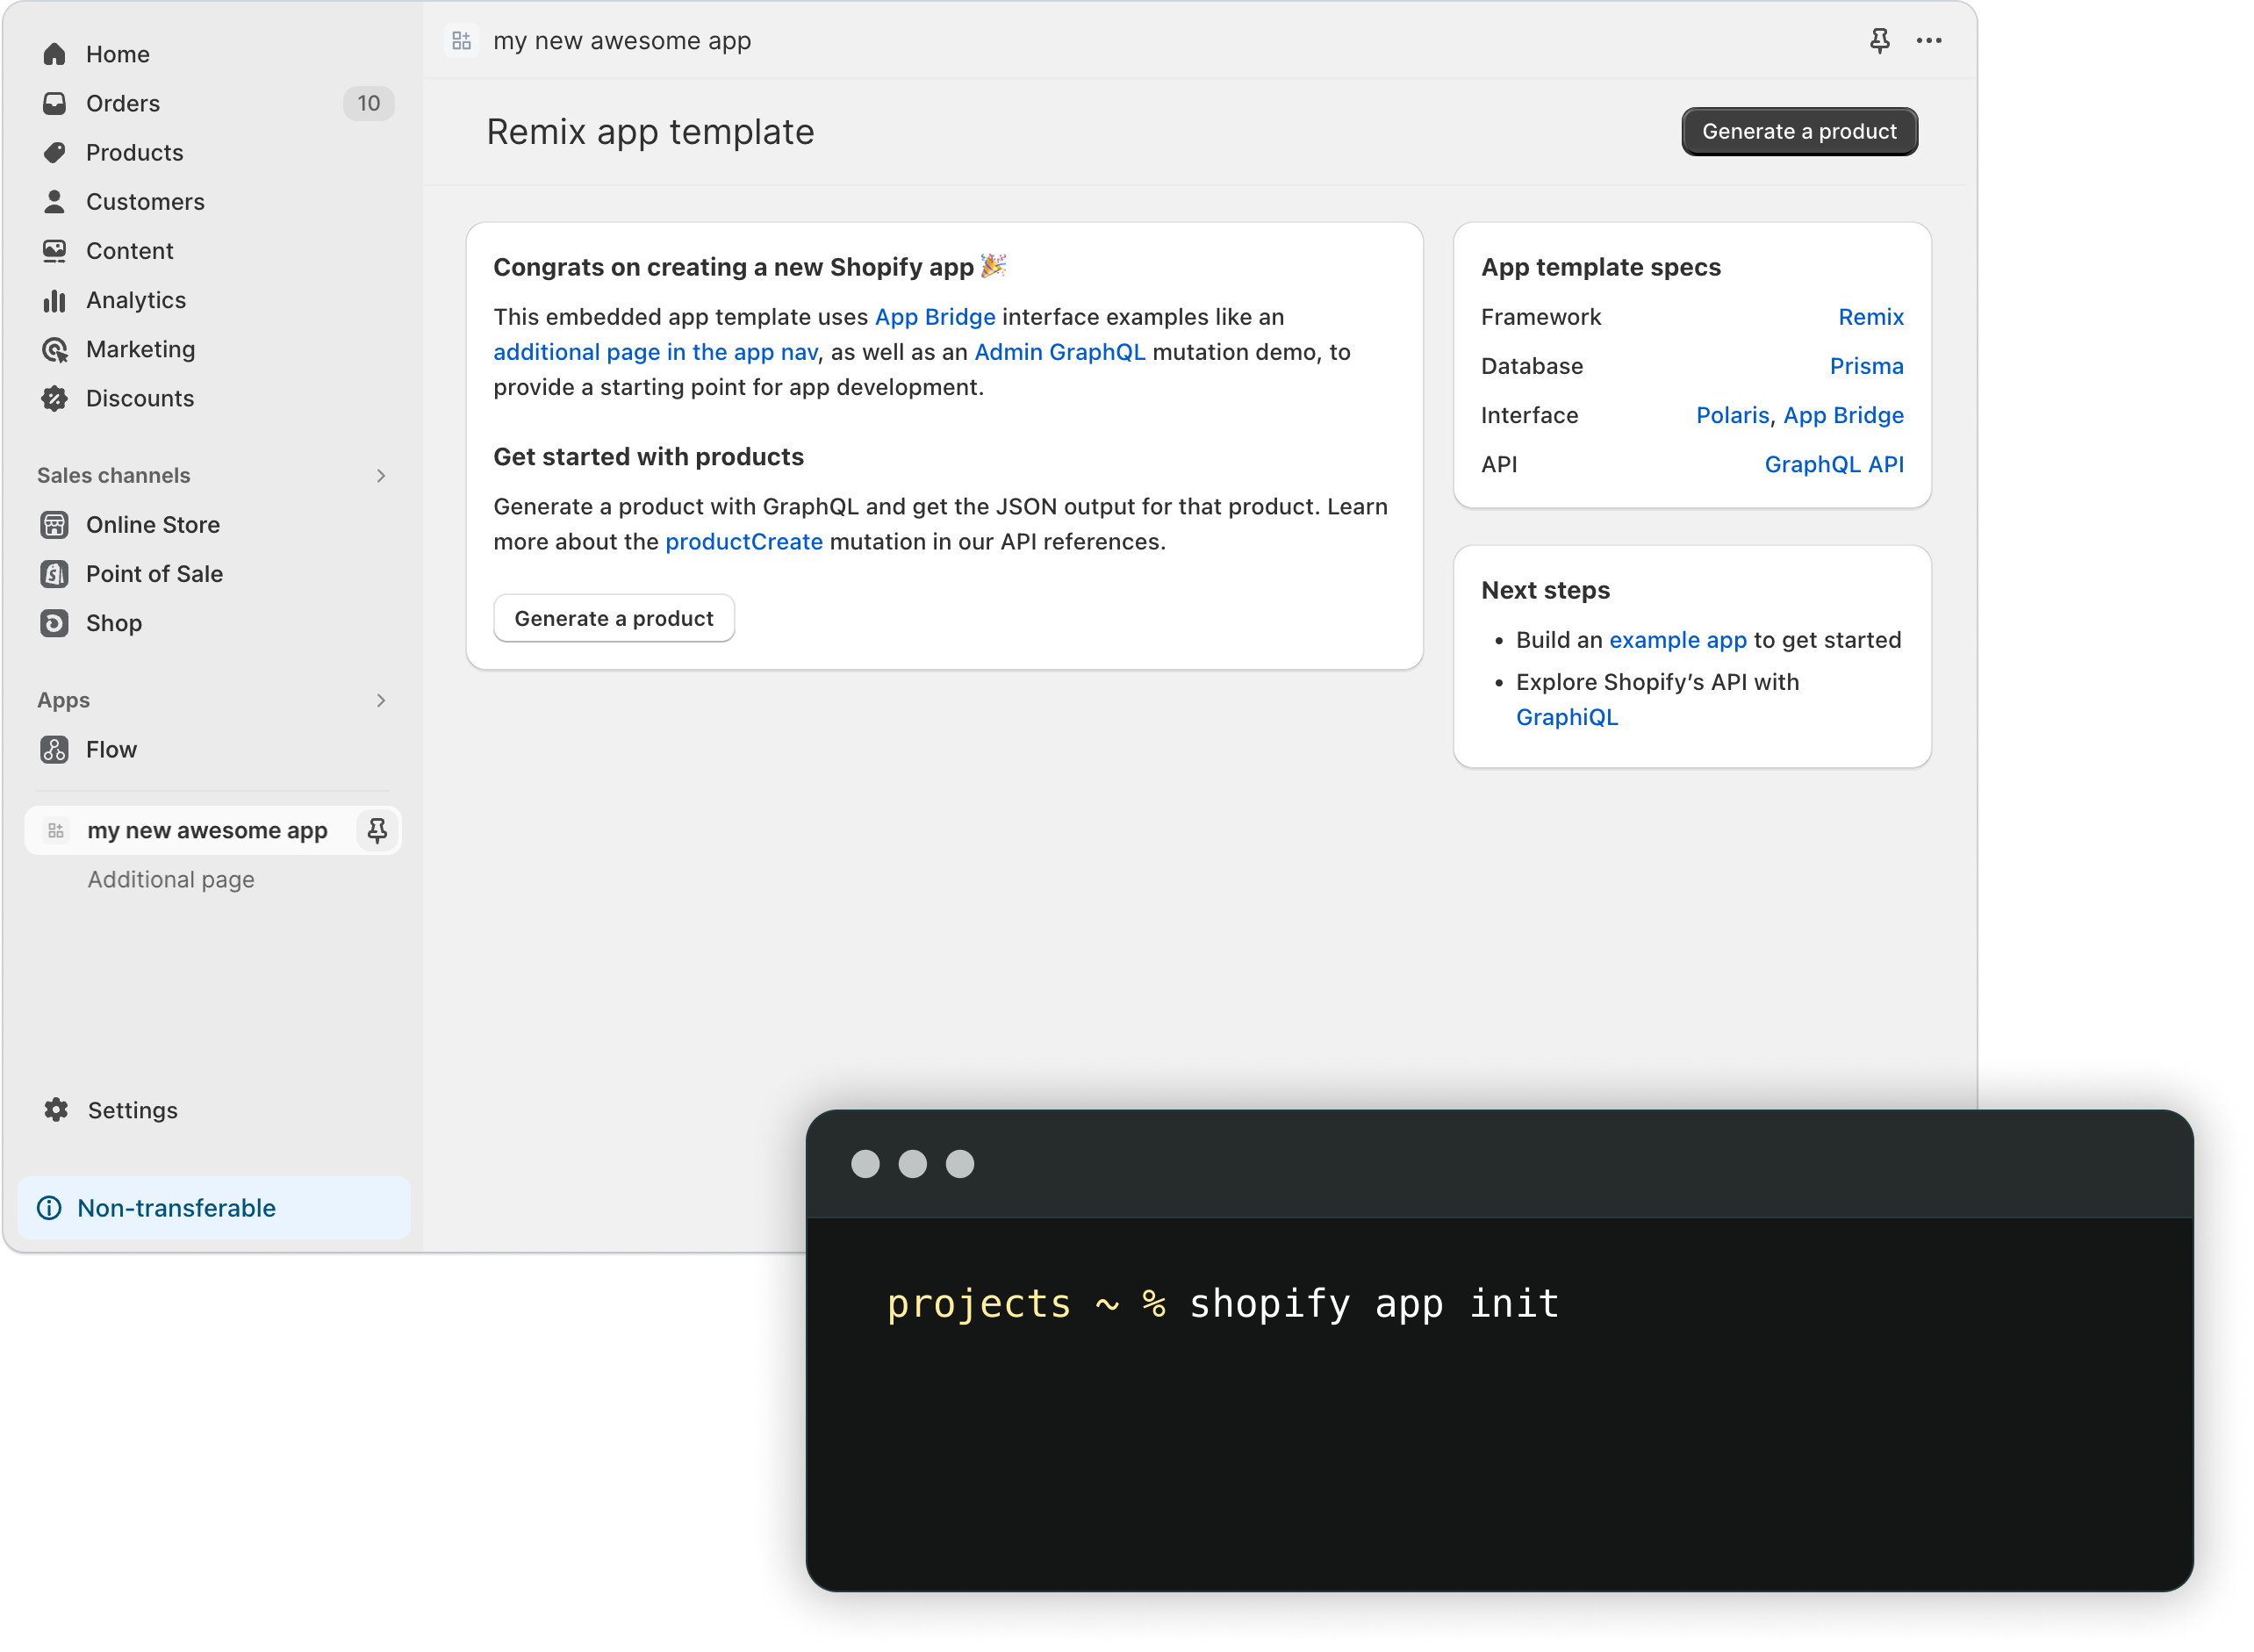
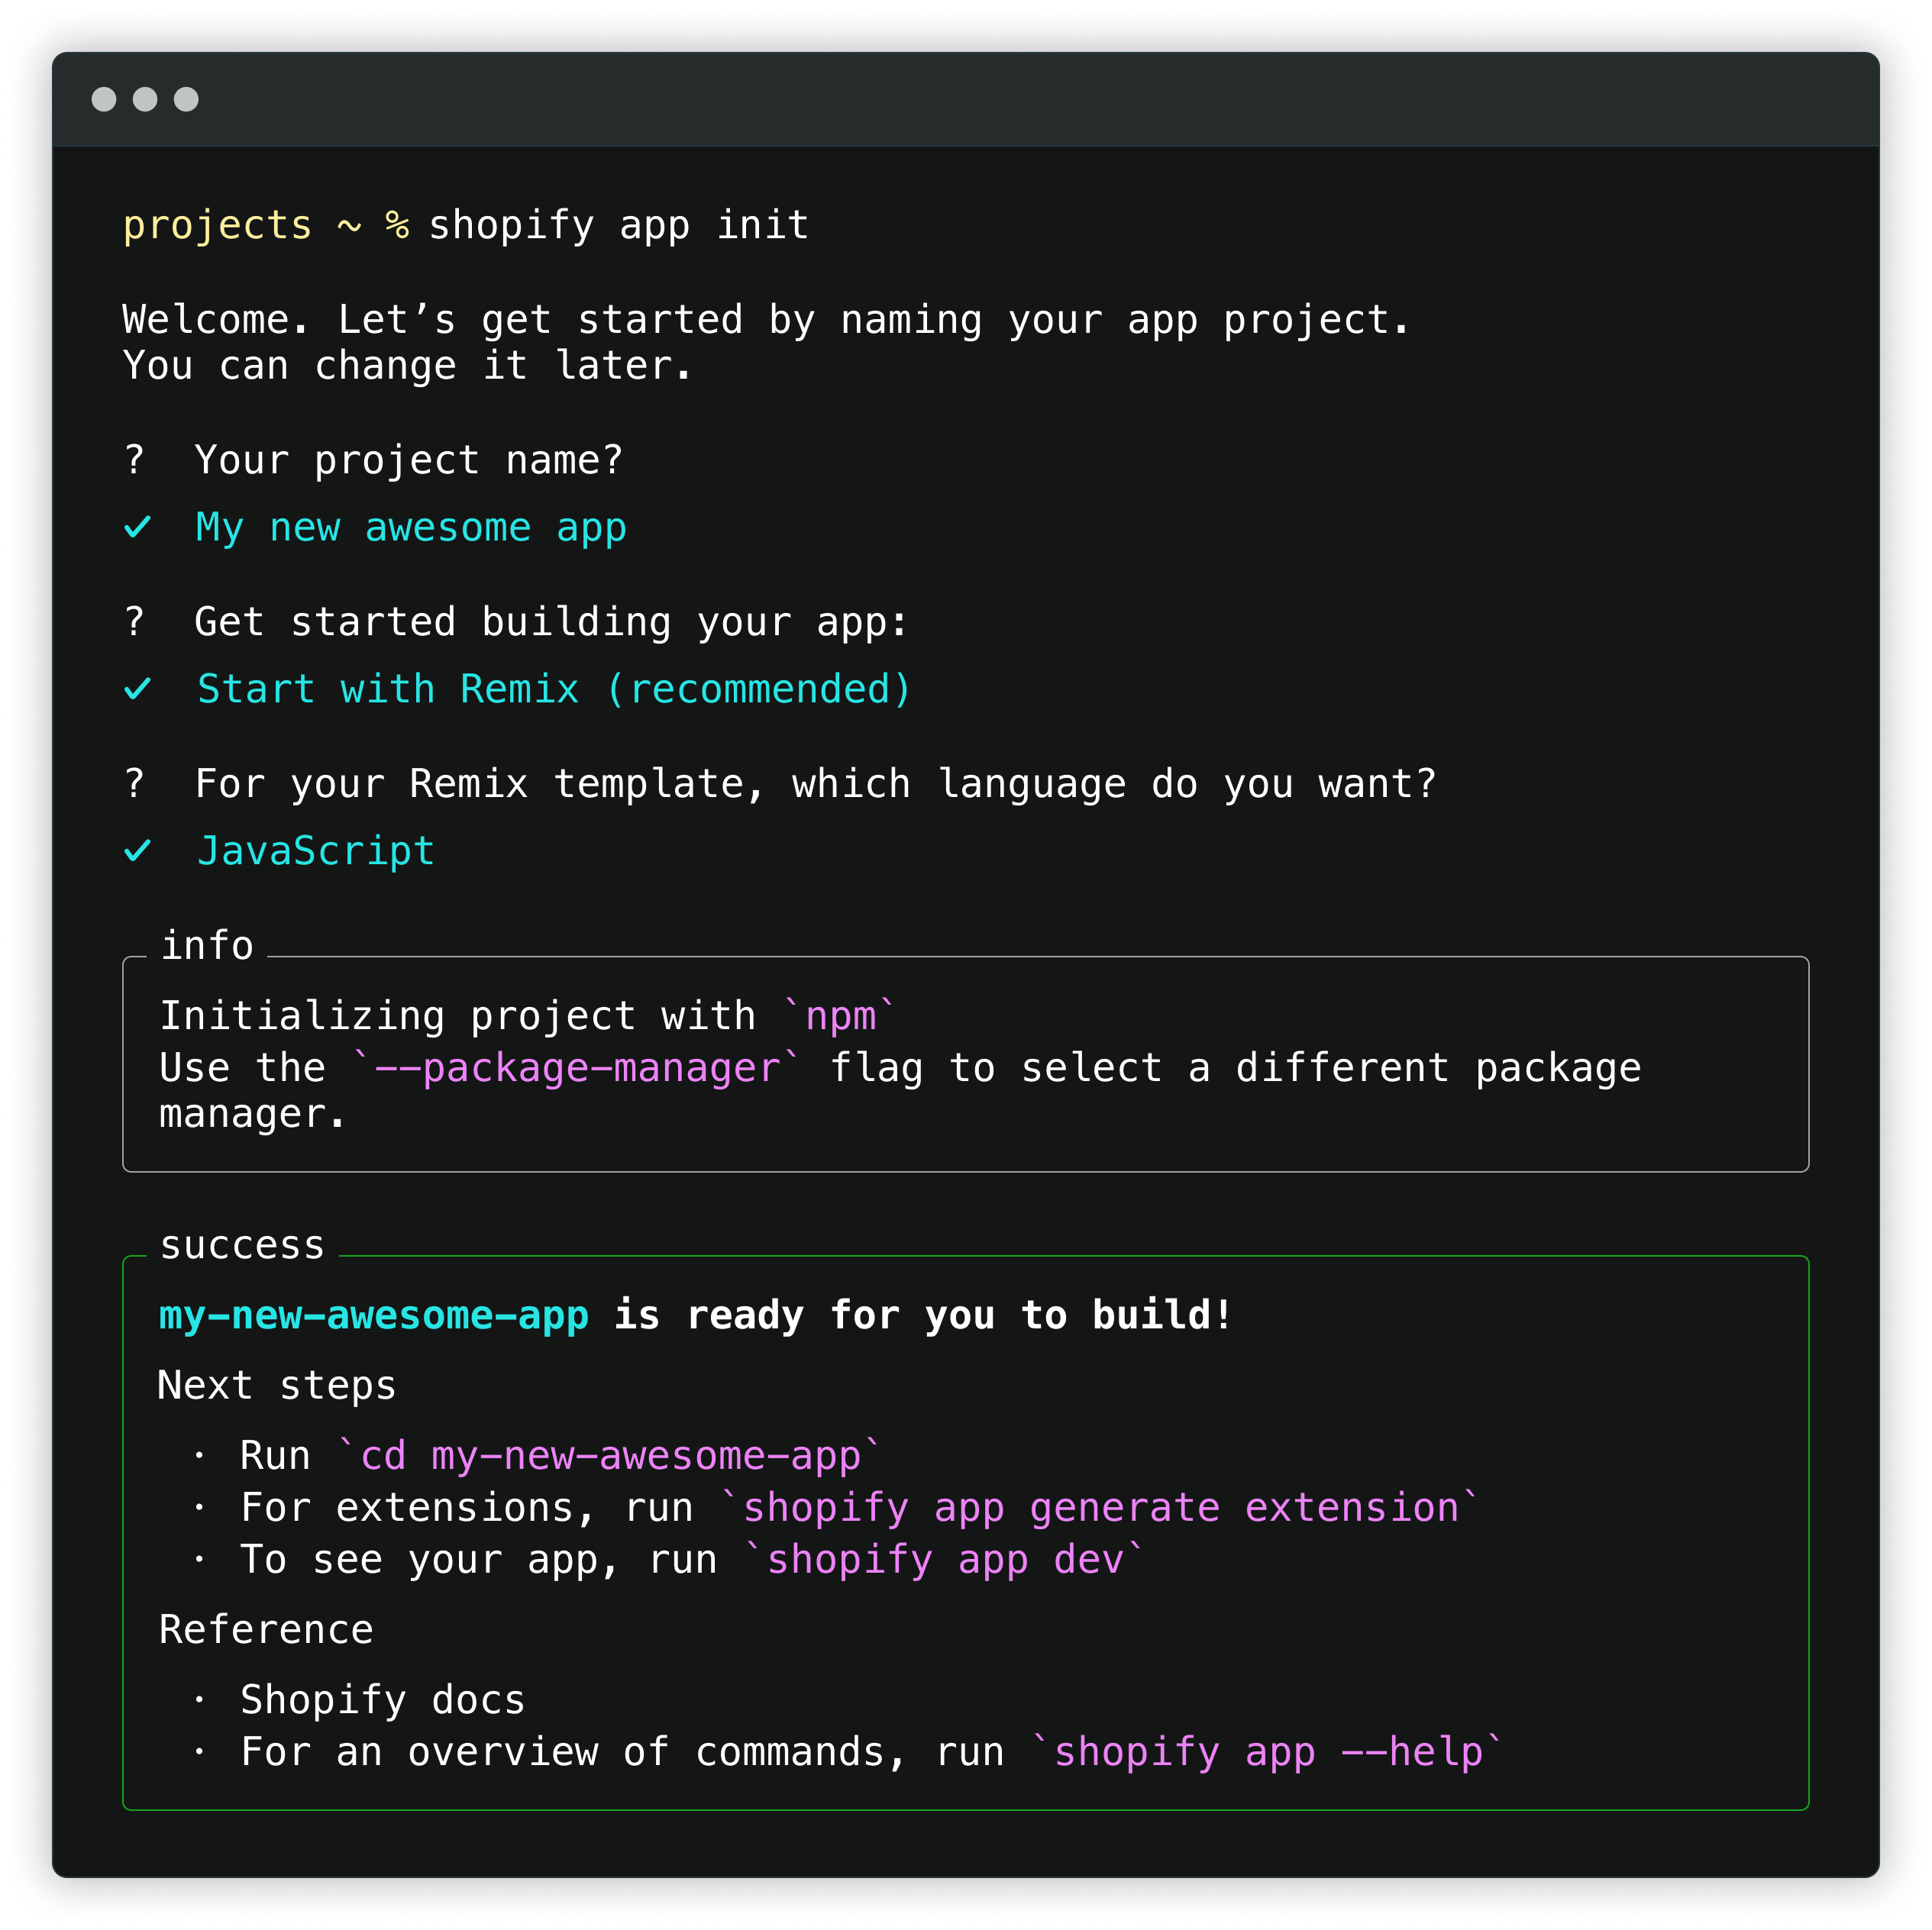
Run the following command to create a new app:
When prompted, enter a name for your app, and then select Start with Remix to use the Remix template.
A new app is created and Shopify CLI is installed along with all the dependencies that you need to build Shopify apps:
Step 2: Start a local development server
Anchor link to section titled "Step 2: Start a local development server"After your app is created, you can work with using a local development server and the Shopify CLI.
Shopify CLI uses Cloudflare to create a tunnel that enables your app to be accessed using a HTTPS URL.
Navigate to your newly created app directory.
Run the following command to start a local server for your app:
Shopify CLI guides you through the following tasks:
- Logging into your Partner account and selecting a Partner organization
- Creating an app in the Partner Dashboard, and connecting your local code to the app
- Creating your Prisma SQLite database
- Creating a tunnel between your local machine and the development store
To learn more about the processes that are executed when you run dev, refer to the Shopify CLI command reference.
Step 3: Install your app on your development store
Anchor link to section titled "Step 3: Install your app on your development store"You can install your app on your development store, and automatically populate your development store with products that you can use for app testing.
With the server running, press
pto open your app's preview URL in a browser.When you open the URL, you're prompted to install the app on your development store.
Click Install app to install the app on the development store.
You now have a development store running with your new app installed:
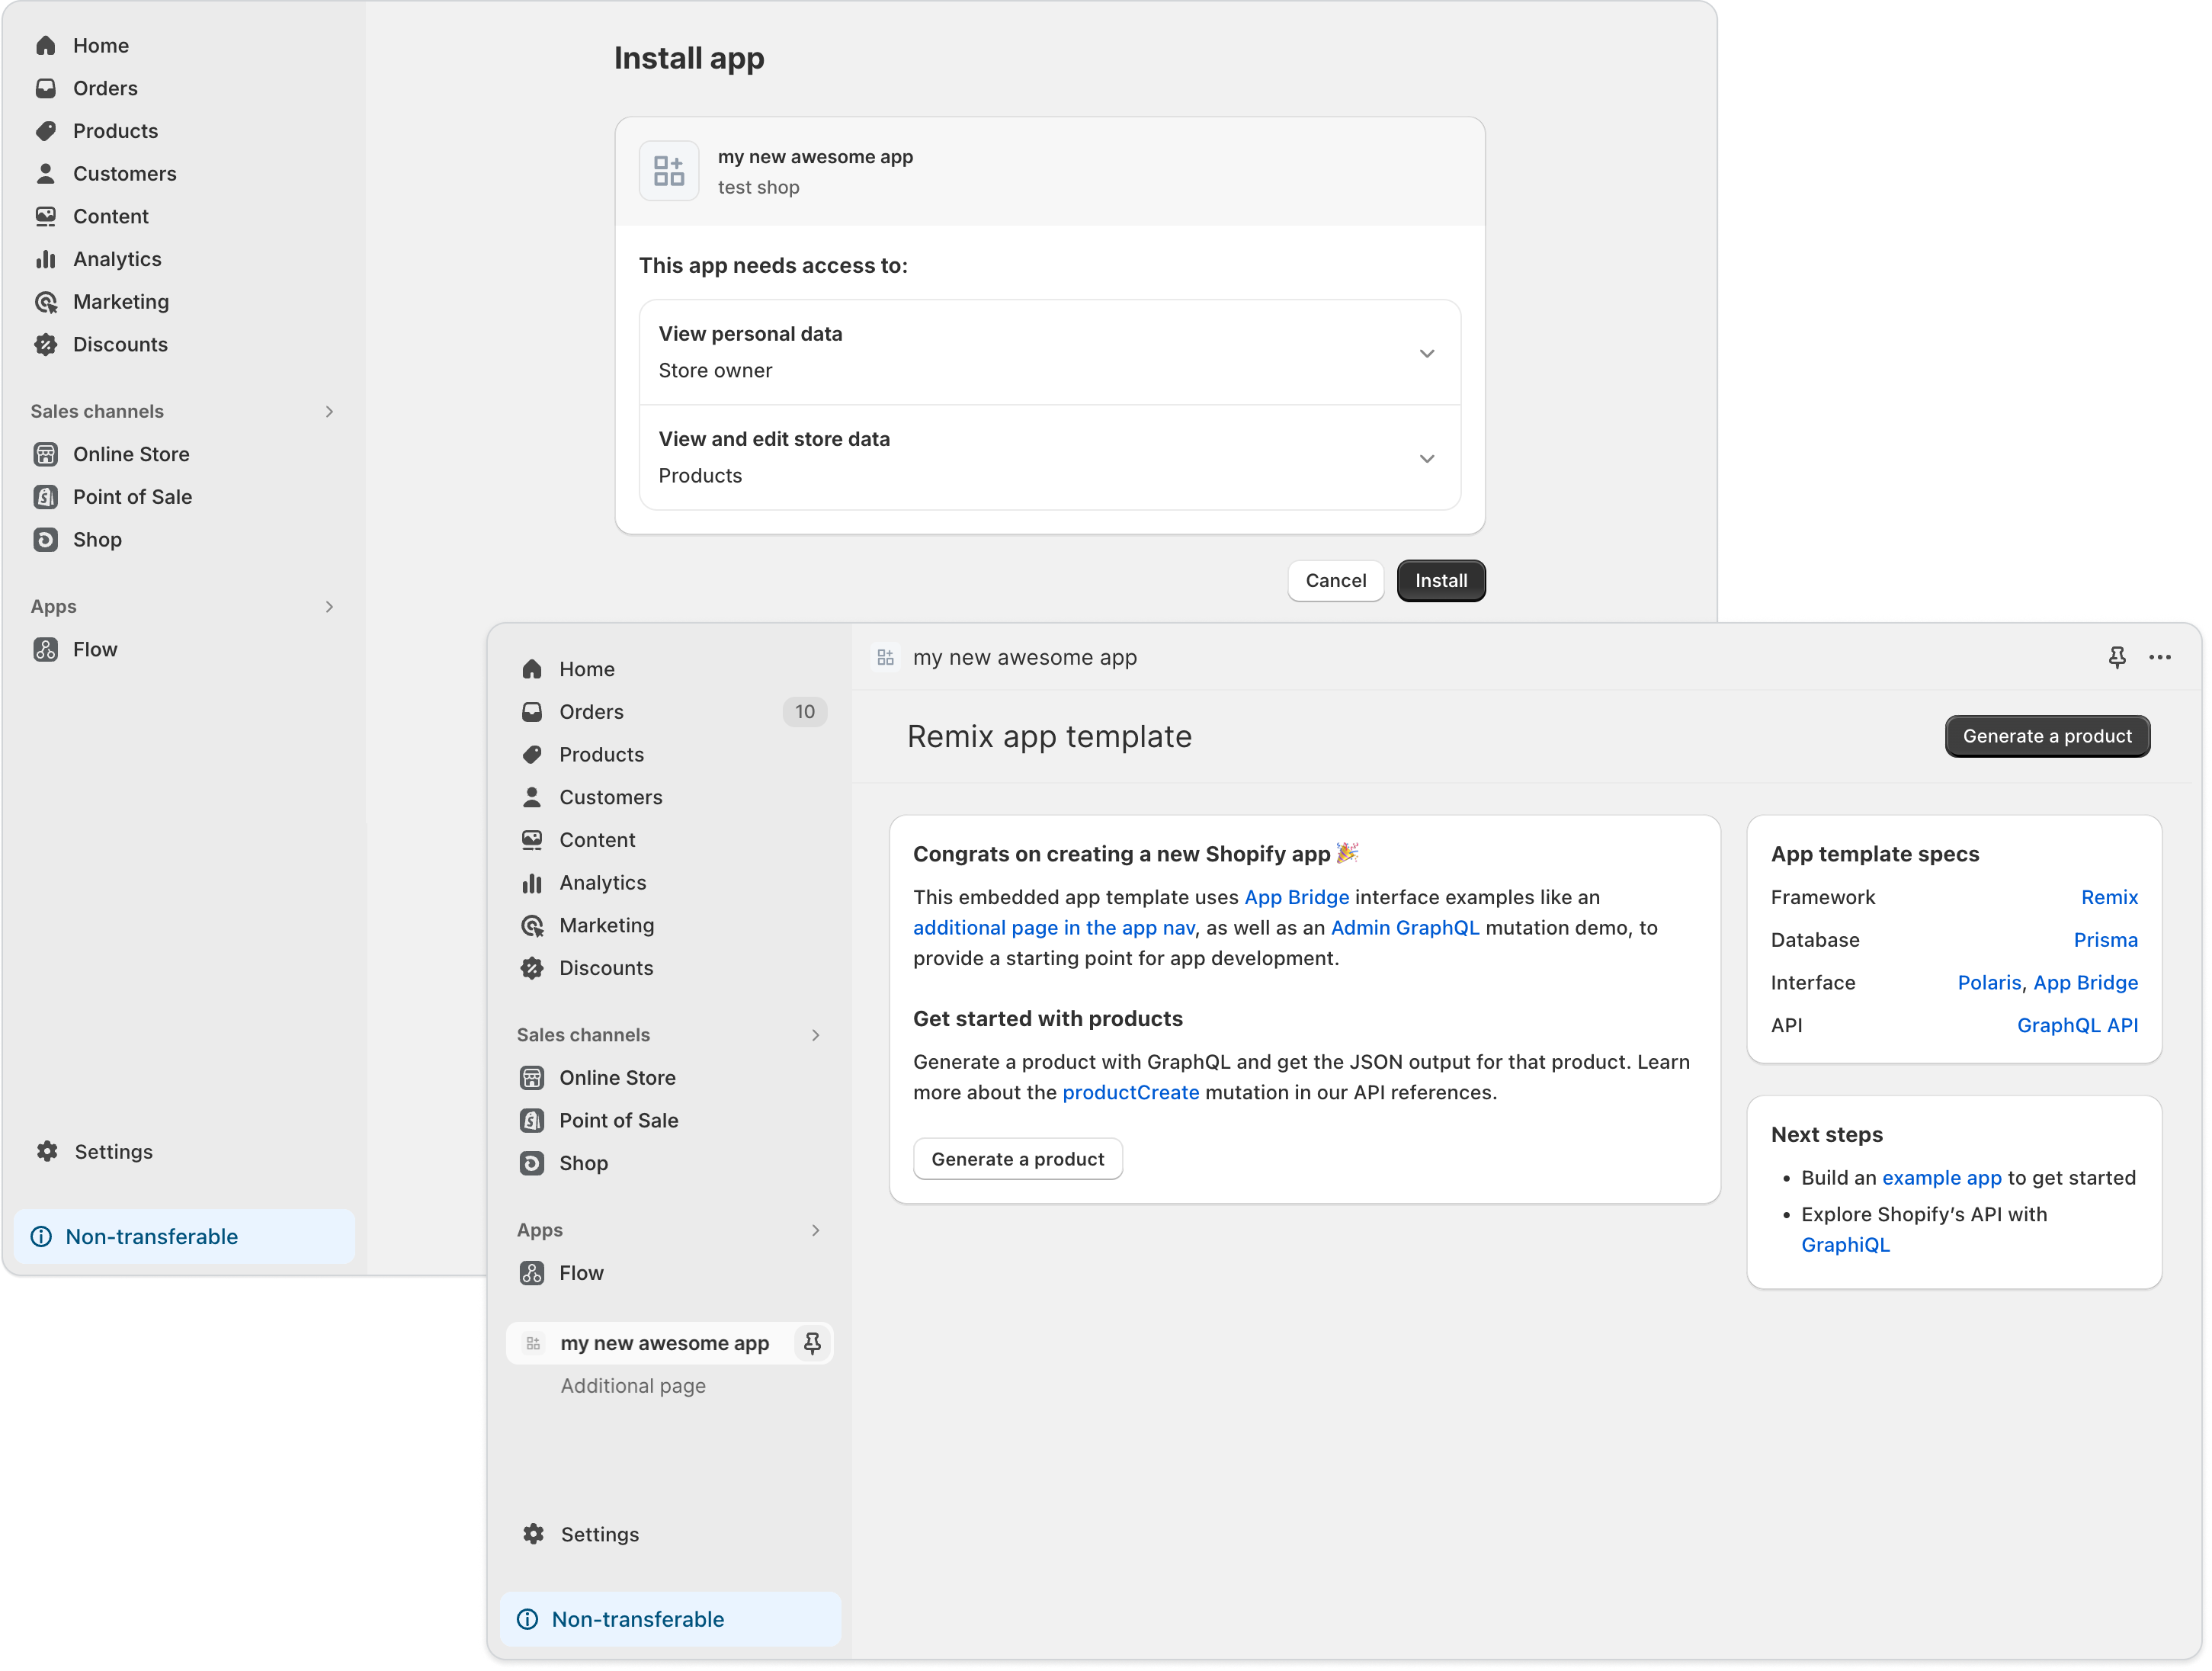
From the home page of the new app, click Generate a product to create a product for your development store.
- Follow the Build a Shopify app using Remix tutorial to learn how to add features to an app using the Shopify Remix template and key Shopify tools and libraries.
- Learn how to deploy and distribute your app.