About custom banners and fields
Checkout UI extensions that render on the information and shipping and payment steps in checkout are available only to stores on a Shopify Plus plan.
Checkout UI extensions that render on the information and shipping and payment steps in checkout are available only to stores on a Shopify Plus plan.
This guide introduces custom banners and fields, and describes the resources that you can use to build them in Shopify checkout.
Anchor to How it worksHow it works
You can build functionality in your app that allows merchants to display and configure the following experiences:
- Custom banners in checkout
- Custom fields in checkout
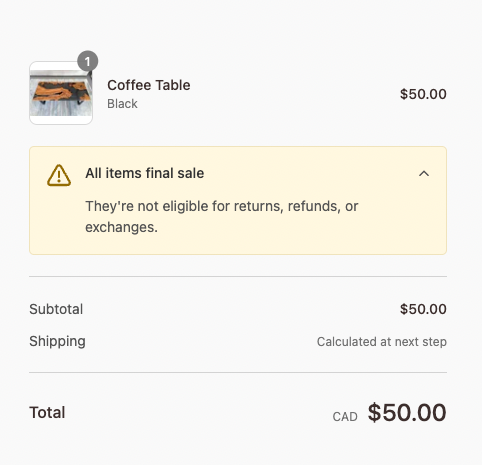
A custom banner is a notice that you can display to customers. For example, you might want to show a banner that indicates that items are final sale and can't be returned or exchanged. You can use a UI extension to build a custom banner.
You can support static targets so that extensions can be rendered using the checkout editor in one of the supported locations in checkout.
The following example shows how to display a banner that renders at the purchase.checkout.block.render target.
Anchor to Custom fieldsCustom fields
A custom field is a property that allows users to enter text into a user interface. For example, you might want to create a custom field that collects delivery instructions from customers. You can use a UI extension to build a custom field.
The following example shows a custom field that collects delivery instructions and renders at the purchase.checkout.shipping-option-list.render-after extension target:
Anchor to Getting startedGetting started
Follow tutorials to learn how to build custom banners and fields.
Anchor to Developer tools and resourcesDeveloper tools and resources
Explore the following developer tools and resources to get familiar with building custom banners and fields.