Onboard a merchant to a payments extension
Before a merchant can use your payments extension, they need to go through an onboarding experience. This guide describes how a merchant discovers, installs, authorizes, and activates a payments app and extension.
Anchor to RequirementsRequirements
- Your payments app is approved. Your app needs to be approved before merchants can install it on their Shopify store.
- You're familiar with the different phases of the onboarding cycle for payments apps.
Anchor to Step 1: Discover a payments app and extensionStep 1: Discover a payments app and extension
A merchant can discover a payments app in the following ways:
-
Through a direct installation link.
-
Through Shopify's public list of payment gateways under additional payment methods.
To be added to the list of payment gateways in the Shopify admin, the payments extension must meet certain criteria, such as being used by at least 50 Shopify stores and having processed over 1,000,000 USD.
Additional payment methods differ from third-party providers. Third-party providers are an alternative to Shopify Payments and process traditional credit card payments. Additional payment methods can be enabled in addition to Shopify Payments or a third-party provider, and provide payment methods such as cryptocurrency, deferred payments, or installments.
Additional payment methods differ from third-party providers. Third-party providers are an alternative to Shopify Payments and process traditional credit card payments. Additional payment methods can be enabled in addition to Shopify Payments or a third-party provider, and provide payment methods such as cryptocurrency, deferred payments, or installments.
Anchor to Step 2: Install the payments appStep 2: Install the payments app
Partners should inform merchants of how and when they can install the new payments app. If you're offering multiple payments apps, then inform merchants which extension to install. If your payments app is replacing any legacy integration, then also inform merchants to deactivate the old gateway.
Partners should inform merchants of how and when they can install the new payments app. If you're offering multiple payments apps, then inform merchants which extension to install. If your payments app is replacing any legacy integration, then also inform merchants to deactivate the old gateway.
You must acquire an access token to obtain permission from the merchant to install your payments extension. The merchant clicks on a link to install your extension, which redirects to Shopify's OAuth grant screen.
After the merchant agrees to the requested access scopes, your extension requests an access token for API access.
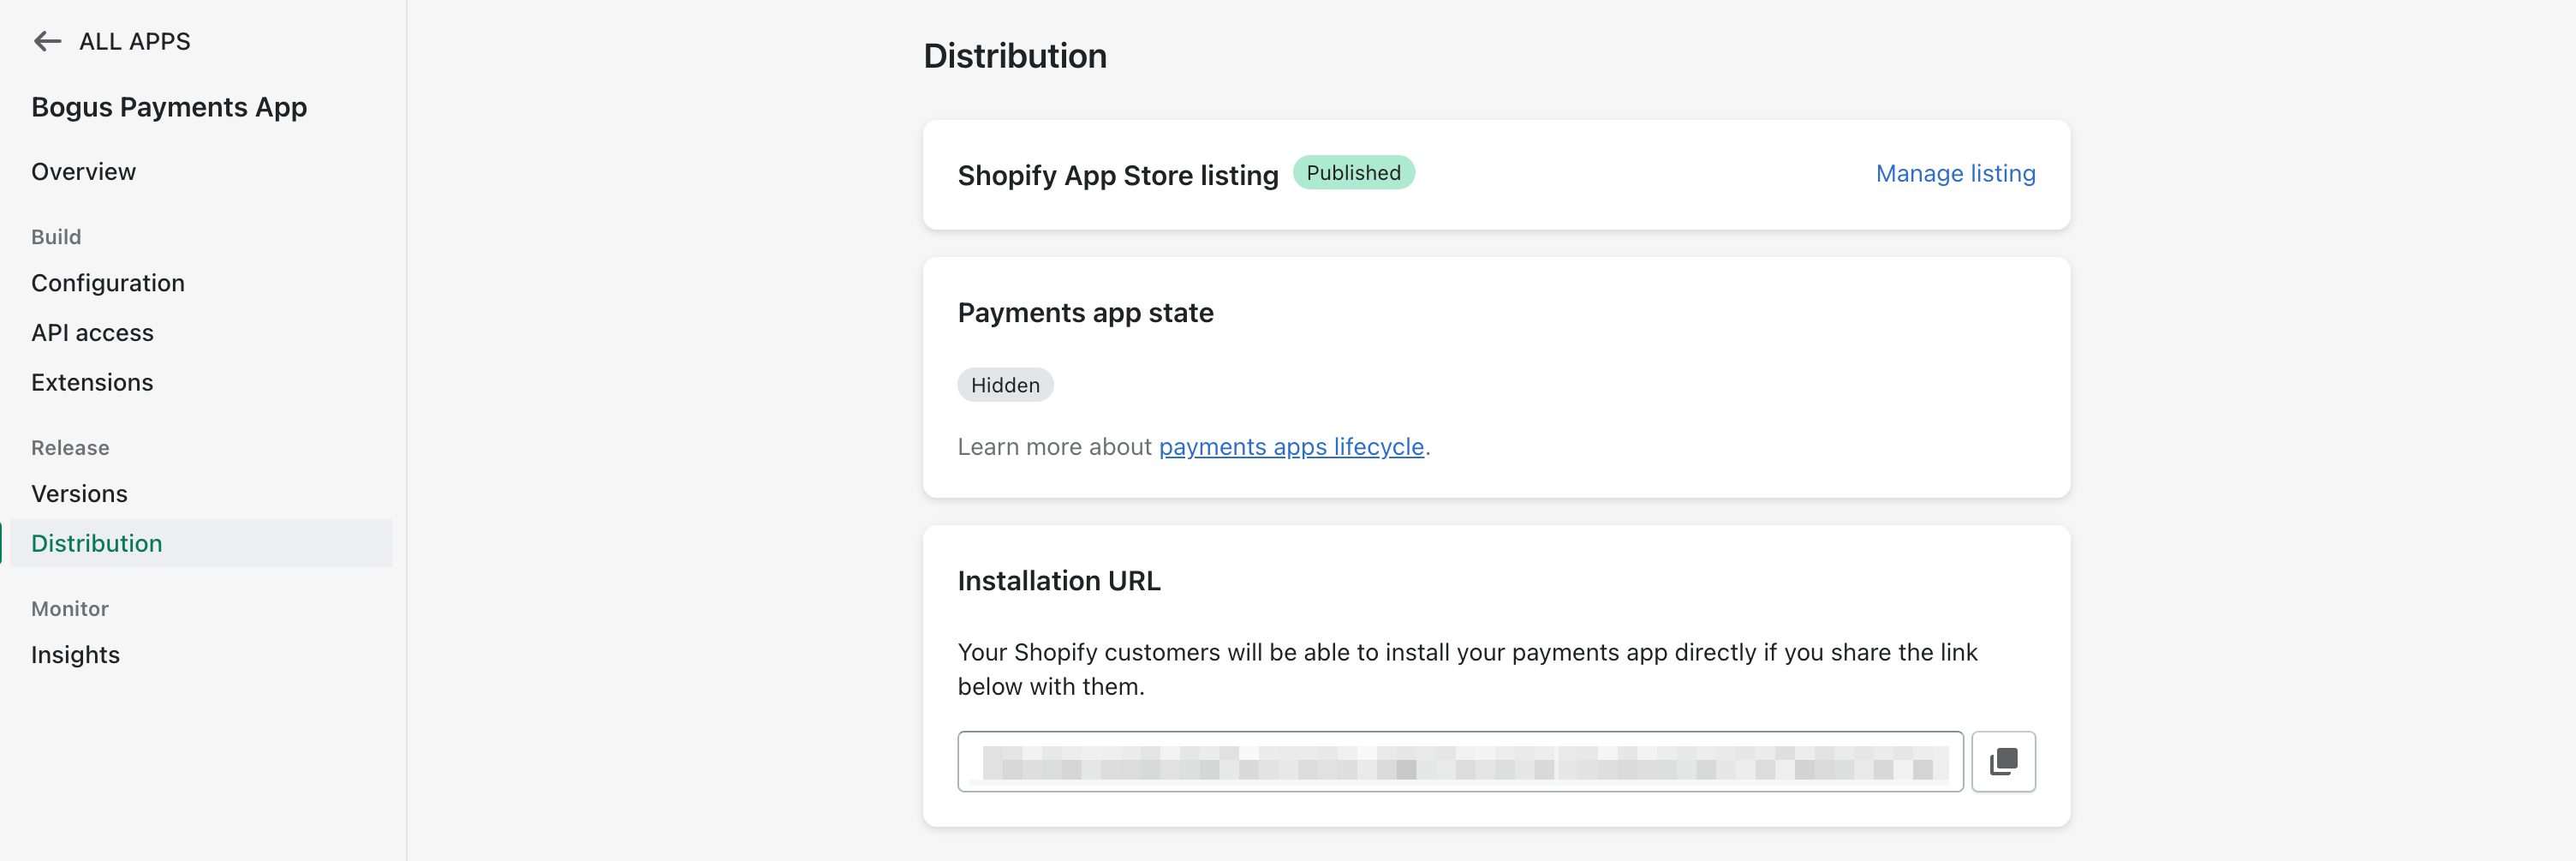
Anchor to Payments app installation URLPayments app installation URL
Merchants can install your payments app with your provider page URL. To get the URL, go to Partner Dashboard > Apps > Distribution.
The URL displays only after Shopify has approved your payments app.
Anchor to Step 2A: Connecting the appStep 2A: Connecting the app
After selecting a payments extension for the first time, the merchant is presented with a description and a Connect button. By clicking Connect, the merchant is redirected to the payments app installation URL. This triggers the installation through OAuth.
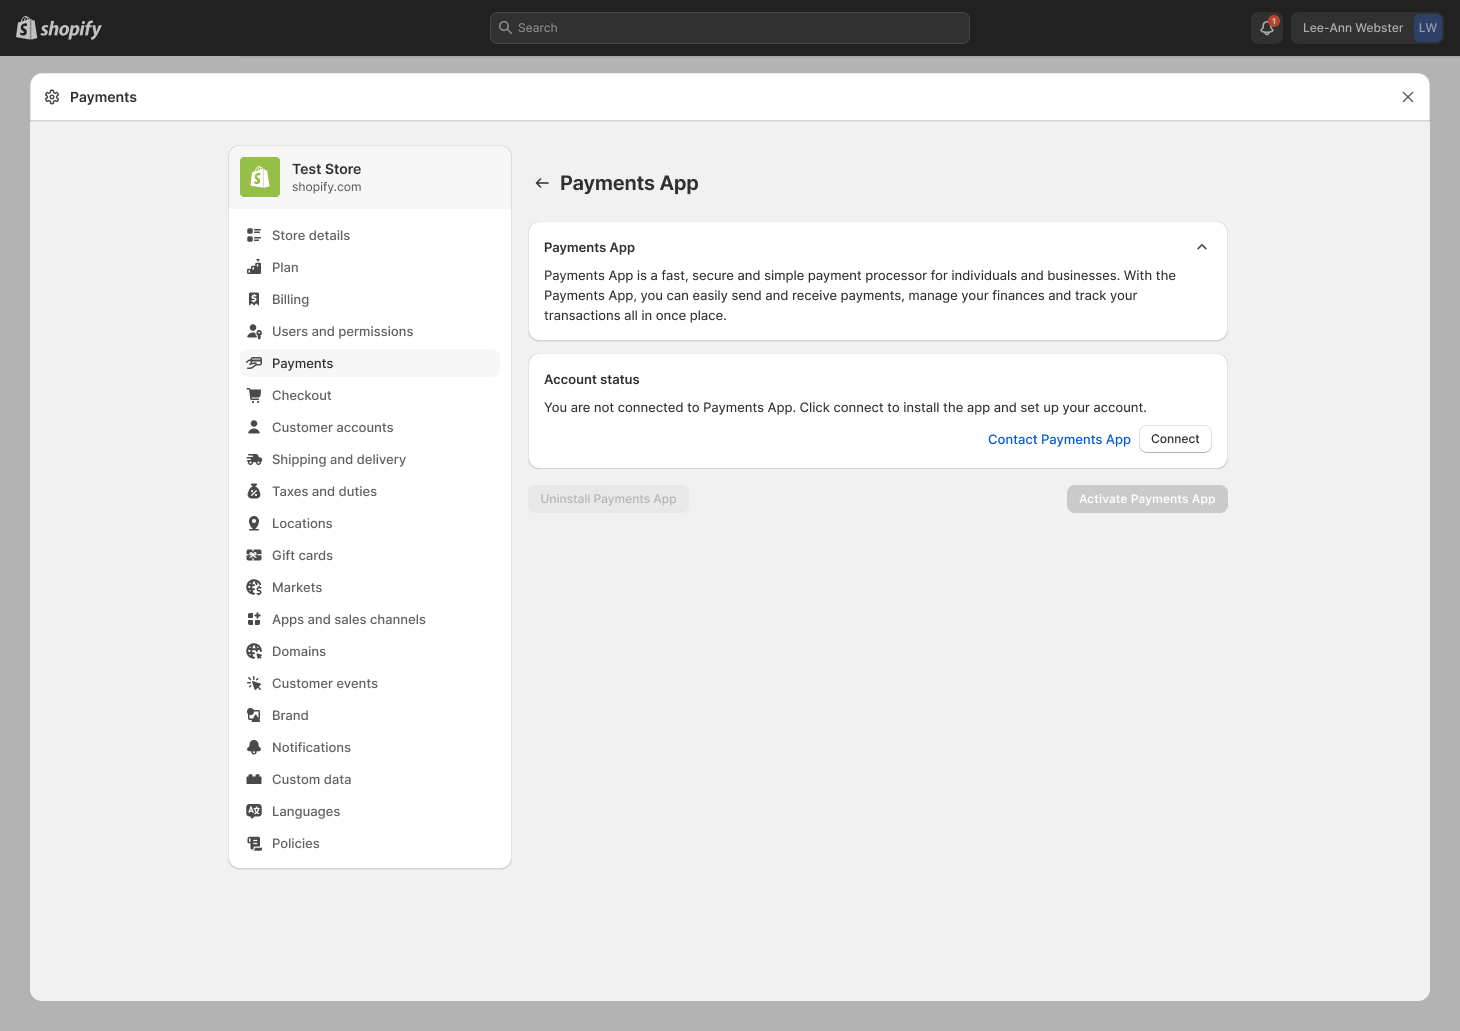
The merchant clicks Install app to start the installation process.
Anchor to Step 2B: Redirect the merchant to your app's onboardingStep 2B: Redirect the merchant to your app's onboarding
The installation flow ends with the merchant being redirected to the payments app page to perform configuration. During this time, a banner shows that the provider isn't ready to process payments.
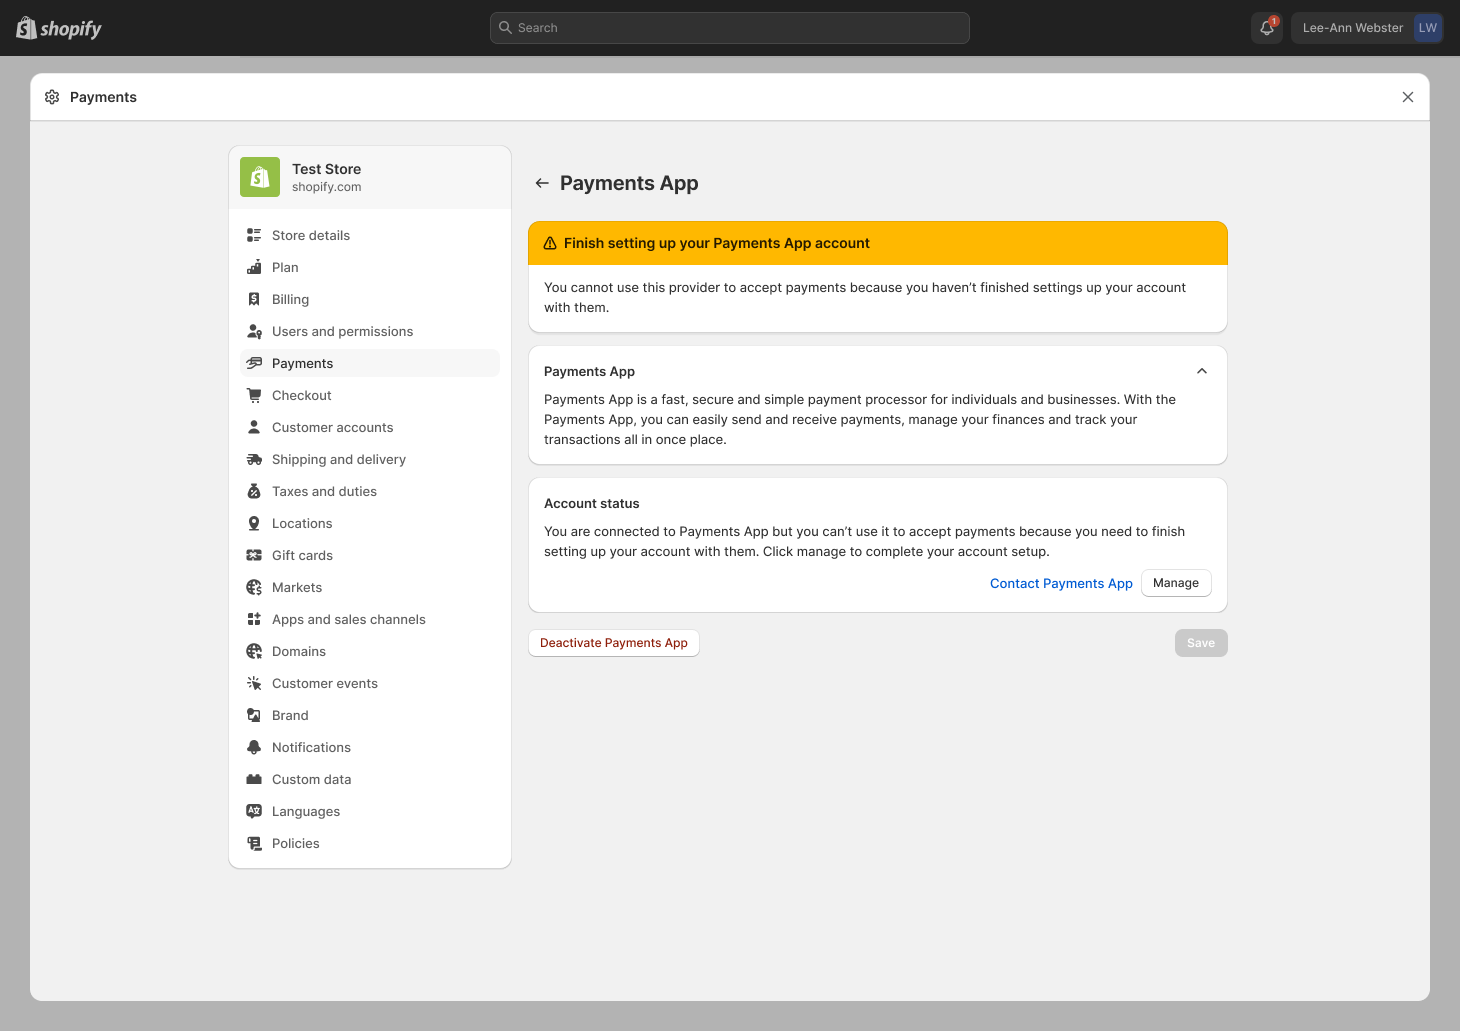
The merchant configures the payments app. The app marks itself as ready by calling the paymentsAppConfigure mutation. After the merchant has completed all the actions that are required for your app's onboarding, they must be redirected back to the Shopify admin using the following URL:
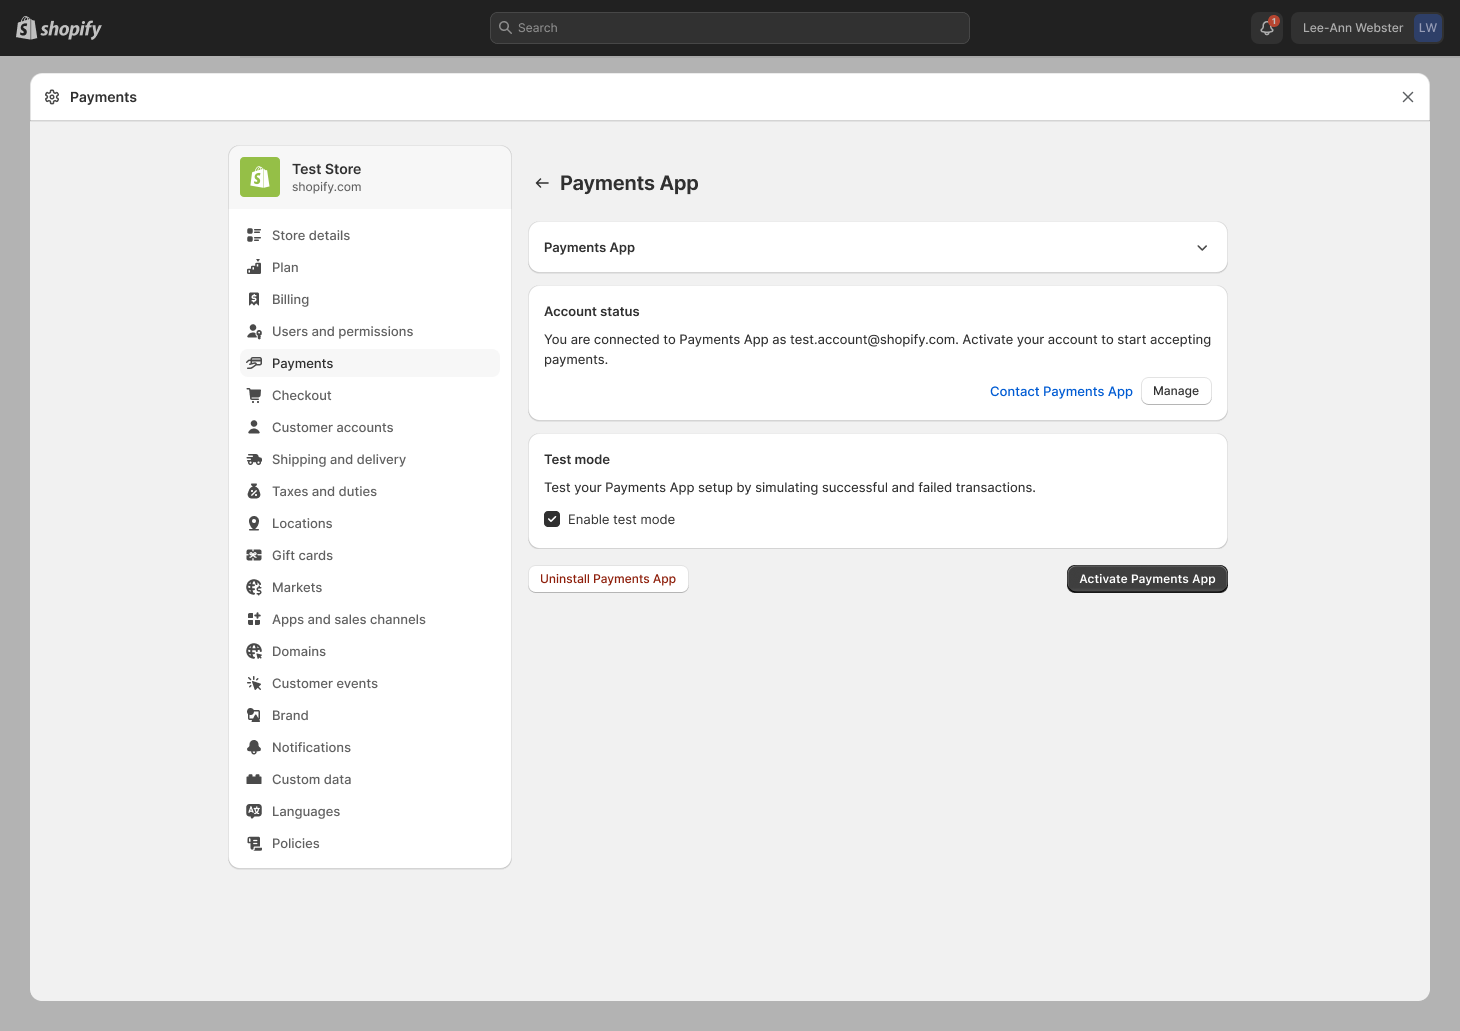
Anchor to Step 4: Activate a payments appStep 4: Activate a payments app
After authorization and configuration are complete, merchants are redirected back to the Shopify admin to select payment methods to offer. These payment methods are displayed to customers as payment icons during checkout.
Merchants use the additional payment method settings in the Shopify admin to activate and deactivate payments apps.
For more information, refer to Additional payment method apps.
Anchor to Step 5 (Optional): Deactivate a payments appStep 5 (Optional): Deactivate a payments app
If merchants no longer need a payments app, then they can deactivate it.
When a merchant deactivates a payments app, customers can't select it at checkout for payment. However, merchants can still manage refunds and captures for orders created with the deactivated payments app. For more information, refer to Additional payment method apps.
Uninstalling a payments app breaks order management. For example, an uninstalled app isn't available for use with any outstanding order returns. If an app is reinstalled after an uninstall, then you need to call the paymentsAppConfigure mutation again.
Uninstalling a payments app breaks order management. For example, an uninstalled app isn't available for use with any outstanding order returns. If an app is reinstalled after an uninstall, then you need to call the paymentsAppConfigure mutation again.