Apps as sales channels
Anchor to What is a sales channel?What is a sales channel?
A sales channel app connects a merchant's online store to surfaces outside Shopify. Examples include traffic-driving channels like Google and Meta, and marketplaces like Amazon that have their own checkout. Sales channel apps help merchants distribute their catalog to where their buyers shop.
Anchor to When to create a sales channel?When to create a sales channel?
Create a sales channel when you want to access the millions of sellers on Shopify and provide a way to push their catalog and inventory to your channel for syndication purposes and have Shopify receive orders placed on your channel if you run your own checkout.
Only create a sales channel if you own and operate, or are contracted to represent, a distinct surface where merchants can promote or sell products outside Shopify.
Only create a sales channel if you own and operate, or are contracted to represent, a distinct surface where merchants can promote or sell products outside Shopify.
Anchor to Sales channel app flowSales channel app flow
The following diagram illustrates how all the features of sales channel apps come together to support the merchant experience of your sales channel app:
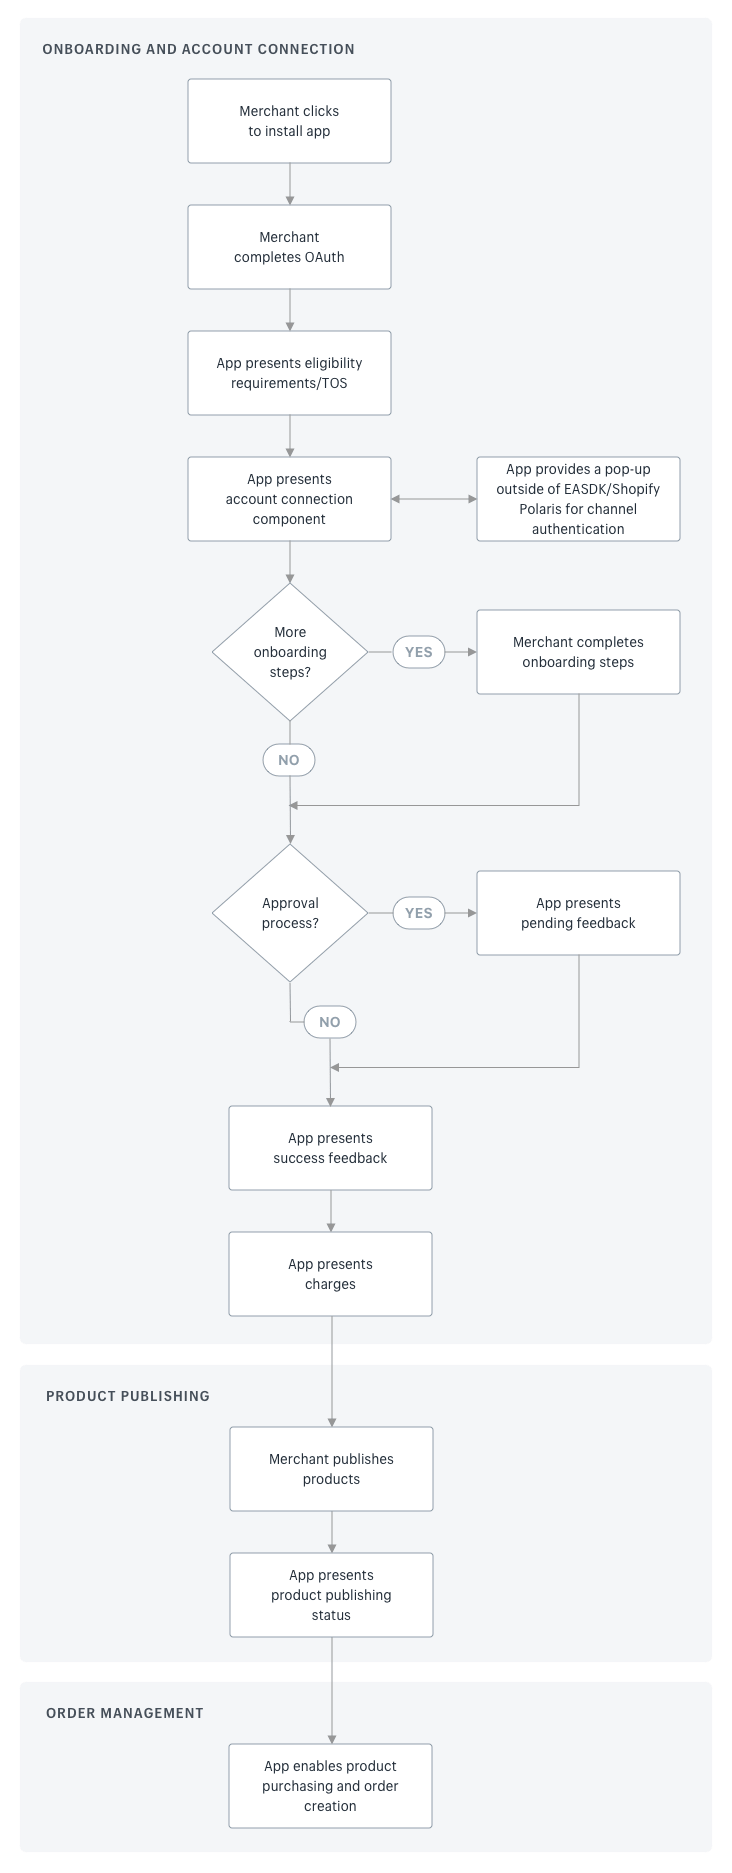
- The merchant clicks to install the sales channel app.
- The merchant connects to the sales channel app on the OAuth grant screen.
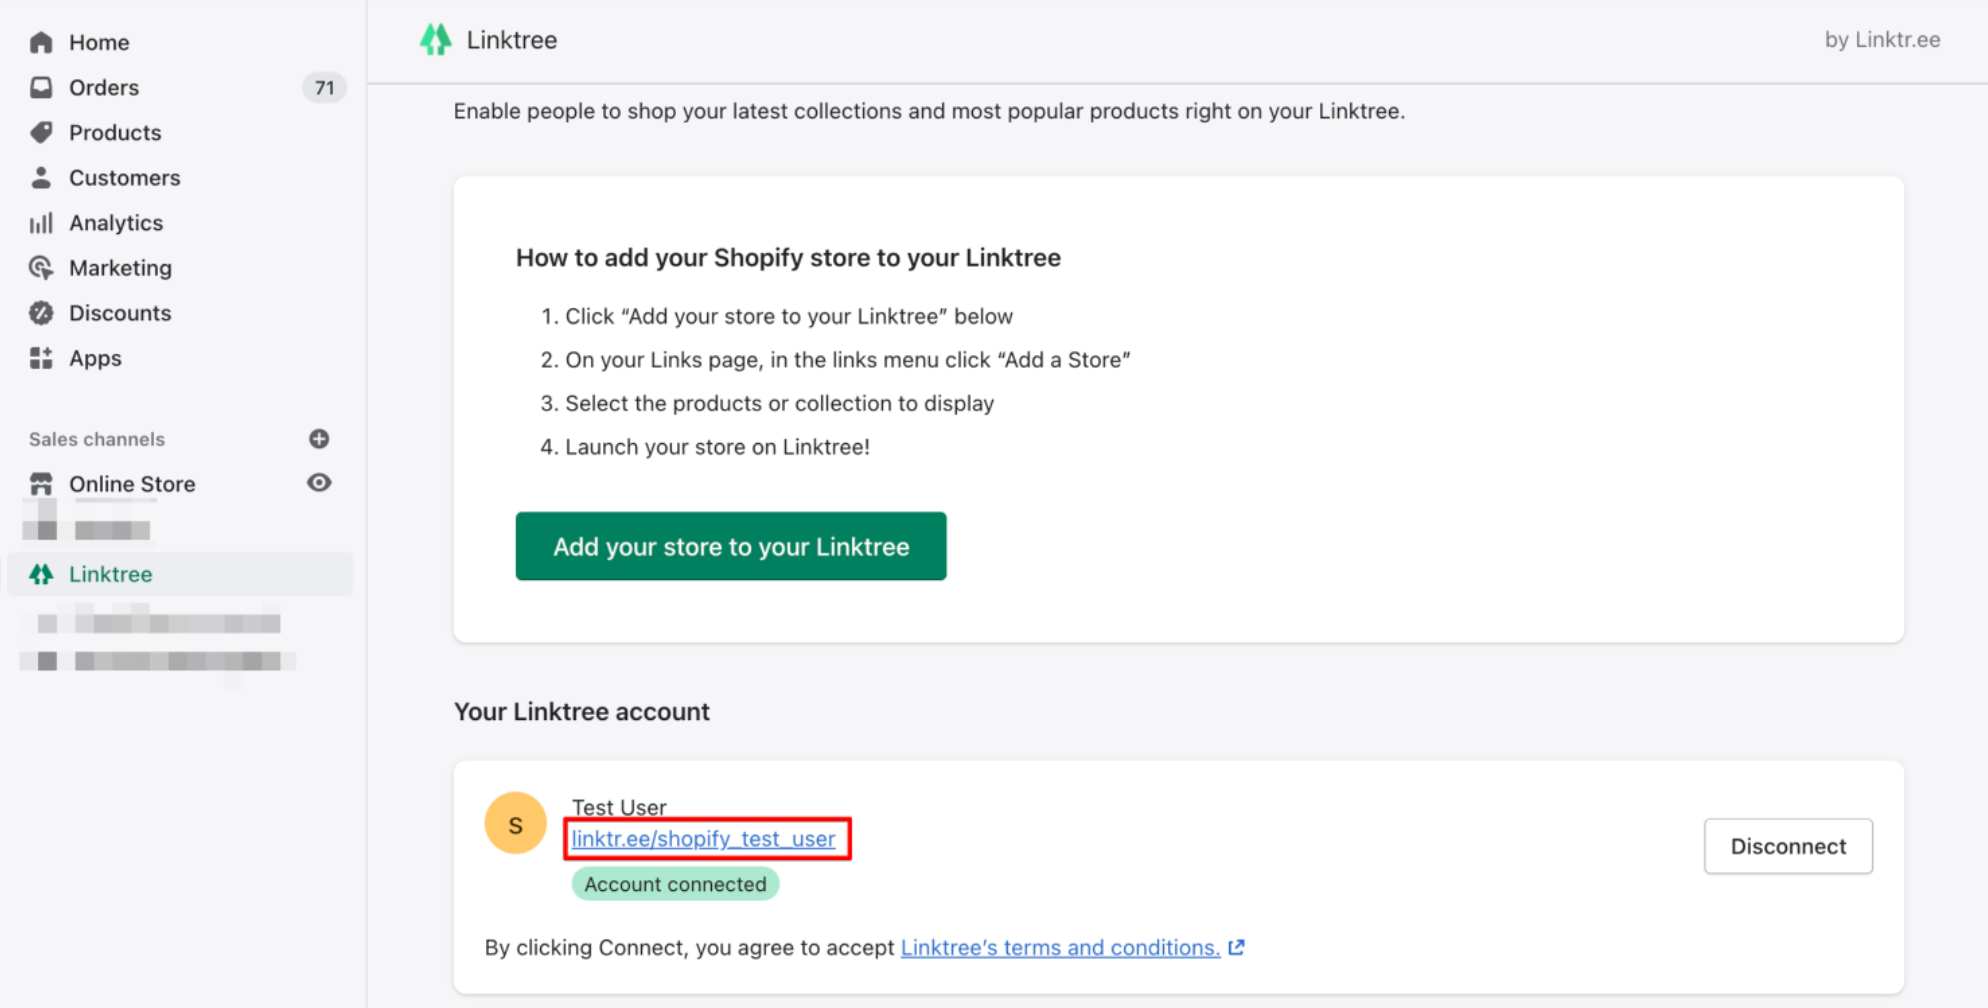
- The merchant connects to the sales channel app account using the account connection component. If the merchant doesn't have an account, then they're prompted to sign up. Authentication happens in a pop-up provided by the app's interface outside of Shopify.
- If additional steps need to be completed, or the merchant needs to wait for their account to be approved, then this can be completed as part of onboarding.
- The app establishes one or more channel connections by calling
channelCreatewith the merchant's external account details. Each channel connection binds a channel specification to the merchant's account and creates the product feeds for the channel's configured regions. - The app configures order attribution so orders can be attributed to the marketplace, surface, region, account, or other order source that drove the sale.
- After the merchant is approved, the approved state is communicated to the merchant using a banner component.
- The app prompts the merchant to agree to any commissions or fees. Use the Billing API to make charging for your sales channel app.
- Merchant publishes products to the sales channel app. The sales channel listens to the product feed to stay in sync. Product publishing errors are reported in the Shopify admin using ResourceFeedback.
Anchor to How channel markets fitHow channel markets fit
After a sales channel app is installed, the merchant connects their account, the app creates channel connections with channelCreate, and product feeds begin syncing. Merchants can use Markets to create channel markets for those channel connections.
Channel markets let merchants override catalog, pricing, and currency for a specific channel. Channel specifications define what the channel supports and requires, including regional coverage, languages, currency behavior, product feed management, and parity expectations. Shopify shows these to merchants when they configure channel markets.
Anchor to Creating and managing checkoutsCreating and managing checkouts
When building a sales channel app, you can create and manage checkouts using one of the following methods:
- Create cart permalinks to take customers directly to a store checkout with a pre-loaded cart
- Use an SDK that's powered by the Storefront API, such as the JavaScript Buy, iOS Buy, and Android Buy SDK
Anchor to Creating a great user experience using PolarisCreating a great user experience using Polaris
A sales channel app should look and feel native to Shopify's admin experience, as it lives within the Shopify admin as an iframe.
The first step to designing a great channel experience is to understand your merchant's workflows. From there, you can create wireframes or sketches to facilitate feedback discussions around the user experience. After you've aligned on an experience that will be Beta-tested with merchants, you can design using Polaris.
Using Polaris increases merchant engagement and saves them time by using familiar components and patterns. For more information, refer to Polaris web components and best practices.
Anchor to Billing for your appBilling for your app
You can use Shopify's Billing API to charge merchants for your sales channel app. When using the Billing API, you can either charge merchants a recurring monthly subscription, or take a commission on sales by creating usage charges. For more information, refer to App billing.
Most sales channel apps don't require a separate billing arrangement with merchants. The channels themselves typically have their own fee structures — advertising fees, referral fees, or success-based commissions — that merchants pay directly to the channel platform. In these cases, the sales channel app connects merchants to a platform where they already have a commercial relationship.
Anchor to Sales channel app requirementsSales channel app requirements
The following requirements apply to all sales channel apps:
- All sales channel apps are submitted for approval to the Shopify app review team.
- Your app introduces a destination or platform for customers to discover products outside of the online store.
- Customers are eventually directed to a sale.
- You need to own and operate the destination or platform where products are sold.
- After the sales channel app is live, you intend to onboard several hundred Shopify merchants in the first year after launch.
Anchor to Build requirementsBuild requirements
All types of sales channel apps have the following features:
-
Onboarding and account connection: You can get permission from merchants to install your app, connect their accounts, and qualify them through channel requirements.
-
Product publishing: You can import products into your channel, manage product errors, and stay in sync with merchants' product catalogs.
-
Link to the marketplace in the channel interface: After merchants upload their products to a marketplace, make sure they know how to navigate to where their products are hosted. You can provide a link to the marketplace in the form of a button or information in the instructions:
Anchor to Sales channels apps built with cart permalinksSales channels apps built with cart permalinks
The following tables lists the build requirements for sales channel apps that are built with cart permalinks.
| General requirements | |
|---|---|
| Pre-approval required? | No |
| PPA Addendum required? | No |
| App approval process required? | Needs to meet the general requirements for apps and sales channel apps. |
| Onboarding and account connection | |
|---|---|
| Connect using OAuth | ✔ |
| Shopify App Bridge | ✔ |
| Shopify Polaris | ✔ |
| Product publishing | |
|---|---|
| Sync products using Contextual Product Feeds | ✔ |
| Manage errors with the ResourceFeedback object | ✔ |
| Payments and orders | |
|---|---|
| Checkout build complexity | Low. Take customers to Shopify's checkout with items pre-loaded in the cart. |
| Payment processing requirements | No |
| Receiving payments | Use the Billing API. For sales attribution, you can use a storefront access token. |
| Revenue share | Refer to the Shopify Partner revenue share agreement. |