Version 2025-07 is the last API version to support React-based UI components. Later versions use Polaris web components, native UI elements with built-in accessibility, better performance, and consistent styling with Shopify's design system. Check out the upgrade guide to upgrade your extension and avoid being blocked from updating your extension after October 1st 2026.
Checkout UI extensions
Extensions add custom UI and logic into any step of the Shopify checkout experience. For example, you can display personalized messages during cart review, integrate custom payment options at checkout, or add a survey to the thank-you page.
By using extension target APIs and UI web components, you can build performant customizations that look and feel familiar while tailoring the checkout experience to a store's brand.
Checkout UI extensions for the information, shipping, and payment steps are available only to stores on a Shopify Plus plan.
Checkout UI extensions for the information, shipping, and payment steps are available only to stores on a Shopify Plus plan.
Anchor to Getting startedGetting started
To get started customizing your store's checkout, scaffold an app extension using Shopify CLI.
Scaffolding the extension creates a file framework that includes your extension's TOML configuration file and a templated Checkout.jsx file where you add your extension's code.
Generate scaffold


Anchor to Building your extensionBuilding your extension
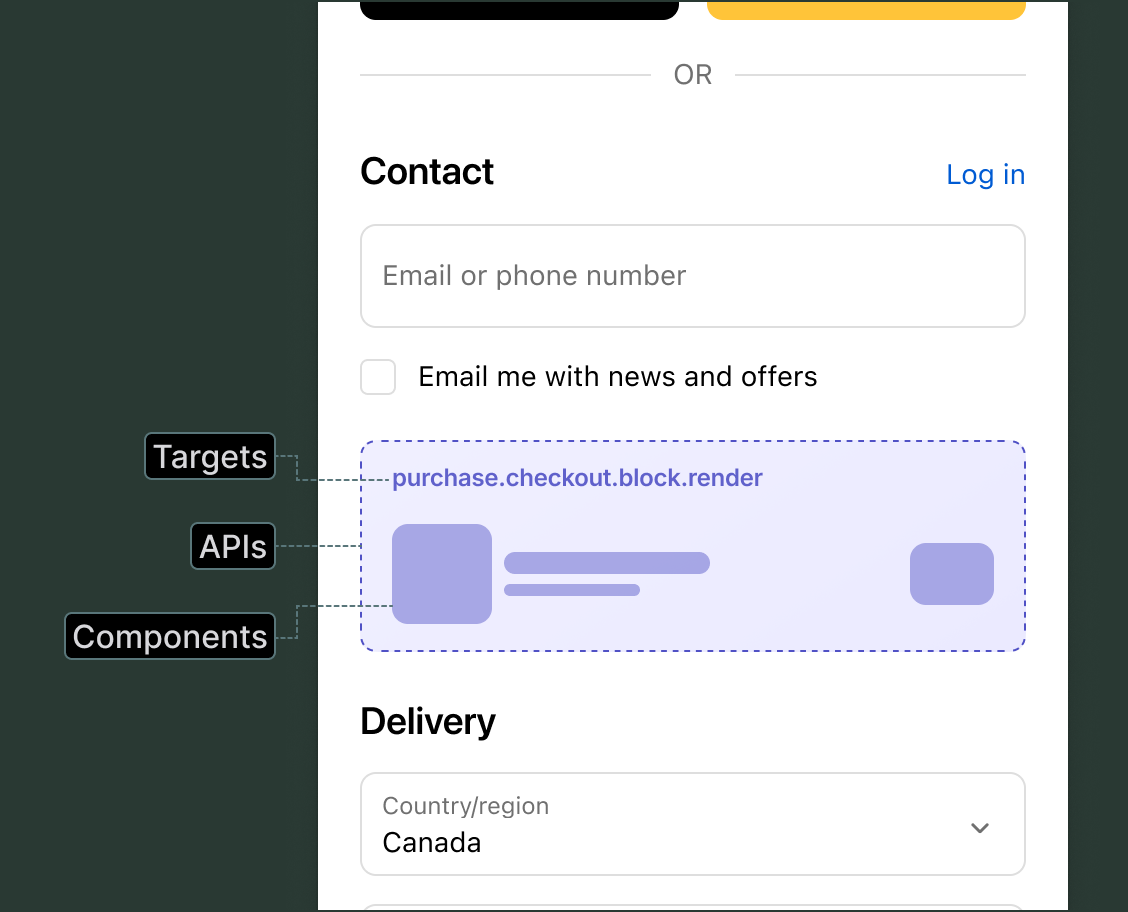
Checkout UI extensions are made up of three interconnected parts: targets that determine where your custom UI appears in the checkout interface, target APIs that provide access to checkout data and functionality, and web components that render UI elements like buttons and menus.
Anchor to Targets: Choose where your custom UI appearsTargets: Choose where your custom UI appears
Targets define where your custom UI appears within Shopify's checkout interface. There are three types of targets:
| Target type | Description |
|---|---|
| Block | Flexible placement targets that merchants can position using the checkout and accounts editor. Merchants can place block targets in various locations throughout the checkout flow and on the Thank you page. |
| Runnable | Targets that provide data or functionality without rendering UI components. These targets run in response to specific events, such as when a customer types in an address field, and return data like autocomplete suggestions or formatted address information. |
| Static | Targets that appear at fixed locations in checkout, such as before actions, after contact fields, or after cart line items. These targets render automatically when the checkout page loads and can't be moved or repositioned. |


Anchor to Target APIs: Define how your extension communicates with Shopify checkoutTarget APIs: Define how your extension communicates with Shopify checkout
Target APIs provide access to data and functionality within the checkout flow. Use them to add custom logic to your extension.
For example, you can use target APIs to do the following:
- Validate customer information before checkout.
- Apply custom discounts.
- Show personalized product recommendations.
- Display dynamic shipping options based on cart contents.


Addresses API: Validate shipping address
React
import {
  reactExtension,
  Banner,
  useShippingAddress,
} from '@shopify/ui-extensions-react/checkout';

export default reactExtension(
  'purchase.checkout.block.render',
  () => <Extension />,
);

function Extension() {
  const address = useShippingAddress();

  if (address?.countryCode !== 'CA') {
    return (
      <Banner>
        Sorry, we can only ship to Canada at
        this time
      </Banner>
    );
  }
}
TypeScript
import {
  extension,
  Banner,
} from '@shopify/ui-extensions/checkout';

export default extension(
  'purchase.checkout.block.render',
  (root, api) => {
    const banner = root.createComponent(
      Banner,
      undefined,
      'Sorry, we can only ship to Canada at this time',
    );

    if (
      api.shippingAddress.current?.countryCode !==
      'CA'
    ) {
      root.appendChild(banner);
    }

    api.shippingAddress.subscribe((address) => {
      if (address?.countryCode !== 'CA') {
        root.appendChild(banner);
      } else {
        root.removeChild(banner);
      }
    });
  },
);
Anchor to UI components: Design your interfaceUI components: Design your interface
These components are built with remote-ui. For the equivalents used in newer API versions, see web components.
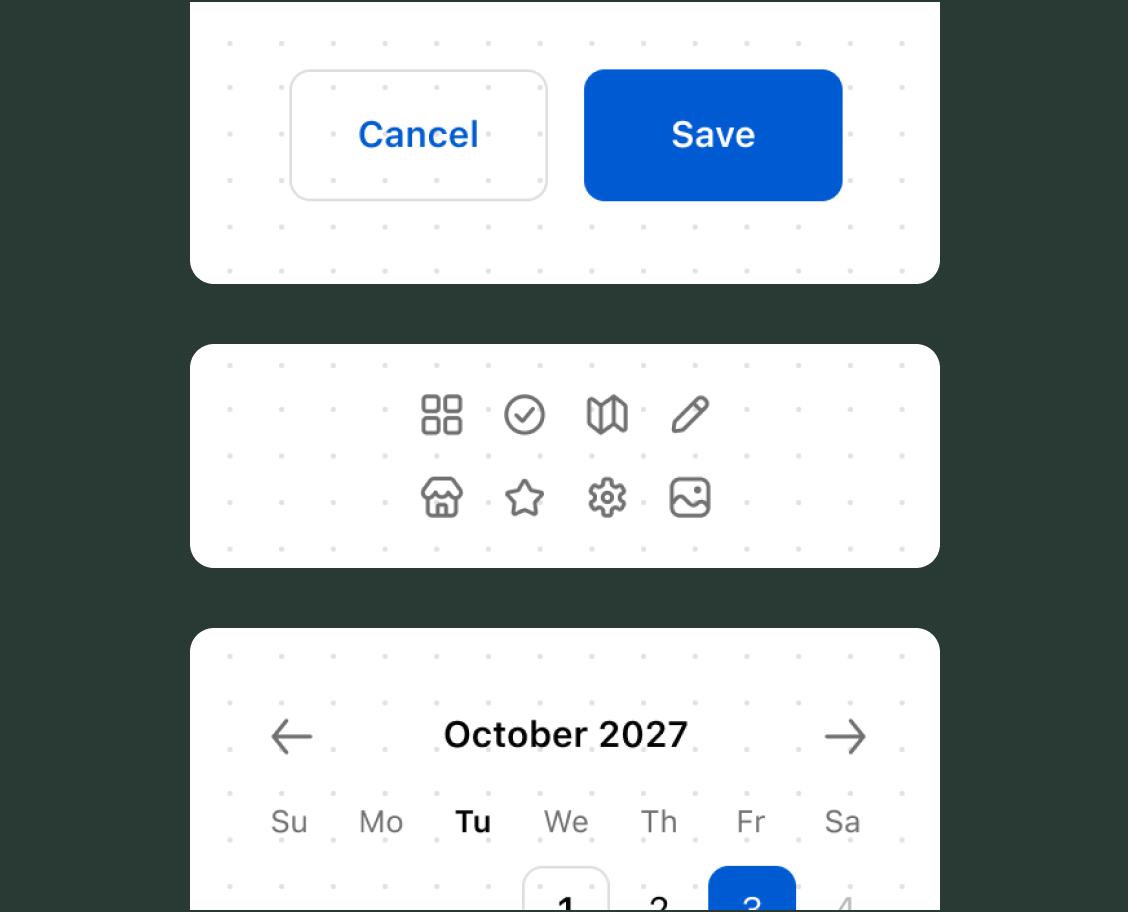
UI components are the building blocks for creating checkout interfaces that follow the Shopify design system. You can use them as React components with JSX or as JavaScript objects created through the extension API.


Using UI components
React
import {
  reactExtension,
  InlineStack,
  BlockStack,
  Image,
  Heading,
  Text,
  Button,
} from '@shopify/ui-extensions-react/checkout';

export default reactExtension(
  'purchase.checkout.block.render',
  () => <Extension />,
);

function Extension() {
  return (
    <InlineStack>
      <Image source="https://cdn.shopify.com/YOUR_IMAGE_HERE" />
      <BlockStack>
        <Heading>Heading</Heading>
        <Text size="small">Description</Text>
      </BlockStack>
      <Button
        onPress={() => {
          console.log('button was pressed');
        }}
      >
        Button
      </Button>
    </InlineStack>
  );
}
TypeScript
import {
  extension,
  InlineStack,
  BlockStack,
  Image,
  Heading,
  Text,
  Button,
} from '@shopify/ui-extensions/checkout';

export default extension(
  'purchase.checkout.block.render',
  (root) => {
    const image = root.createComponent(
      Image,
      {source: 'https://cdn.shopify.com/YOUR_IMAGE_HERE'},
    );
    const heading = root.createComponent(
      Heading, undefined, 'Heading',
    );
    const description = root.createComponent(
      Text, {size: 'small'}, 'Description',
    );
    const button = root.createComponent(
      Button,
      {onPress: () => console.log('button was pressed')},
      'Button',
    );
    root.appendChild(
      root.createComponent(InlineStack, undefined, [
        image,
        root.createComponent(BlockStack, undefined, [
          heading, description,
        ]),
        button,
      ]),
    );
  },
);
Anchor to Apply changes: Update the cart and checkoutApply changes: Update the cart and checkout
Some target APIs include methods that update the cart and checkout. For example:
applyAttributeChangesets a cart attribute.applyMetafieldChangewrites a cart metafield.
Each method returns a promise that resolves after Shopify applies the change and the corresponding API property updates with the new state.
Rate limits may apply to extensions that make too many changes during a checkout. After an extension is rate limited, it can't make further changes during the buyer's session.
Batch multiple changes with Promise.all. Only apply the changes your extension needs.
Rate limits may apply to extensions that make too many changes during a checkout. After an extension is rate limited, it can't make further changes during the buyer's session.
Batch multiple changes with Promise.all. Only apply the changes your extension needs.
Apply a single change
React
import {
  reactExtension,
  Checkbox,
  useApi,
} from '@shopify/ui-extensions-react/checkout';

function Extension() {
  const api = useApi();

  async function onCheckboxChange(isChecked) {
    await api.applyAttributeChange({
      type: 'updateAttribute',
      key: 'includeGift',
      value: isChecked ? 'yes' : 'no',
    });
  }

  return (
    <Checkbox onChange={onCheckboxChange}>
      Include a complimentary gift
    </Checkbox>
  );
}

export default reactExtension(
  'purchase.checkout.block.render',
  () => <Extension />,
);
TypeScript
import {
  extension,
  Checkbox,
} from '@shopify/ui-extensions/checkout';

export default extension(
  'purchase.checkout.block.render',
  (root, api) => {
    async function onCheckboxChange(isChecked) {
      await api.applyAttributeChange({
        type: 'updateAttribute',
        key: 'includeGift',
        value: isChecked ? 'yes' : 'no',
      });
    }

    root.appendChild(
      root.createComponent(
        Checkbox,
        {onChange: onCheckboxChange},
        'Include a complimentary gift',
      ),
    );
  },
);
Apply multiple changes together
React
import {
  reactExtension,
  Button,
  useApi,
} from '@shopify/ui-extensions-react/checkout';

function Extension() {
  const api = useApi();

  async function saveGiftPreferences() {
    // Shopify batches these into a single request.
    await Promise.all([
      api.applyAttributeChange({
        type: 'updateAttribute',
        key: 'includeGift',
        value: 'yes',
      }),
      api.applyMetafieldChange({
        type: 'updateCartMetafield',
        metafield: {
          namespace: '$app:gift',
          key: 'message',
          type: 'single_line_text_field',
          value: 'Happy birthday!',
        },
      }),
    ]);
  }

  return (
    <Button onPress={saveGiftPreferences}>
      Save gift preferences
    </Button>
  );
}

export default reactExtension(
  'purchase.checkout.block.render',
  () => <Extension />,
);
TypeScript
import {
  extension,
  Button,
} from '@shopify/ui-extensions/checkout';

export default extension(
  'purchase.checkout.block.render',
  (root, api) => {
    async function saveGiftPreferences() {
      // Shopify batches these into a single request.
      await Promise.all([
        api.applyAttributeChange({
          type: 'updateAttribute',
          key: 'includeGift',
          value: 'yes',
        }),
        api.applyMetafieldChange({
          type: 'updateCartMetafield',
          metafield: {
            namespace: '$app:gift',
            key: 'message',
            type: 'single_line_text_field',
            value: 'Happy birthday!',
          },
        }),
      ]);
    }

    root.appendChild(
      root.createComponent(
        Button,
        {onPress: saveGiftPreferences},
        'Save gift preferences',
      ),
    );
  },
);
Anchor to React hooksReact hooks
If you're building with React, you can use React hooks to subscribe to checkout state and automatically re-render your component when data changes. Hooks like useShippingAddress(), useCartLines(), and useApplyAttributeChange() wrap the target APIs, giving you a reactive way to access checkout data without manually subscribing to value changes.
useShippingAddress: React to address changes
Anchor to ConfigurationConfiguration
You define your extension's configuration in a shopify.extension.toml file. This file contains the extension's name, targeting definitions, API version, and other settings. We recommend that you always set the latest supported api_version in your configuration file.
When you scaffold your extension using Shopify CLI, a shopify.extension.toml file with a default configuration is created for you. As you build your extension, you define the targets you want to use and their corresponding code modules in this file.
Anchor to PropertiesProperties
Checkout UI extensions use the following configuration properties:
api_version required
The version of the API that's being used for the extension. If provided in the [[extensions]] array, then the specified API version is used instead of the root level api_version.
[[extensions]] required
The name of the array that contains all extensions listed in the TOML file. Contains the following properties:
-
type: required The extension type. For checkout UI extensions, useui_extension. -
name: required The customer-facing name of the extension. Limitations:- 5 characters minimum.
- 30 characters maximum.
-
handle: required The unique internal identifier for the extension. After you create a draft version of the extension, or deploy an extension, you can't change thehandlevalue.Limitations:
- Allowed characters:
a-z,A-Z,0-9,-. - 50 characters maximum.
- Must be unique within the app.
- Allowed characters:
-
uid: required The extension user identifier that must be unique within the app. An app-scoped identifier used byshopify app deployto determine whether an extension is being created, updated, or deleted. This identifier is generated automatically when you scaffold your extension using Shopify CLI. -
description: optional The merchant-facing description of the extension.
[[extensions.targeting]] required
The name of the array that contains a target and its associated module. Contains the following properties:
-
target: requiredAn identifier that specifies where you're injecting your extension into the checkout interface.
-
module: requiredThe path to the JavaScript or TypeScript file that contains your extension code.
-
default_placement: optionalFor block targets, the placement your extension is added to when a merchant first installs it. Merchants can move it afterward. The value must be a placement reference supported by the target, such as
WALLETS1. Refer to the placement references for the checkout block target and the Thank you block target.
You can define multiple targets in a single configuration file, but each target must point to a separate module file. See the targets overview for more details.
[extensions.capabilities] optional
Defines the capabilities associated with your extension.
| Capability | Description |
|---|---|
api_access | Allows your extension to query the Storefront API. |
network_access | Allows your extension to make external network calls. |
collect_buyer_consent | Allows your extension to collect buyer consent for policies like SMS marketing. |
block_progress | Allows your extension to block the buyer's progress. |
[[extensions.metafields]] optional
Define metafields your extension needs access to. Use [[extensions.metafields]] for metafields needed by all targets, or [[extensions.targeting.metafields]] for target-specific metafields.
Checkout targets can use the Metafields API to read metafields you request in the TOML, and to write cart metafields with applyMetafieldChange (updateCartMetafield and removeCartMetafield). Thank you page targets can read metafields through the Metafields API, but don't have write access.
Refer to the available metafield data types.
Learn more in the Metafields API reference.
[extensions.settings] optional
Settings let merchants configure your extension from the checkout editor. Each settings definition can include up to 20 settings. All setting inputs are optional. Build your extension so it still works if the merchant hasn't set a value.
Each field in [[extensions.settings.fields]] accepts the following properties:
-
key: required The identifier for the setting. The configured value is exposed under this key at runtime. -
type: required The setting type. Determines what input the merchant sees and how the value is validated. Supported types:boolean,single_line_text_field,multi_line_text_field,number_integer,number_decimal,date,date_time, andvariant_reference. -
name: required The display name shown to the merchant in the checkout editor. -
description: optional Help text displayed to the merchant in the checkout editor. -
validations: optional Constraints on the input that Shopify validates, such as a minimum length or a regex pattern. Include each validation using itsnameand a correspondingvalue. The available options depend on the setting'stype. For the full list of validation options and examples, refer to Validation options.
shopify.extension.toml


Anchor to Testing and deploymentTesting and deployment
Shopify CLI provides a set of tools to help you test and deploy your extension.
Anchor to Local testingLocal testing
To run your extension locally during development, start a dev server using Shopify CLI. The dev command creates a preview of your extension on your chosen dev store. If your extension is built on an app with a backend, then this command also serves your backend locally using a Cloudflare tunnel.
The dev server automatically reloads your extension when you make changes to your code, so you can test updates in real-time.
Start development server
Anchor to DeploymentDeployment
When you're ready to go live, deploy your extension to production using Shopify CLI.
The Shopify CLI deploy command builds your extension bundle and uploads everything to Shopify. If your extension is built on an app with a backend, then you need to deploy your app to a hosting service first. Shopify hosts only your extension's code.
Your compiled UI extension bundle can't exceed 64 KB, or 128 KB for full-page customer account extensions. Shopify enforces this limit at deployment to ensure fast loading times and optimal performance. Learn how to analyze and reduce your bundle size.
Your compiled UI extension bundle can't exceed 64 KB, or 128 KB for full-page customer account extensions. Shopify enforces this limit at deployment to ensure fast loading times and optimal performance. Learn how to analyze and reduce your bundle size.
Deploy your extension


Anchor to VersioningVersioning
Polaris reference docs follow Shopify's API versioning policy. Each stable version is supported for a minimum of 12 months. Older versions continue to work, they just won't have dedicated docs on Shopify.dev. Shopify CLI already prevents deploys targeting API versions older than 12 months, so we recommend keeping your extensions on a supported version.
Anchor to SecuritySecurity
Checkout UI extensions are a safe and secure way to customize the appearance and functionality of checkout without compromising the security of customer data.
- They run in an isolated sandbox, separate from the checkout page and other UI extensions.
- They don't have access to sensitive payment information or the checkout page itself (HTML or other assets).
- They are limited to specific UI components and APIs that are exposed by the platform.
- They have limited access to global web APIs.
- Apps that wish to access protected customer data must submit an application and are subject to strict security guidelines and review processes by Shopify.
Anchor to Error handlingError handling
To handle errors in your extension, add an unhandledrejection listener for promise rejections or an error listener for other exceptions like Javascript runtime errors or failures to load a resource.
You can also use third party error-reporting libraries. However, these libraries might require extra configuration because UI extensions run inside of a Web Worker which doesn't have access to window or the DOM. You'll typically need to disable default integrations and manually attach error listeners to self.
The third-party tool example shown uses Sentry. To install and initialize this tool, follow their Browser JavaScript guide. We recommend disabling the default integrations to be sure the tool will run within a Web Worker. You'll need to add event listeners manually.
You must request network access to transmit errors to a third party service.
You must request network access to transmit errors to a third party service.
Error handling examples
Using a listener
// For unhandled promise rejections
self.addEventListener('unhandledrejection', (event) => {
  console.warn('event unhandledrejection', event.reason);
});

// For other exceptions
self.addEventListener('error', (event) => {
  console.warn('event error', event.error);
});
Sentry (React)
import {
  reactExtension,
  Banner,
} from '@shopify/ui-extensions-react/checkout';
import {
  BrowserClient,
  captureException,
  defaultStackParser,
  getCurrentScope,
  makeFetchTransport,
} from '@sentry/browser';

const sentryClient = new BrowserClient({
  dsn: 'https://examplePublicKey@o0.ingest.sentry.io/0',
  transport: makeFetchTransport,
  stackParser: defaultStackParser,
  integrations: [],
});
getCurrentScope().setClient(sentryClient);
sentryClient.init();

self.addEventListener('unhandledrejection', (event) => {
  captureException(event.reason);
});

self.addEventListener('error', (event) => {
  captureException(event.error);
});

export default reactExtension(
  'purchase.checkout.block.render',
  () => <Extension />,
);

function Extension() {
  return <Banner>Your extension</Banner>;
}
Sentry (JS)
import {
  extension,
  Banner,
} from '@shopify/ui-extensions/checkout';
import {
  BrowserClient,
  captureException,
  defaultStackParser,
  getCurrentScope,
  makeFetchTransport,
} from '@sentry/browser';

const sentryClient = new BrowserClient({
  dsn: 'https://examplePublicKey@o0.ingest.sentry.io/0',
  transport: makeFetchTransport,
  stackParser: defaultStackParser,
  integrations: [],
});
getCurrentScope().setClient(sentryClient);
sentryClient.init();

self.addEventListener('unhandledrejection', (event) => {
  captureException(event.reason);
});

self.addEventListener('error', (event) => {
  captureException(event.error);
});

export default extension(
  'purchase.checkout.block.render',
  (root) => {
    root.appendChild(
      root.createComponent(
        Banner,
        undefined,
        'Your extension',
      ),
    );
  },
);
Anchor to Tutorials and resourcesTutorials and resources
Deepen your understanding of checkout UI extensions with these tutorials and community resources.


