Shopify Git
The Shopify GitHub app lets you connect your GitHub and Shopify accounts. This lets you sync theme code to and from GitHub repositories and collaborate with other developers on your themes.
Anchor to FeaturesFeatures
- Automatically pull and push theme code from any organization or repository associated with your GitHub account
- Connect one or more branches from a repository to easily develop and test new theme features or campaigns
- Keep a theme up to date with commits to a branch, and track edits made in the Shopify admin, including the code editor and theme editor
- Connect branches to unpublished or published themes
Anchor to How it worksHow it works
The GitHub theme integration updates your theme in the Shopify admin whenever the connected branch is updated. It also commits changes made through the Shopify admin to the branch to ensure that the branch and theme in the Shopify admin always match.
Files are updated in GitHub whenever changes are made to a connected theme. This can't be disabled. If you want to separate the code that Shopify has access to from the rest of your code, then consider using multiple repositories or subtrees. For more information, refer to Version control best practices for Shopify themes.
Files are updated in GitHub whenever changes are made to a connected theme. This can't be disabled. If you want to separate the code that Shopify has access to from the rest of your code, then consider using multiple repositories or subtrees. For more information, refer to Version control best practices for Shopify themes.
Anchor to Commits by ShopifyCommits by Shopify
When your theme is edited through the Shopify admin, any changes are automatically committed to your repository by Shopify. A commit is created when any owner, staff member, or collaborator makes changes. Changes are added as a commit to the connected branch when they are saved.
You can edit your theme in the following areas of the Shopify admin:
- The theme editor. When you customize a theme using the theme editor, these customizations are stored in setting files, which are part of the theme code.
- The code editor.
- Theme apps installed in the Online Store.
Anchor to Organization accessOrganization access
If you grant the Shopify GitHub app access to repositories in a GitHub organization, then any user that has a GitHub account that is part of the organization, and has the Manage themes permission or Themes permission, can view any repository that the app has access to in the list of available repositories. However, these users can only connect branches for which they have write permissions, and the branch needs to match the required repository structure.
If you want to prevent users from viewing certain repositories, then you should grant Shopify’s GitHub app access to only the repositories that you want to connect to the Shopify store. If you grant access to only specific repositories and you create a new repository that you want to use with Shopify, then you need to grant the app access to the repository through GitHub.
Anchor to Conflicts and error handlingConflicts and error handling
If a user is editing an open file in the theme editor while the same file is being edited in GitHub or the code editor, then the user is warned that they're overriding the new changes when they save.
There are currently no conflict alerts in the code editor. The version of the file in the code editor overwrites the GitHub version of the file.
In case of a conflict in commits or pushes made outside Shopify, the developer has a chance to resolve it in GitHub or force push the change to overwrite the file in Shopify.
In limited cases, conflicts might occur if a file is saved in the theme editor or code editor and a change is pushed to the GitHub branch simultaneously. In this case, the commit coming from Shopify might be viewed as outdated and rejected by GitHub.
If you suspect that an error has occurred when pushing or pulling changes, then you can view the logs for the last few version control events by clicking View logs beside the Last saved timestamp on the theme card.
If you believe that the theme has fallen out of date with the branch, then you can pull the latest version of the branch manually by going to the theme card and selecting Actions > Reset to last commit.
Anchor to LimitationsLimitations
- Only repositories to which you have write access can be used to create a new theme.
- Outside collaborators can't connect branches. Only members of the organization with write access can.
- Personal repositories where you're a collaborator, but not the owner, aren't visible in the list of available repositories.
Anchor to Repository structureRepository structure
You can connect only branches that match the default Shopify theme folder structure. This structure represents a buildless theme, or a theme that has already gone through any necessary file transformations.
Folders in the repository that don't match the default theme structure are ignored.
Anchor to Branch management strategiesBranch management strategies
Consider the following when managing themes connected to GitHub repositories in Shopify:
-
You can't reconnect a branch to a theme after it has been disconnected. If you reconnect a branch, then it's added as a new theme.
-
If an unpublished theme is connected to a branch and then published, then it maintains its connection to the branch.
To understand the relationship between branches and themes, and how to optimize your workflow to use branches effectively, refer to our version control best practices.
Anchor to Step 1: Connect a theme repoStep 1: Connect a theme repo
Make sure you've installed the Shopify GitHub app first.
- From your Shopify admin, go to Online Store > Themes.
- In the Theme library section, click Add theme > Connect from GitHub.
- In the Connect theme pane, select your organization or account.
- Under Repository, select your repo.
- Under Branch, search for the branch you want to connect.
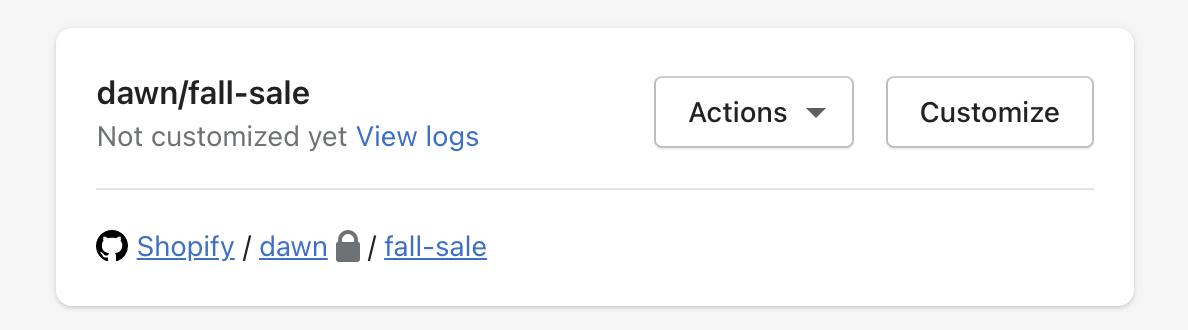
The theme appears in your theme library. Themes that are connected to GitHub list the repository, branch name, and last commit time on the theme card.
Anchor to Step 2: Test the connectionStep 2: Test the connection
Try making a small change to the theme and then verify that a commit was made in the branch.
- From your Shopify admin, go to Online Store > Themes.
- On the theme that's connected to GitHub, click Customize.
- Change any setting in your theme. For example, in Dawn, you might change the text on the announcement bar.
- Click Save, and then exit the theme editor.
- In the theme library, on the card for the theme, click the name of the branch to navigate to GitHub.
- Note the most recent commit. It should list the
shopifybot as the author of the commit.

If desired, you can also push a change to the branch from your local machine. After you push a commit to your branch, the Last saved date on the theme updates and the change is visible in the theme.
Anchor to Step 3: Publish the themeStep 3: Publish the theme
To track changes to your published theme, you need to publish a theme from your theme library that's connected to a GitHub branch. You might add your main branch as a theme so you can keep your published theme up to date using Git.