---
title: Start building a pre-order and Try Before You Buy (TBYB) app
description: >-
Learn how to set up required access scopes and pages for your deferred
purchase option app.
source_url:
html: >-
https://shopify.dev/docs/apps/build/purchase-options/deferred/create-deferred-purchase-app/start-building
md: >-
https://shopify.dev/docs/apps/build/purchase-options/deferred/create-deferred-purchase-app/start-building.md
---
ExpandOn this page
* [What you'll learn](https://shopify.dev/docs/apps/build/purchase-options/deferred/create-deferred-purchase-app/start-building.md#what-youll-learn)
* [Requirements](https://shopify.dev/docs/apps/build/purchase-options/deferred/create-deferred-purchase-app/start-building.md#requirements)
* [Step 1: Set up required access scopes](https://shopify.dev/docs/apps/build/purchase-options/deferred/create-deferred-purchase-app/start-building.md#step-1-set-up-required-access-scopes)
* [Step 2: Update the navigation](https://shopify.dev/docs/apps/build/purchase-options/deferred/create-deferred-purchase-app/start-building.md#step-2-update-the-navigation)
* [Step 3: Update app home page](https://shopify.dev/docs/apps/build/purchase-options/deferred/create-deferred-purchase-app/start-building.md#step-3-update-app-home-page)
* [Next steps](https://shopify.dev/docs/apps/build/purchase-options/deferred/create-deferred-purchase-app/start-building.md#next-steps)
# Start building a pre-order and Try Before You Buy (TBYB) app
You're ready to create a new app that helps merchants create pre-order or TBYB options. To get started, you'll set up the foundation of your app.
To build a pre-order or TBYB app, you want to set up required access scopes and pages for the app. You want to have the following pages on the app:
* A page where merchants can create a pre-order or TBYB option
* A homepage where merchants can view a list of the pre-order or TBYB options that they created
***
## What you'll learn
In this tutorial, you'll learn how to do the following tasks:
* Set up required access scopes
* Create an app page
* Add navigation for app pages
* Add the empty state and title bar components to the homepage
***
## Requirements
Note
* Most subscriptions, pre-order and try before you buy apps need to request API access through the [Partner Dashboard](https://shopify.dev/docs/apps/build/authentication-authorization/access-tokens/authorization-code-grant#ask-for-permission). We give API access to apps that are designed according to our \[principles for subscriptions, pre-order and TBYB apps] (/docs/apps/selling-strategies/purchase-options#shopifys-principles).
* Public apps that use subscriptions, pre-order or TBYB need to meet [specific requirements](https://shopify.dev/docs/apps/launch/app-requirements-checklist#purchase-option-apps) to be published on the Shopify App Store.
* Custom apps [created in the Shopify admin](https://shopify.dev/docs/apps/build/authentication-authorization/access-tokens/generate-app-access-tokens-admin) can't use subscriptions, pre-order or TBYB because these apps can't use extensions or request access to protected scopes. If you're building a solution for a single store, then build your custom app in the Partner Dashboard.
- [Complete the tutorial to scaffold an app](https://shopify.dev/docs/apps/build/scaffold-app) and set up your development environment.
- Complete the tutorials to [create pre-order and TBYB (try before you buy) options](https://shopify.dev/docs/apps/build/purchase-options/deferred/build-deferment-solution) and [manage delivery profiles](https://shopify.dev/docs/apps/build/purchase-options/deferred/delivery-and-deferment/build-delivery-profiles).
***
## Step 1: Set up required access scopes
Your app requires the following access scopes:
* `write_products`
* `write_customers`
* `write_draft_orders`
* `write_purchase_options`
1. Navigate your app directory.
2. In the [`shopify.app.toml`](https://shopify.dev/docs/apps/build/cli-for-apps/app-structure#root-configuration-files) file, add the access scopes.
## shopify.app.toml
```env
scopes = "write_products,write_customers,write_draft_orders,write_purchase_options"
```
***
## Step 2: Update the navigation
Update the navigation links in the `app/routes/app.jsx` file. For more information on routing refer to [s-app-nav](https://shopify.dev/docs/api/app-home/app-bridge-web-components/s-app-nav) in the [App Bridge Library web components](https://shopify.dev/docs/api/app-home/app-bridge-web-components).
1. In `app/routes/app.jsx`, replace the content with the following code:
## app/routes/app.jsx
```jsx
import {Outlet, useLoaderData, useRouteError } from "react-router";
import { boundary } from "@shopify/shopify-app-react-router/server";
import { AppProvider } from "@shopify/shopify-app-react-router/react";
import { authenticate } from "../shopify.server";
export const loader = async ({ request }) => {
await authenticate.admin(request);
return { apiKey: process.env.SHOPIFY_API_KEY || "" };
};
export default function App() {
const { apiKey } = useLoaderData();
return (
Home
Create
);
}
// Shopify needs React Router to catch some thrown responses, so that their headers are included in the response.
export function ErrorBoundary() {
return boundary.error(useRouteError());
}
export const headers = (headersArgs) => {
return boundary.headers(headersArgs);
};
```
***
## Step 3: Update app home page
Now that you've set up your app pages, you can use [Polaris](https://polaris.shopify.com) to build the user interface. You'll add the following components to the `app._index.jsx` file:
* [`EmptyState`](https://polaris.shopify.com/components/layout-and-structure/empty-state) is used to display the empty state before merchant can view their pre-order or TBYB options.
* [`s-page`](https://shopify.dev/docs/api/app-home/app-bridge-web-components/title-bar) is used to show button actions to create pre-order or TBYB options.
In `app/routes/app._index.jsx`, replace the content with the following code:
## app/routes/app.\_index.jsx
```jsx
import { useNavigate } from "react-router";
export default function Index() {
const navigate = useNavigate();
return (
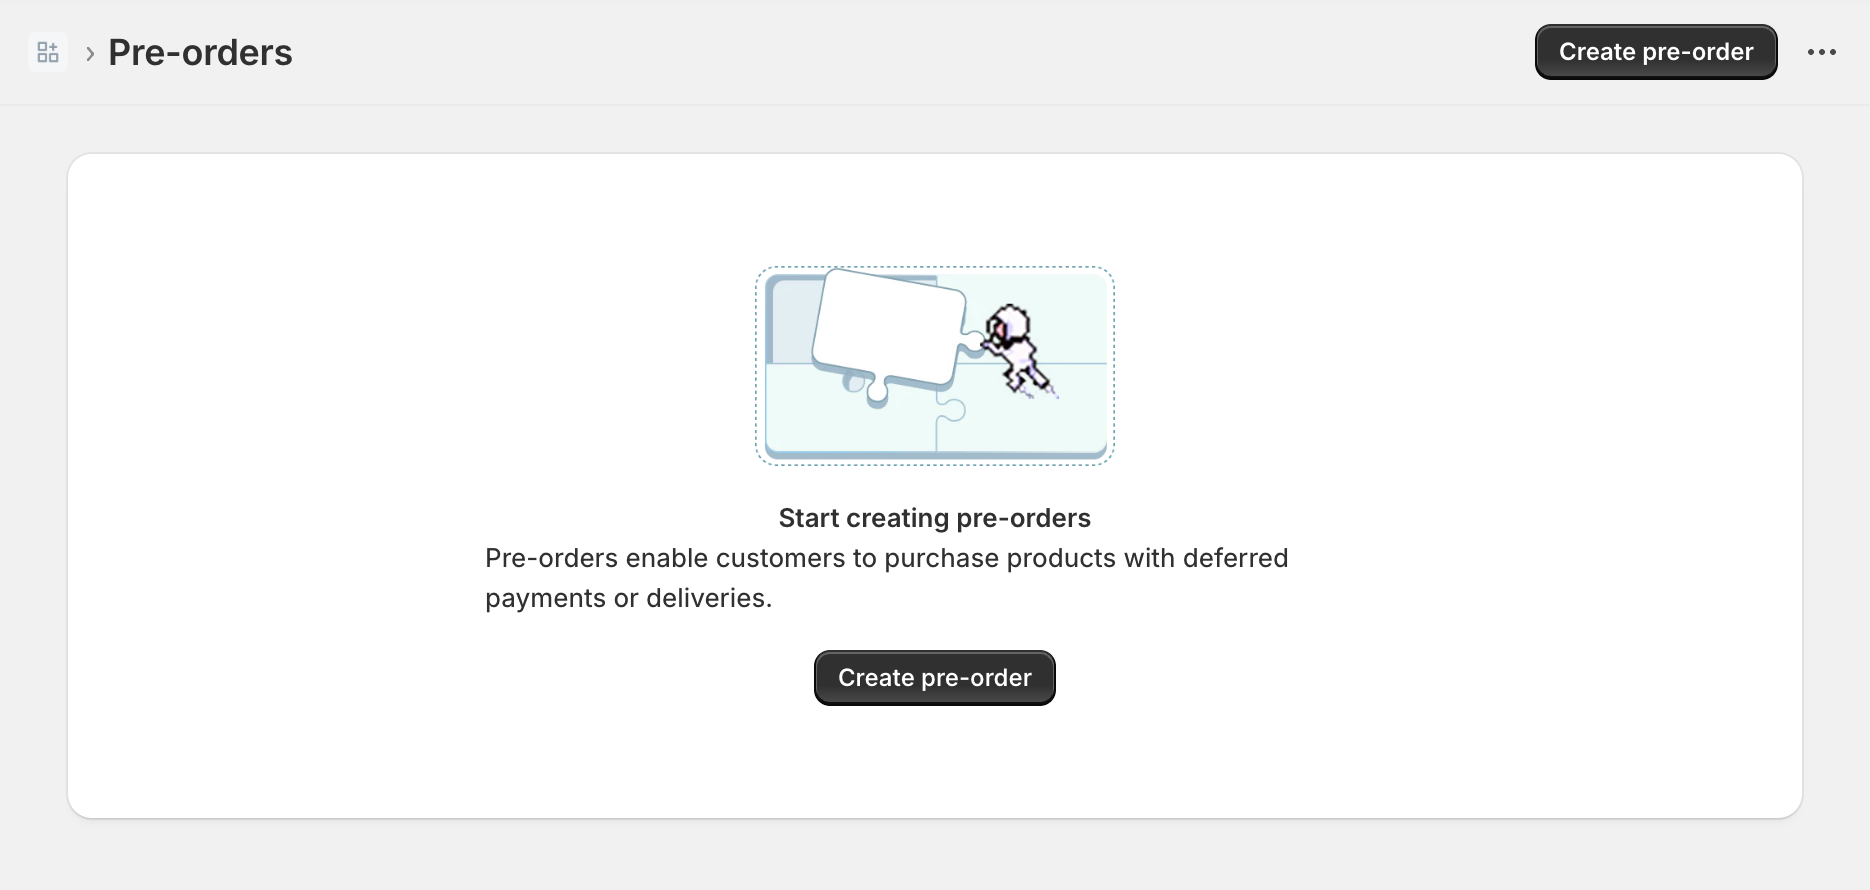
Start creating pre-orders
Pre-orders enable customers to purchase products with deferred
payments or deliveries.
navigate("/app/create")}
>
Create pre-order
);
}
```
Your app's homepage displays the empty state and the title bar:
***
## Next steps
* [Create and add app components](https://shopify.dev/docs/apps/build/purchase-options/deferred/create-deferred-purchase-app/create-ui)
***
* [What you'll learn](https://shopify.dev/docs/apps/build/purchase-options/deferred/create-deferred-purchase-app/start-building.md#what-youll-learn)
* [Requirements](https://shopify.dev/docs/apps/build/purchase-options/deferred/create-deferred-purchase-app/start-building.md#requirements)
* [Step 1: Set up required access scopes](https://shopify.dev/docs/apps/build/purchase-options/deferred/create-deferred-purchase-app/start-building.md#step-1-set-up-required-access-scopes)
* [Step 2: Update the navigation](https://shopify.dev/docs/apps/build/purchase-options/deferred/create-deferred-purchase-app/start-building.md#step-2-update-the-navigation)
* [Step 3: Update app home page](https://shopify.dev/docs/apps/build/purchase-options/deferred/create-deferred-purchase-app/start-building.md#step-3-update-app-home-page)
* [Next steps](https://shopify.dev/docs/apps/build/purchase-options/deferred/create-deferred-purchase-app/start-building.md#next-steps)